Get ready to ignite your creativity with these stunning red nail art ideas. Dive into the world of artistic expression by experimenting with abstract patterns, geometric shapes, or intricate floral designs, all using a captivating palette of reds, blacks, and whites to create striking contrasts. Whether you prefer vibrant neon hues or sultry, deep tones, these art ideas offer endless possibilities for showcasing your personal style and making a bold statement this summer.
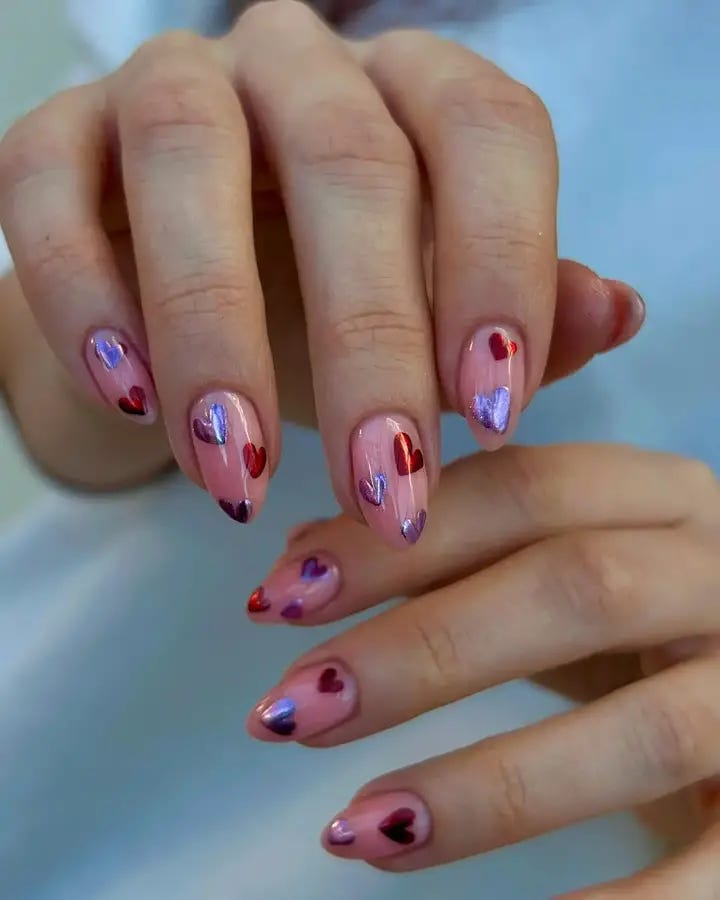
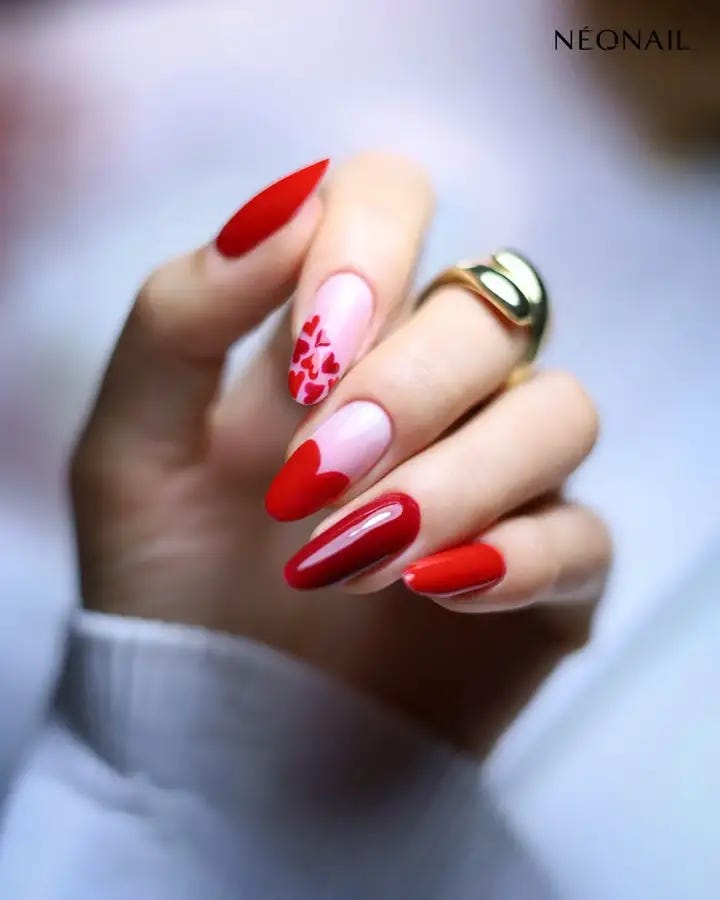
Hearts Aflame
For a presentation of love, these nails are decorated with shiny heart shapes colored in red and lavender against a see-through pink foundation. It is a simple design but the hearts make it full of affection so that it becomes an ideal match for any summer love affair or conveying one’s jolly mood.
- Translucent Pink Polish: OPI “Bubble Bath”
- Red Heart Stickers: Nail Art Stickers
- Lavender Polish: Essie “Go Ginza”
- Top Coat: ORLY Glosser Top Coat
Pro Tip: To get a flawless finish, make sure to push down stickers firmly and cover them completely with top coat.
DIY Guide:
- Apply two coats of “Bubble Bath” for sheer base.
- Place heart stickers randomly or in a pattern.
- Use “Go Ginza” to add extra hearts with dotting tool.
- Finish off with smooth glossy overlay using “ORLY Glosser”.
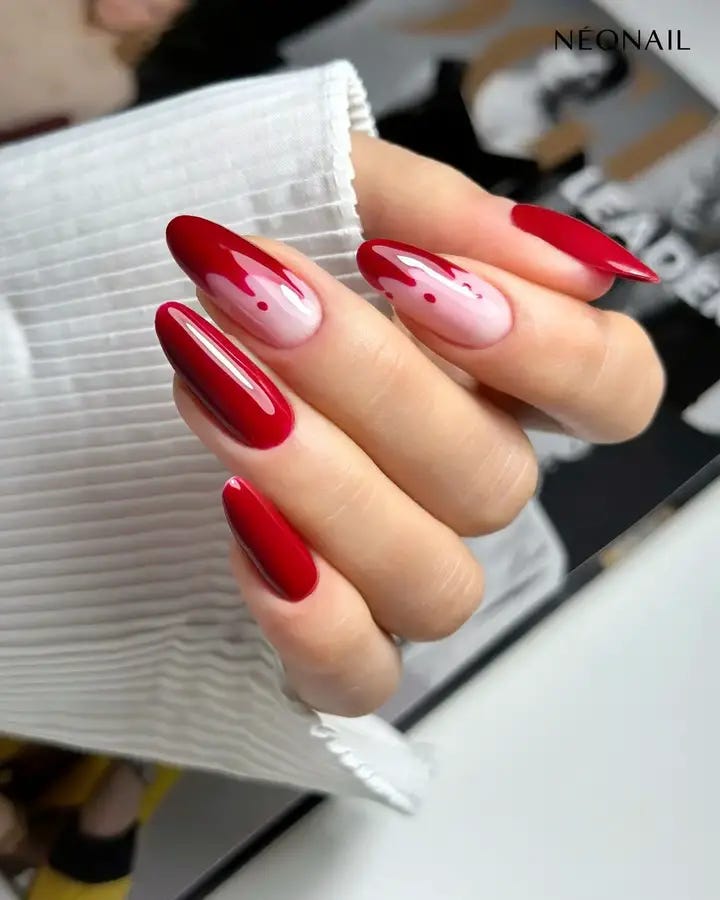
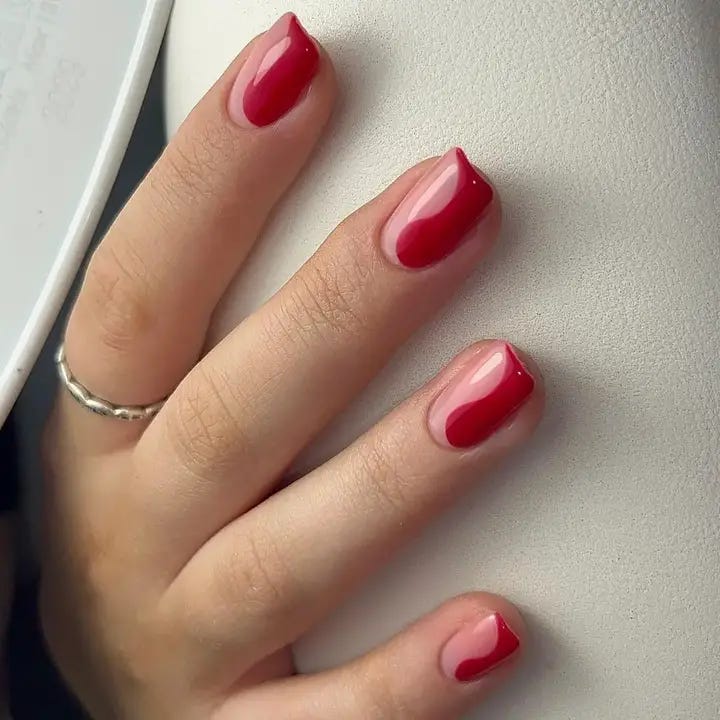
Splash Of Passion
The ombre’s grace is timeless, but when it’s treated with the passion of red, it becomes a statement piece. The nails shown here are based on a clear foundation that goes from one end to anything red hot, marking the gentle change between a quiet day and an active summer evening. There are occasional splashes of red droplets which give chance for spontaneity making the manicure alive together with dynamic and polished look.
- Base Gel: Sally Hansen Miracle Gel
- Red Nail Polish: CND Shellac Luxe in “Hollywood”
- Dotting Tool for Splashes
- Top Coat: OPI GelColor Top Coat
Pro Tip: Using the dotting tool to place splashes can allow you random yet artistic placements.
DIY Guide:
- Apply clear base gel as per instructions and cure under lamp.
- Start near tips with red ombre effect going up.
- Use a dotting tool to create red droplets then cure again.
- Finish off your entire design with a coat of gel topcoat to make your nail art glossy forever.
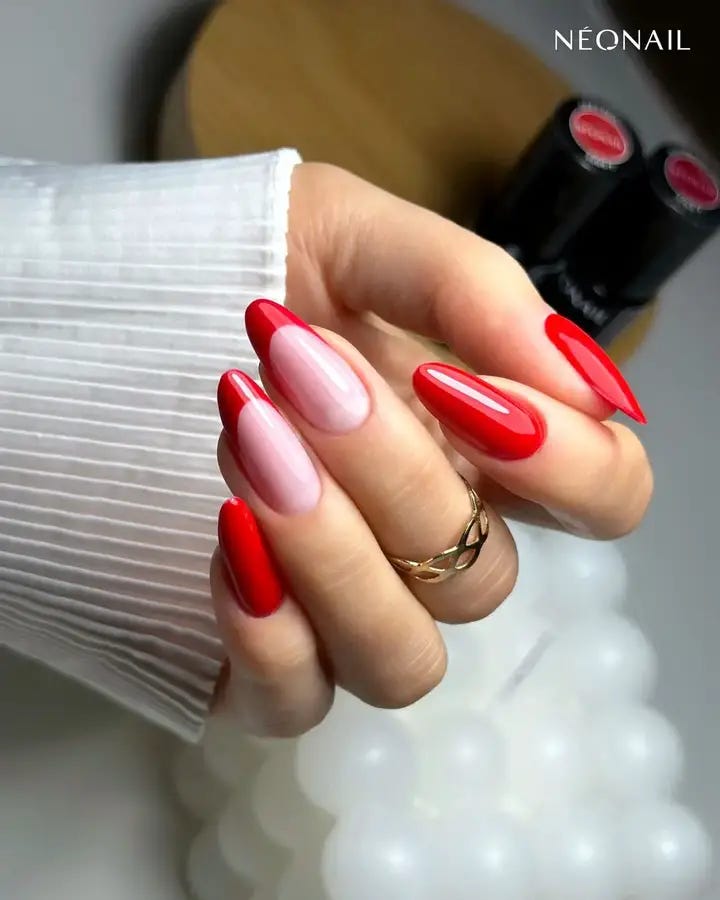
Classic Red Meets Modern Design
Combining classic red with the sheer softness of pink, this design is perfect for people who like to mix old-fashioned and up-to-date styles. The shiny red is lively and strong, while the pale pink base provides a delicate stage for gentle summer love affairs or the sugary taste of summer fruit.

- Pink Base Polish: Essie “Muchi, Muchi”
- Classic Red Polish: OPI “Big Apple Red”
- Top Coat: Seche Vite Dry Fast Top Coat
Pro Tip: Blend your colors seamlessly by using a sponge to apply the red in small dabs at the tips and working it into the pink base.
DIY Tutorial:
- Paint your nails with “Muchi, Muchi” to achieve a subtle pink tint.
- Dab on “Big Apple Red” at the tips using a sponge and blend it softly into your base color.
- Apply “Seche Vite Dry Fast Top Coat” over your design to protect it and give it an intense shine.
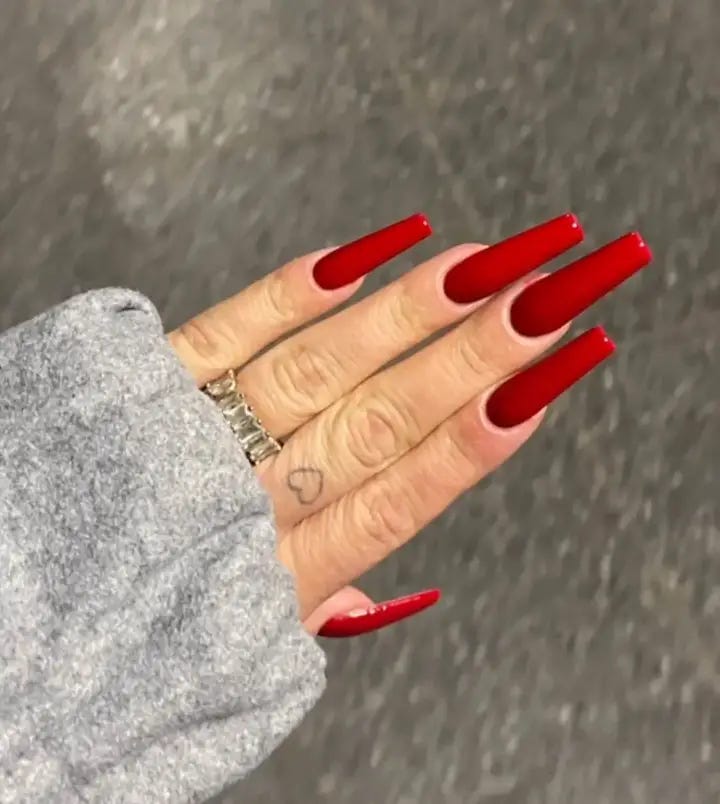
The Matte Red Revolution
Here is a picture of matte red nails that are bold and undeniably modern. Such a finish shows how powerful texture can be. With no shine, the attention is focused more on the shade itself which is a flaming true red color. Additionally, the elongated coffin shape gives it an avant-garde feel and makes a statement as bold as it is fashionable.
- Matte Top Coat: OPI Matte Top Coat
- Red Nail Polish: Butter LONDON “Come to Bed Red”
- Nail File for Shaping Coffin Nails
Pro Tip: Apply the matte top coat quickly to avoid streaking and ensure consistent texture throughout.
DIY Guide:
- Paint your nails with two coats of “Come to Bed Red.”
- Once they dry, apply one layer of OPI Matte Top Coat for an ultra-modern finish.
- Use a nail file to shape your nails into the desired coffin shape for added drama.
The Enigmatic Burgundy: Deep Red With A Twist
Sophistication and obscurity are what the burgundy nails represent. The dark, wine-like hues of this polish give it an opulence of color that is hard to match with any other shade in summer reds. It has an egg shape which is more feminine and classic looking than square or round ones, making them suitable for all events.
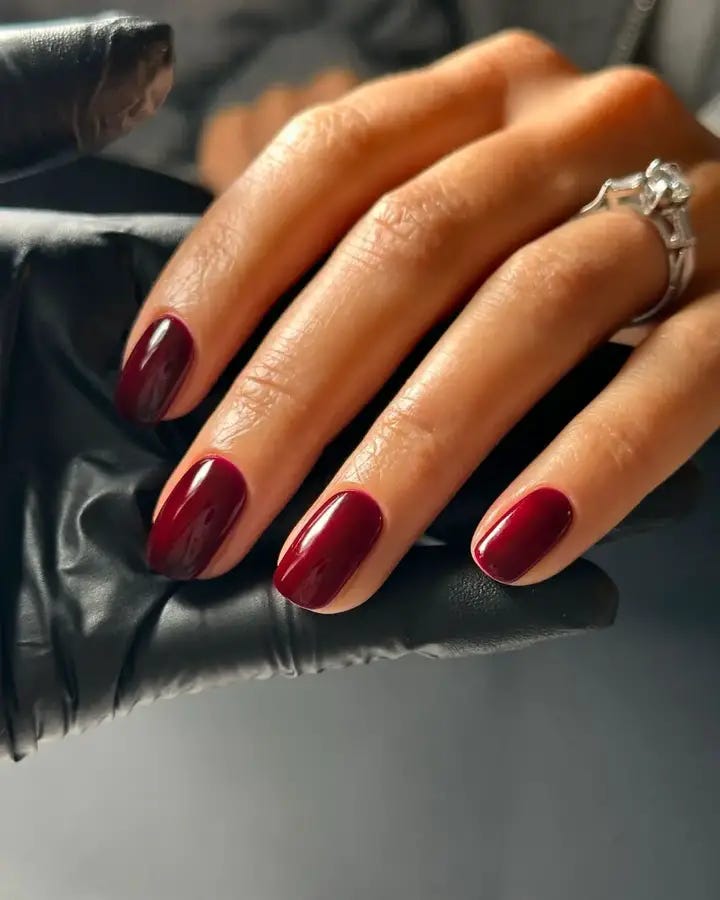
- Deborah Lippmann “All About That Base” — base coat
- ILNP “Sirène” — burgundy nail polish
- Seche Vite Dry Fast Top — top coat
Tip: When working with darker colors such as burgundies, it is important to be neat because they can make a mess if applied carelessly. Keep a brush soaked in acetone nearby for cleaning up any excess product on your skin.
Guide
- Start off by applying one layer of “All About That Base” so that the surface becomes even.
- Next, you need to put two coats of “Sirène” by ILNP which will create a luxurious deep velvet finish.
- Finally, seal everything with “Seche Vite Dry Fast Top Coat” in order to achieve shiny long-lasting effect.
Sparkling Red Artistry
This guide will show you how to get your nails looking as amazing as they ever can. The red artistry on display is incredible, there’s a combination of sparkling glitter and white artistic strokes that lead to cute little heart shapes. It has a clear, natural nail base going up towards the shiny red tip that defines summer fun in an elegant way. It’s a perfectly designed work that conveys the happiness of summer festivals.
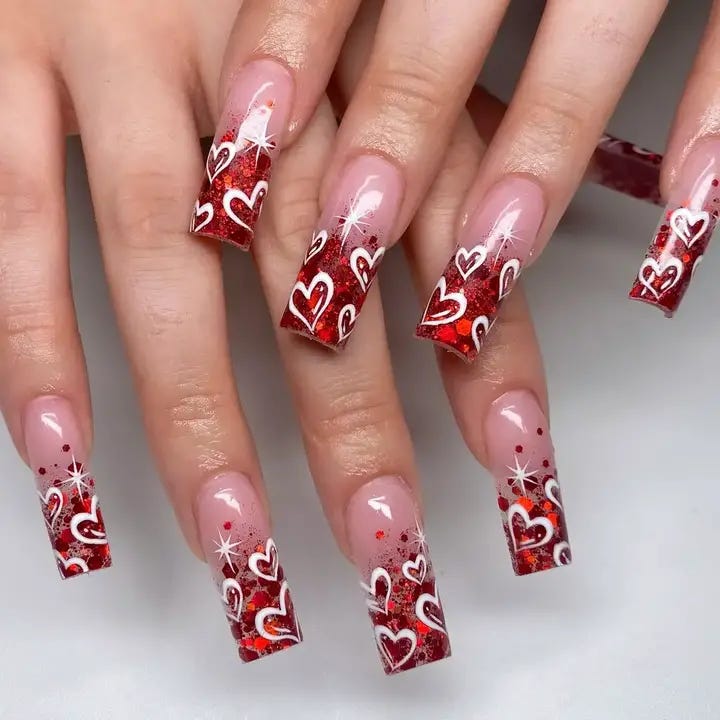
- Clear Nail Gel: Bio Seaweed Gel “No-Sanding Base”
- Red Glitter Polish: Deborah Lippmann “Ruby Red Slippers”
- White Nail Art Paint: BMC Nail Lacquer
- Top Coat: Born Pretty No Wipe Top Coat
Pro Tip: When it comes to red lines, try using a nail art brush with sharp edges or a firm hand. Just applying it only on the tips makes brilliant fading effect.
Guide:
- Start with a clear gel base because it is natural and strong at the same time.
- Put on red glitter polish until at least half way down from the tip of each nail then blend downwards for a gradient.
- Using white paint carefully create hearts or artistic swirls.
- When you are done, seal your design by adding glossy no-wipe top coat in order to make it shine forever.
Jewel-Toned Elegance
These nails have jewel-like decorations on them that go from skin-colored to pale pink. The luxuriousness of the design is improved by adding small gold elements. This style is ideal for those who want a mix of elegance and intricate beauty, and can be worn during summer day or evening events.
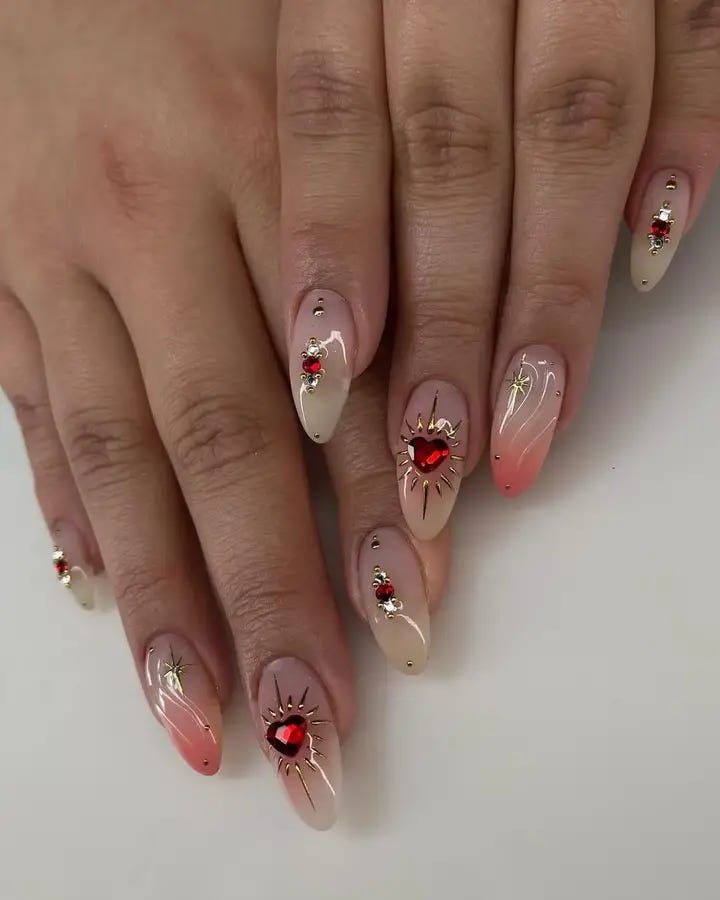
- Nude Gel Polish: Gelish “Simple Sheer”
- Pink Gel Polish: Gelish “June Bride”
- Gold Embellishments: Twinkled T Gold Charms
- Gel Top Coat: Gelish Top It Off Sealer Gel
Pro Tip: Apply embellishments with a dotting tool dipped in clear gel; cure under lamp then seal them down with top coat.
DIY Guide:
- Paint the base using “Simple Sheer.” Blend “June Bride” from mid-point to tip.
- Place gold charms in position and seal with top coat layer.
- Cure using UV light until jewels are secure and polish sets.
Heartfelt Detailing On Almond Claws
These oval-shaped fingernails can be seen as a blank space to show affection and love through tiny heart designs. Creating the impression of clear pink mixed with bold red hearts, this style creates an interesting opposition between fun and risk. It is a manicure that brings summer into your life with its bright energy and touches of caprice.
Transparent Pink Nail Polish: OPI “Bubble Bath”
- Red Nail Art Paint: Orly Instant Artist Paint
- Brush for Hearts Detailing
- Top Coat: INM Out The Door Super Fast Drying Top Coat
Professional Tip: When painting hearts, make sure you keep your hand steady, and wait until each layer is completely dry before applying the following one so as not to smudge them.
Step-by-Step Instructions:
- Start with painting all nails in a base shade of “Bubble Bath” for sheer neatness.
- Use the art paint in red color along with detailing brush for creating small hearts.
- Finish off by applying quick-drying top coat over it that will give smoothness and durability.
The Chic Simplicity Of Gradient Red
Gradient nails are beautiful in which the natural pink color on them flows seamlessly towards a rich burgundy tip. It is an understatement of style that is sophisticated yet versatile for any summer event, from the gentle blush of a summer morning to the intense warmth of a sunset.
- DND “Pink & White” Sheer Pink Gel
- Gelish “Plum and Done” Burgundy Gel Polish
- Gelish “Top It Off” Gel Top Coat
- Sponge for Gradient Effect
Pro Tip: The sponge should be lightly dabbed to create smoother gradient transitions; you should also cure between layers so as to avoid colors bleeding into each other.


0 Comments