Toes in the Sand: Cute Art Ideas for Summer Toenails.Get your toes beach-ready with adorable toenail art ideas. Try simple, cute designs like mini sunsets, waves, or tiny palm trees that reflect the essence of summer. These ideas are easy to apply and perfect for adding a splash of fun to your toenails, making them stand out whether you’re in the sand or by the pool.
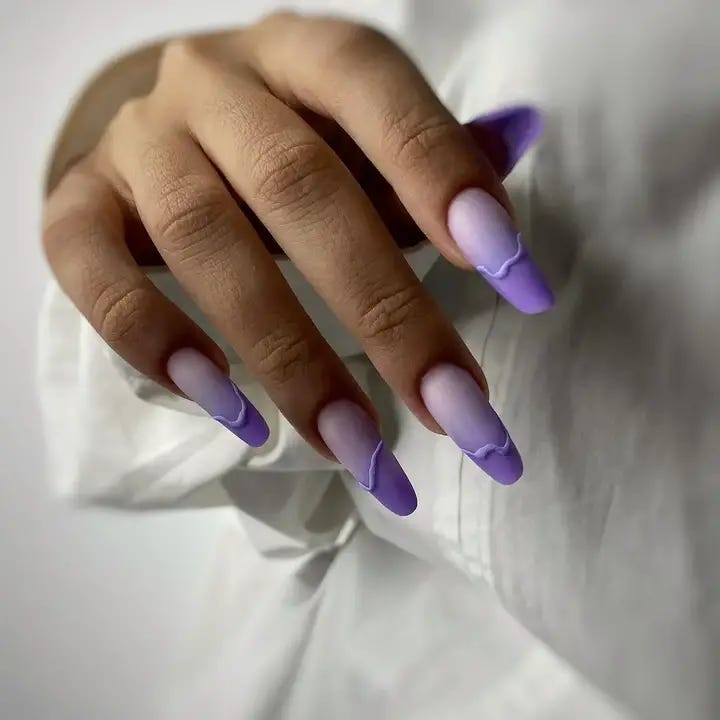
Lavender Dreams: Acrylic Elegance With A Glossy Finish
Soft to the eye but very sharp in design, this pastel lavender set is a perfect blend of elegance and edginess. It’s the art for beginners who want to step up their nail game without the fuss. Simple fun approach to acrylic nails is why it is one of the summer favorites particularly among canvas lovers.
For that pastel base you’ll need:
- Acrylic Powder: A soft lavender color.
- Acrylic Liquid: To make the ideal bead consistency.
- Finishing Wipe: For a faultless finish after application.
To achieve this ethereal appearance, mix your acrylic powder together with liquid then create a bead and apply it on the nail as you sculpt it. Make sure that you add a curvy line of white acrylic against the background of light purple once it dries. The last thing is applying glossy top coat before gliding through your day gracefully.
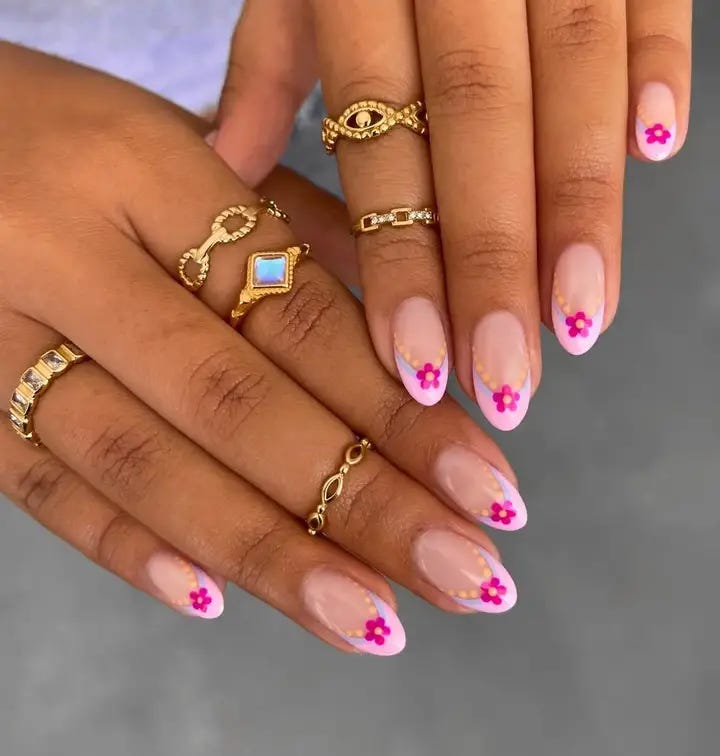
Petite Petals: Sunshine And Smiles On Your Fingertips
Imagine your nails being adorned with small and playful flowers that reflect summertime. This design is full of possibilities, as insignificant as these little bursts of joy may appear on your nails or toes. It’s like the whole summer day has been captured in the form of a bright pink hue against a translucent background that is so light it can easily float away.
Needed for this design:
- Sheer Nude Nail Polish: A base color that says “classy”
- Bright Pink Nail Polish: For poppy petals
- Yellow Nail Polish: Just ‘a dot’ in the middle
- Detailing Brush: Your best petal friend
- Glossy Top Coat: To seal in the brightness
Start with a base coat that matches your natural nail tone to achieve that simple, clean look. Then using your detailing brush, apply pink petals which shout summer time. Each flower is finished off with a yellow centre that gives life to the flower pattern. With one swipe of glossy top coat, you will be ready for summer sun and fun all season long just like fresh daisies.
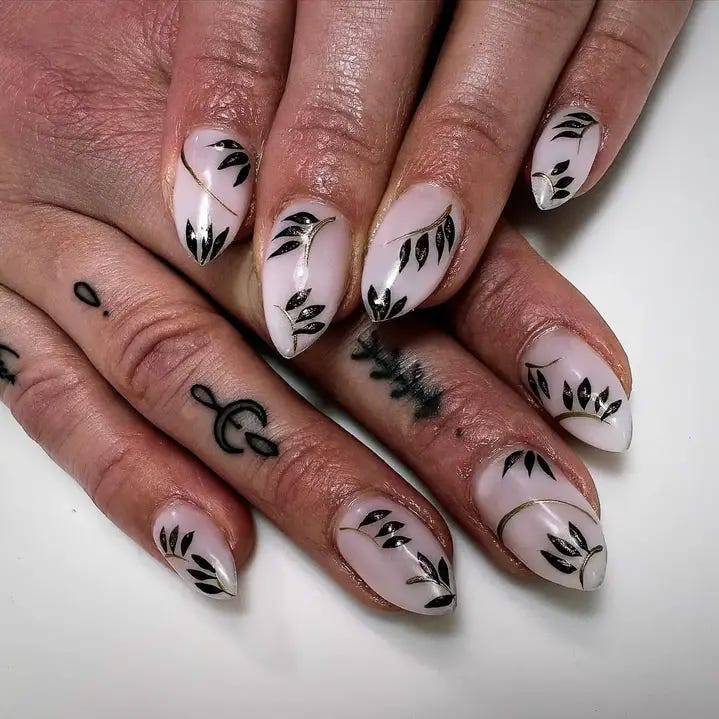
Leaves Of Elegance: A Sophisticated Summer
Let the elegance of summer embrace you with a nail design that certainly is elaborate yet at the same time straightforward. This look is bold and trendy, with clear black leaves on top. It’s art for beginners and professionals, which gives you a high end look without the salon price tag.
Materials for this design:
- Clear Gel Polish: For a look that’s glassy clear.
- Black Acrylic Paint: They are painted in thin lines of delicate leaves.
- Thin Nail Art Brush: The little strokes created by such brushes could be used to make these botanical beauties.
- Matte Top Coat: A glossy finish that makes it feel like velvet..
As each leaf is carefully painted onto them, the clear base will set the tone for dramatic effect. Create this botanic beauty using an ultra-thin brush. Lastly, choose a matte top coat for an unexpected twist in your artwork. Design for those who understands real fashion is all about details.
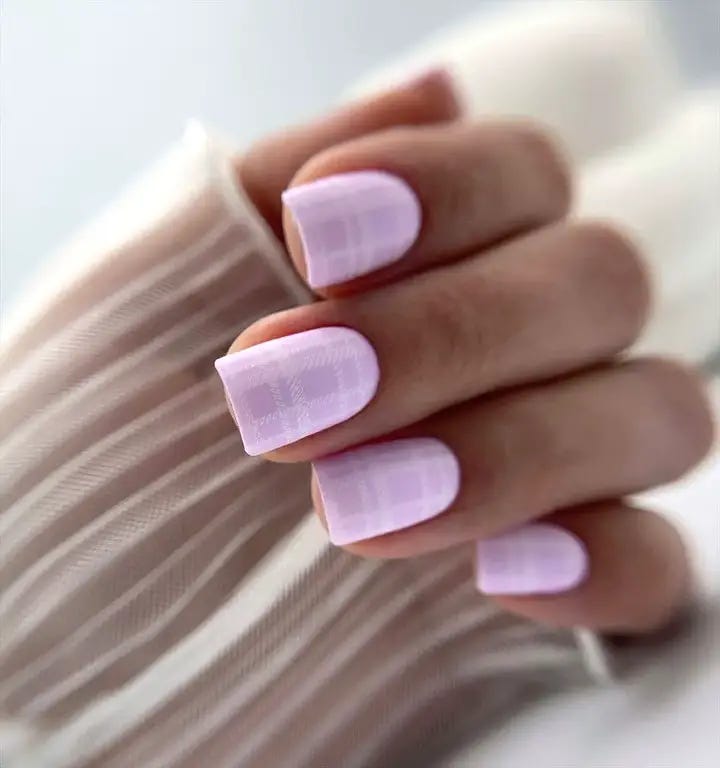
Lilac Lace: Subtle Elegance
Lastly, there is the quiet beauty of the lilac lace design. The appearance is simple but has an otherworldly feeling due to its intricate patterns. It’s a gel design that works well for people who want their summer nails to be easy and fun.
Things you need for this design:
- Lilac Gel Polish: This soft pastel color will serve as the base.
- White Gel Paint: This will be used to create the lace look.
- Detailing Brush: You’ll need one if your designs are more intricate.
- Glossy Top Coat: This will protect and enhance the pattern.
Using white paint on top of a lilac base, draw delicate lines that imitate a lace pattern. It could occupy either whole nails or just some parts; everything depends on your imagination, but remember about lightness and steadiness. Finally, cover everything with a glossy top coat; that way not only should it make our design pop even more but make sure it lasts through plenty warm evenings too!
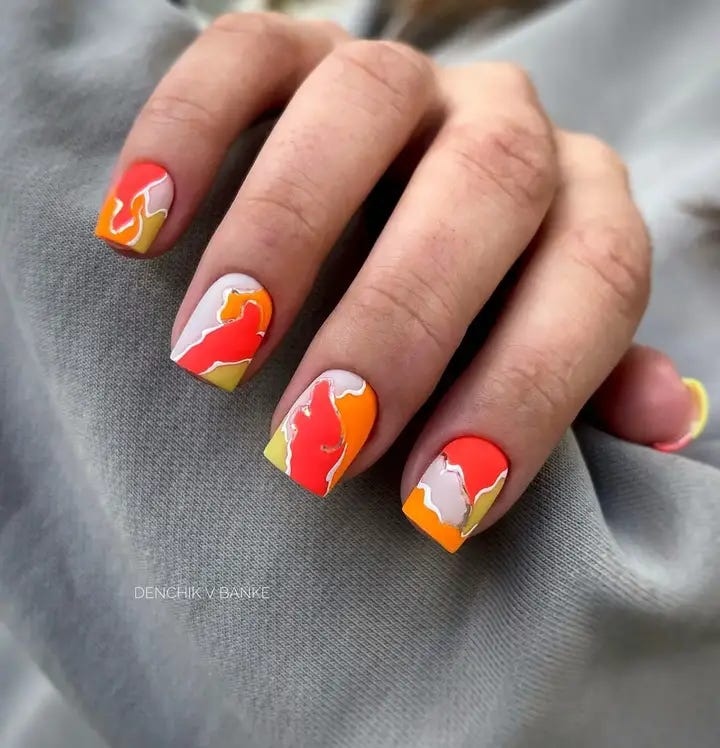
Sunset Flames: Ignite Your Summer Passion
The manicure should be an embodiment of spirit of summer as fiery as sunsets. The bright and bold flames that flow in the colors typical of sunset will set you apart from others. This is not just a design, it’s a summer romance on your fingertips. Great for those who want to add some drama to their style.
Consumables for this design:
- Orange Gel Polish: Use this to create the base layer for the fire.
- Yellow and Red Gel Polish: For creating layers of depth.
- White Gel Polish: Makes a hot center shine brightly.
- Fine Detail Brush: To enable one draw perfect flickering flames.
- Glossy Top Coat: This will preserve your fiery artwork in place.
Primarily, start with an orange gel polish and then layer on yellow or red gel polish to make the fire with the help of fine detail brush that mixes both colors together. Finally, at the core of each flame, use white paint to give them an incredible brightness like real fire does with light effect. Lastly apply top coat which is glossy ensuring long-lasting shiny finish that’s hard wearing too
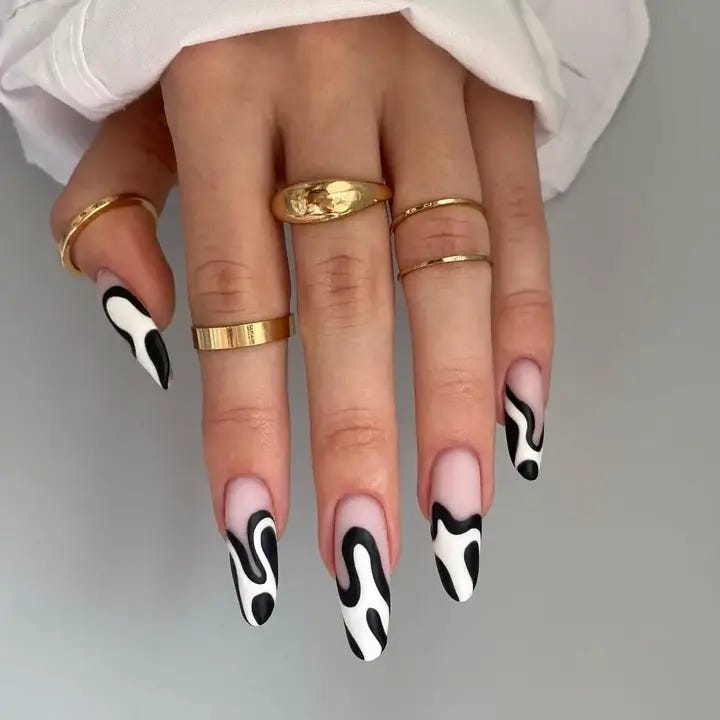
Monochrome Magic: Elegance With A Twist
Who says summer can’t be elegant? This is the ultimate simplicity of sophistication. The black and white contrast brings a modern twist to classical grace. It’s just right for a summertime grown-up who wants to make an understated yet dramatic statement.
Materials for this design:
- Black and White Gel Polish: For that strikingly sharp contrasting look.
- Detailing Brush: To ensure perfect flowing shapes.
- Matte Top Coat: With some luster, but mostly dry sheen.
Creating this look is like painting shadows and light. First of all, apply a soft pink or nude base followed by sketching out with the black polish the sinuous shapes. Fill in as much or little as you wish using white and black polishes, alternating with matte top coat for avant-garde effect. Super simple elements; super impactful results in this design.
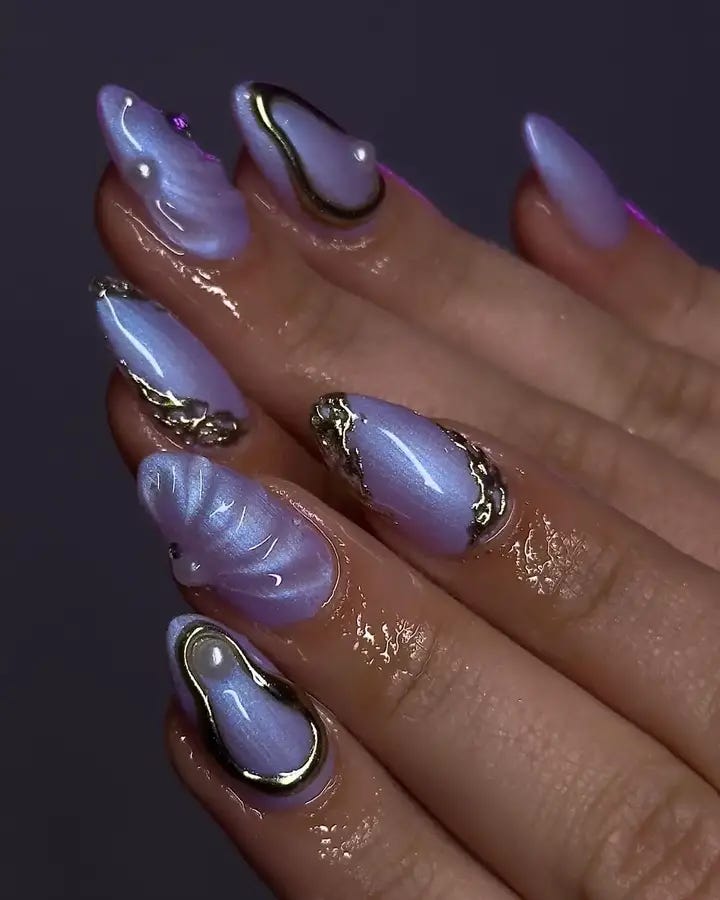
Galactic Glamour: A Cosmic Twist On Summer Nails
Let your nails transcend the earth by giving them a design that is truly out of this world. The cosmic merger of purples and blues, rimmed with metallic accents, creates a space effect that is just as curious as enchanting. This design takes easy & cute summer nails to a celestial level.
Materials needed for this design:
- Purple and Blue Gel Polish: The foundation of your intergalactic journey.
- Silver Metallic Stripe Tape: To put in those stellar highlights.
- Glitter Top Coat: To finish it off with some sparkle that resembles the night sky.
Start with a gradient of purple and blue, blending them together seamlessly for that cloudy background look. Decorate your nails with silver stripe tape so it looks like there are rings around distant planets on them. Then sprinkle on glitter top coat to give the illusion of a galaxy lit by stars. This manicure is for the dreamers and the stargazers– perfect for warm summer nights spent under twinkling skies.
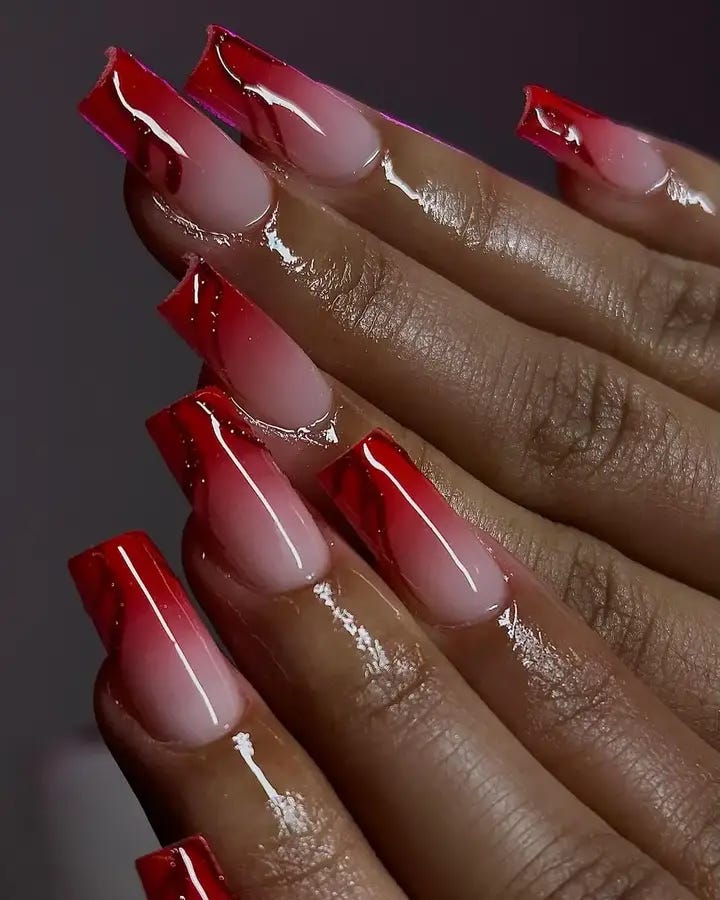
Crimson Edge: The Bold And The Beautiful
To make it interesting this summer, there is nothing like a shocking and sharp-edged look. These nails possess a daring scarlet top that transforms a basic manicure into something amazing. It is an idea for those who want to be both wild and elegant.
Things needed for this design:
- Sheer Pink Gel Polish: This will create a healthy, natural-looking foundation.
- Crimson Gel Polish: For the deep, rich edge.
- Glossy Top Coat: This gives off the incredible shiny reflective finish.
Start by applying the sheer pink polish as your base color to get that barely-there blush on your nails and then carefully paint tips with crimson polish using tape or steady hand to create crisp line. A coat of glossy top coat once everything is dry pulls it all together, making you look bold as well as sacred.
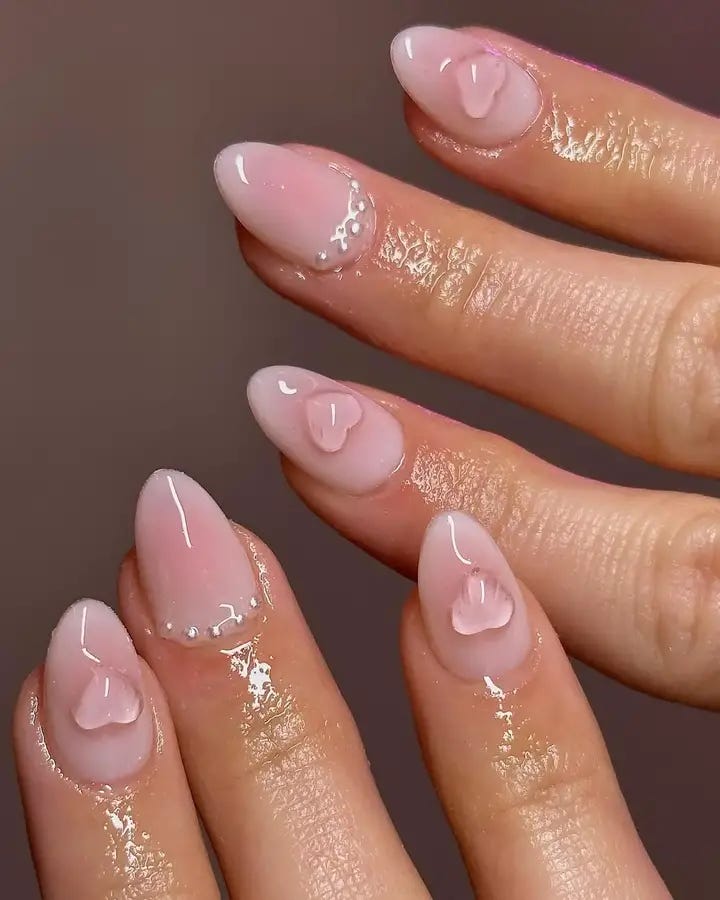
Soft Swirls: Whispers Of Elegance
These nails are characterized by gentle swirls that make them look almost ethereal, so elegant for any summer occasion. It’s a minimalistic design with such a great depth of expression that is present in your nails without saying anything.
Supplies needed to do this design:
- Nude Gel Polish: A calm and delicate undercolor.
- Clear Gel: This will enable you to create the swirling pattern in 3D.
- Dotting Tool: For correct dot positioning.
- Glossy Top Coat: To have a flat finish on top of the 3D parts.
Start with a nude base and then apply clear gel in order to make raised swirls and dots on your nail. The texture added by the 3D effect makes it fun to feel as well as see. Finally, gliding a covering coat over your nails ensures smoothness before contact with anything.
Ombre Elegance: A Gradual Grasp Of Glamour
The gradient in this ombre design represents a sunset. It shifts from a passionate pink to a mysterious mauve. Symbolizing the slow and beautiful change from day to night, casual to formal, simple to simply stunning.

Materials for this design:
- Gel polishes in pink and mauve: So that you can make an ideal gradient.
- Sponge: For dabbing and blending the ombre effect.
- Top coat with gloss finish: Guarantees smoothness between colors as well as gives them shine.
To achieve the ombre effect, apply a base of pink gel polish, then use a sponge to lightly dab on the mauve at the tips, blending it as you go. This creates an even-toned transition that mimics natural evening skies. Finally, apply another layer of glossy topcoat which will enhance depth and vibrancy of colours — making your manicure statement piece for any summer night.
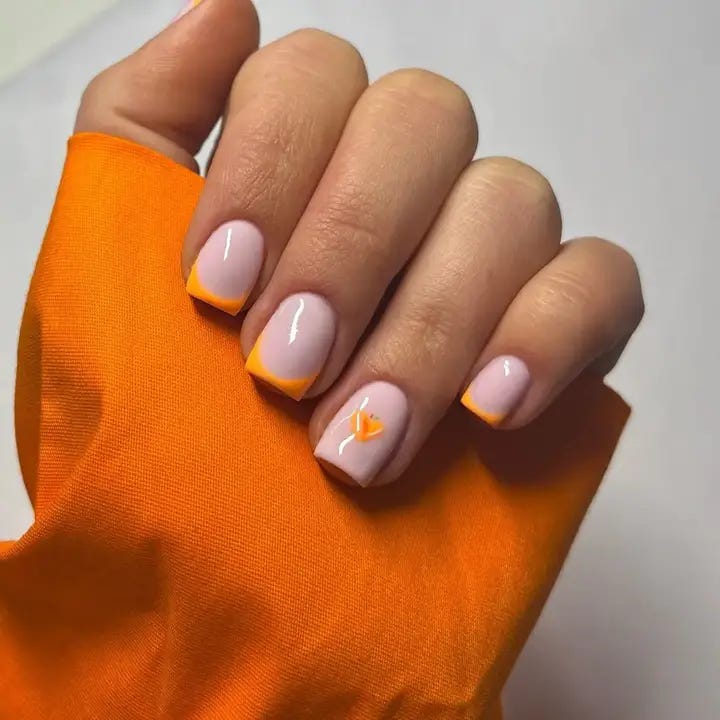
Sunrise Hues: Embracing Daybreak
Somehow, on these nails, the silence of dawn is magical. Soft pastel base with its vibrant orange tips recalls that brief moment before the sun comes up filled with hope and warmth. It’s an uncomplicated design that makes a big impact and it’s great for celebrating a new day.
Things you will require for this artwork:
- Pastel Lilac Gel Polish: To establish a calm background.
- Vibrant Orange Gel Polish: For a morning explosion.
- Detailing Brush: To depict intricate sunrise.
- Glossy Top Coat: To seal in first light of day.
Paint your lilac base, cure it, then with the detailing brush apply the orange polish across the tip and blend it slightly into the base for an invisible connection. The final glossy top coat adds durability and shine, ready to take you from day to night.
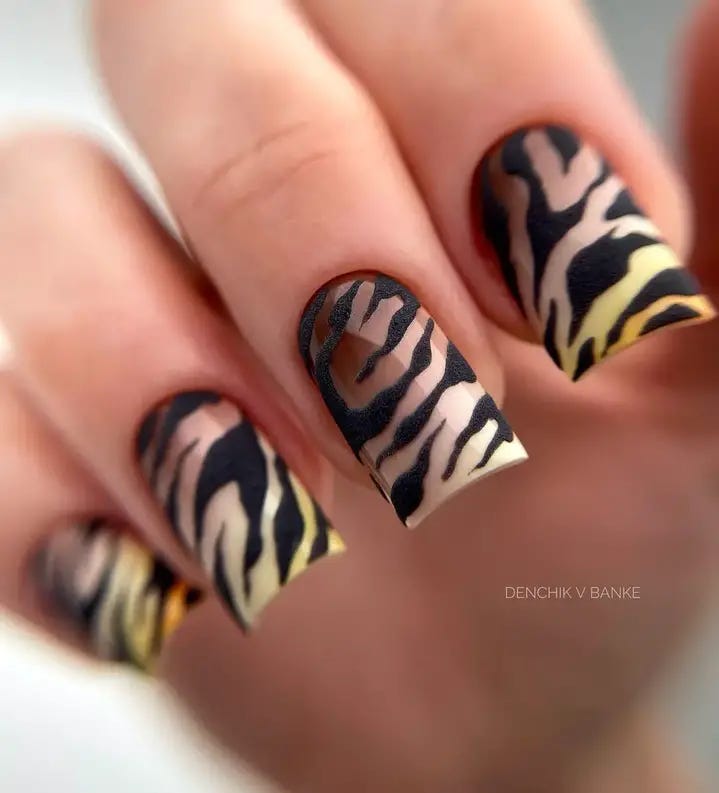
Wild Instincts: Unleashing Your Inner Animal
These nails are for brave-hearted and daring, the ready to unleash their wild side. The timeless leopard print gets a makeover through colors that adds an untamed beauty that is both arresting and trendy. This design can create a statement without words.
Dies needed for this design:
- Black and Yellow Gel Polish: For creating your animal print base.
- Detailing Brush: So you can make those intricate lines.
- Matte Top Coat: Adds a modern touch to it.
The foundation of the animal print is created by layering yellow and black gel polish. Using a detailing brush, paint in black stripes to create the iconic designs. These nails have been finished off with matte top coat for contemporary edge that screams fierce fabulousness.
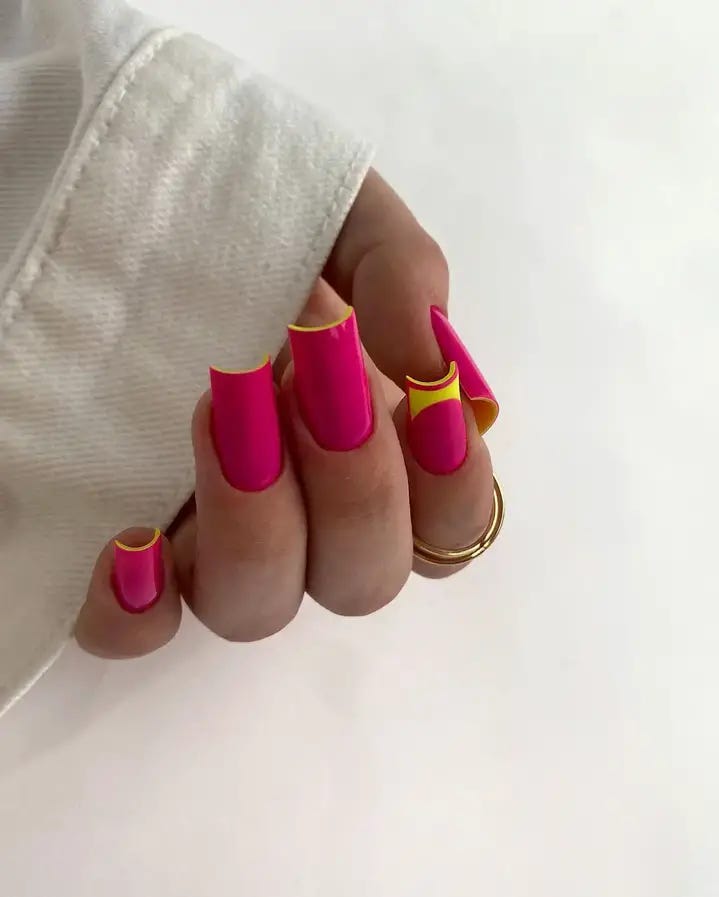
Neon Nightfall: The Dusk Till Dawn Vibe
To the individuals who can’t stop dancing until dawn, this is for you. These nails are painted in a bright neon pink color with glowing yellow lines going through them as if they were city lights on the horizon at dusk. They’re fun and daring just like summer should be.
What you’ll need:
- Gel Polish in Neon Pink: This is where the party starts!
- Striping Tape in Yellow: For an electric pop.
- Top Coat (Glossy): Make sure your mani is ready for a long night.
Start by painting your base with neon pink; cure it and then frame each nail using yellow striping tape, cutting away any excess tape that extends past the nail’s edge. Finish it off with a glossy top coat to keep it looking fresh no matter how many hours you dance away.
Modern Elegance: A Monochrome Affair
This is a place where you can find a balance between simplicity and complexity. These nails are dedicated to monochromatic magic and have an elegant black shade that remains timeless yet modern. This is an artwork for beginners who want to go for elegance in silence.
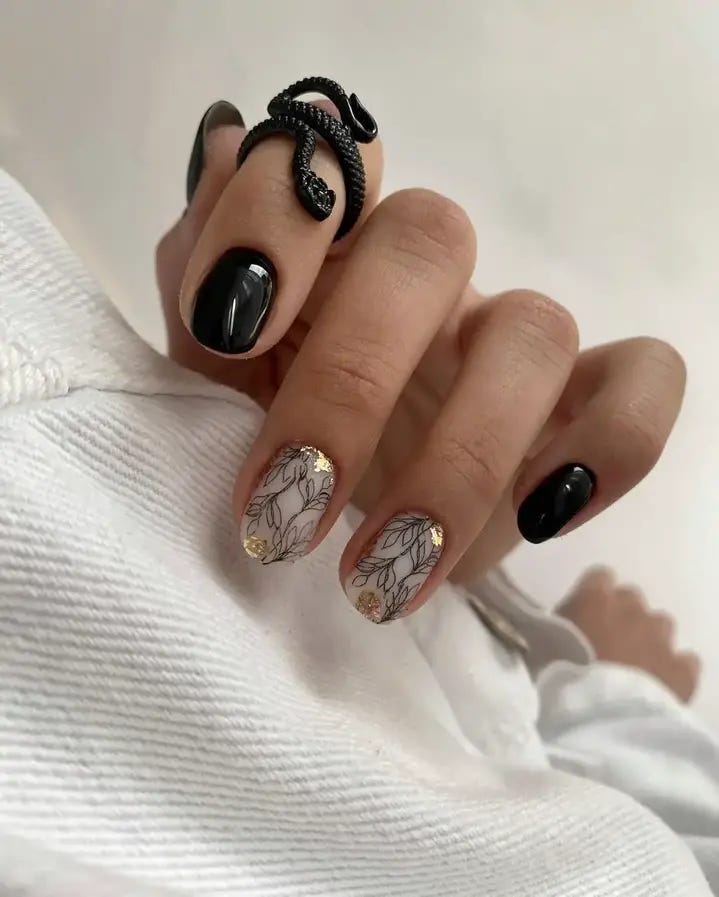
Necessary items:
- Jet Black Gel Polish: This gives dark intense look.
- Sheer White Gel Polish: To make the complicated floral patterns.
- Gold Flake Top Coat: This adds little richness.
- Fine Detailing Brush: For delicately drawing each flower.
What makes the technique work is how the black is used as shadow and the white as light, with all floral patterns painted by hand for individualism. Gold flake top coat adds an element of extravagance. It’s very simple but it’s just perfect!
Whimsical Dots: Playful Sophistication
This nail design is whimsical, indicating the wide range of creativity that one can have with nails. Simply fun, this style uses negative space and dots strewn around to make it look all fresh, interesting and just a great one to try for an easy & cute summer nails.
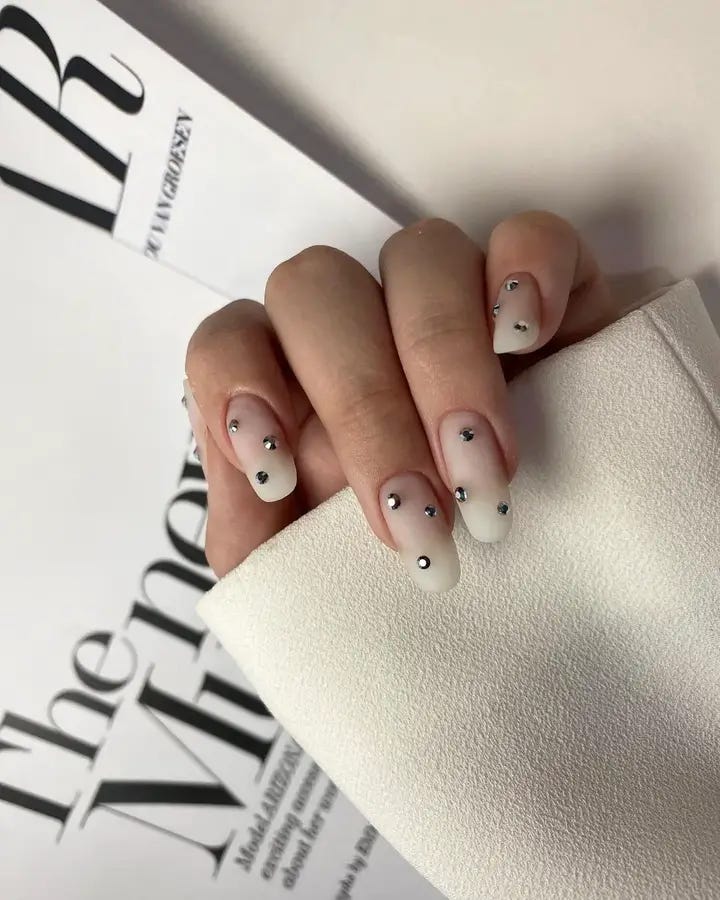
Materials needed:
- Clear Gel Polish: So subtle base will match any complexion.
- Black Gel Polish: To emphasize the playful features.
- Glossy Top Coat: An unbreakable cover does not let the party end.
This design takes on form in precision — a nude base first then black dots placed strategically as we could see in any night sky filled with stars. Glossy top coat in the end tightens up these playful pointers so wherever you go this summer they won’t be lost.
Floral Whisper: A Delicate Blossom
Grab a hold of the soft side of summer with these whispers of flowers. Transparent nails painted with soft flower drawings and specks of gold provide a whimsical, romantic aesthetic fit for any event.
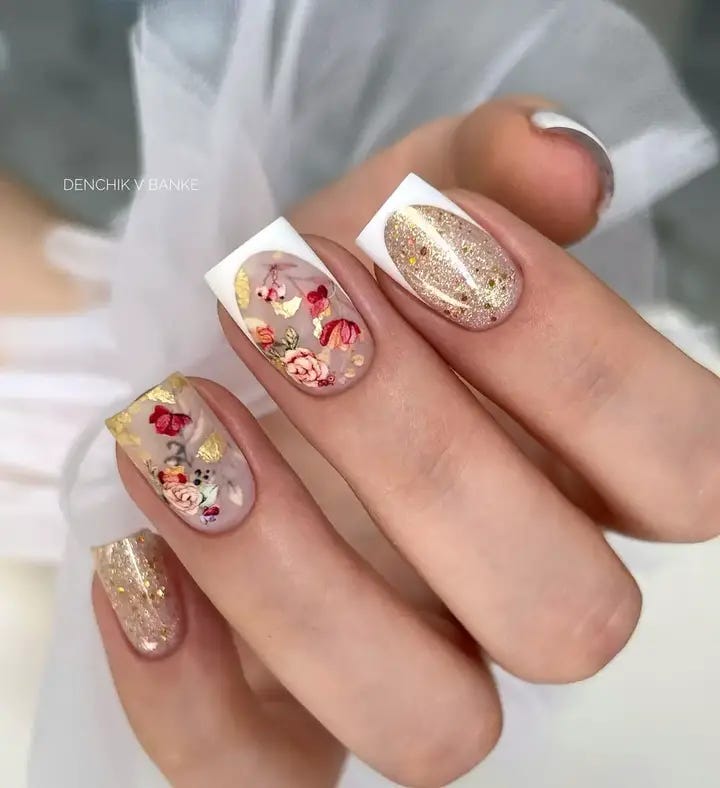
Materials needed for this design:
- Clear Gel Polish: To let your nail’s natural beauty shine through.
- Flower Nail Stickers: For an easy but detailed design.
- Gold Foil: To add some glitz and glam.
- Glossy Top Coat: To seal in the floral whisper and gold accents.
Using clear gel as a base, each nail has stickers placed on them to create bouquets. Little pieces of gold foil are then put on top to create contrast in color. For the last layer, a shiny top coat is put over everything which helps protect the art while giving it an airy yet elegant look.


0 Comments