Neon Nights: Illuminate Your Summer with Vibrant Oval Nail Colors! Light up your summer evenings with neon hues of pink, yellow, and orange on short to medium-length oval nails for a stunning statement. Whether adorned with simple designs or kept solid, these trendy manicures are perfect for summer soirées and nighttime gatherings!
Pink Elegance With A Glitter Line
Professional Manicurist’s Take: These nails offer a refined elegance with their sheer pink base and a hint of sparkle. The thin glitter line adds a subtle yet glamorous touch, perfect for those who appreciate a simple, classy look with a hint of fun.
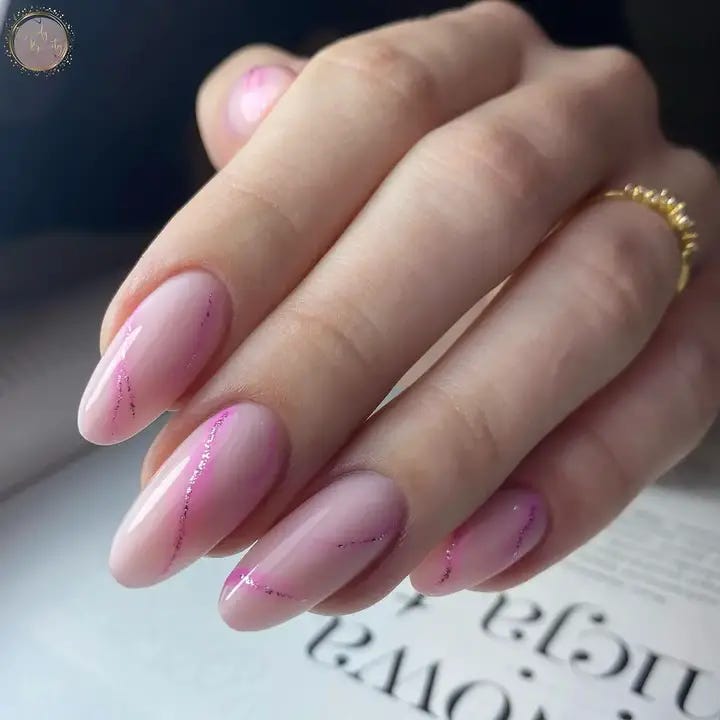
Consumables:
- Base Coat: ORLY Bonder Rubberized Base Coat
- Sheer Pink Polish: Essie Sugar Daddy
- Pink Glitter Stripe: OPI Princesses Rule!
- Top Coat: Seche Vite Dry Fast Top Coat
DIY Guide: Begin with the rubberized base coat for staying power. Apply two coats of Sugar Daddy for a healthy, pink sheen. Carefully add a stripe of Princesses Rule! where the pink fades. Finish with Seche Vite for a durable, glossy sheen.
Floral Accent On Vibrant Pink
Professional Manicurist’s Take: A bold, vibrant pink provides the backdrop for delicate floral accents in this lively design. The contrast of bright color with subtle floral details creates a look that’s both eye-catching and sweet, embodying the spirit of summer with a touch of aesthetic art.
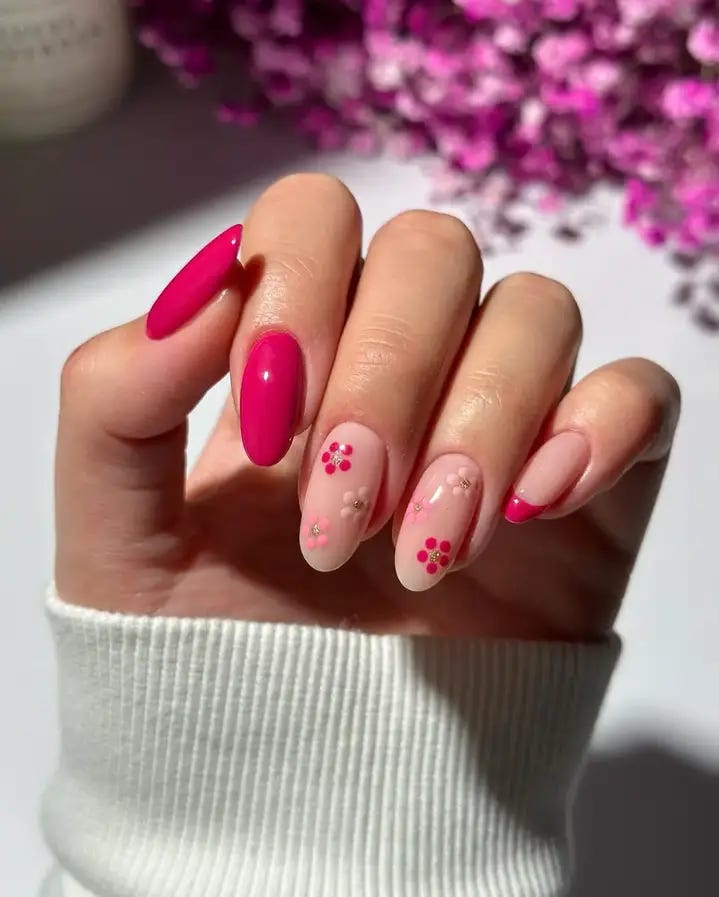
Consumables:
- Base Coat: CND Stickey Base Coat
- Vibrant Pink Polish: China Glaze Shocking Pink
- White Polish for Flowers: Sally Hansen White On
- Pink Rhinestones
- Top Coat: OPI Glossy Top Coat
DIY Guide: After your base, apply Shocking Pink for a vivid effect. Use White On to add floral designs, then adorn with pink rhinestones for a three-dimensional aspect. Cap it off with a glossy top coat for shine and durability.
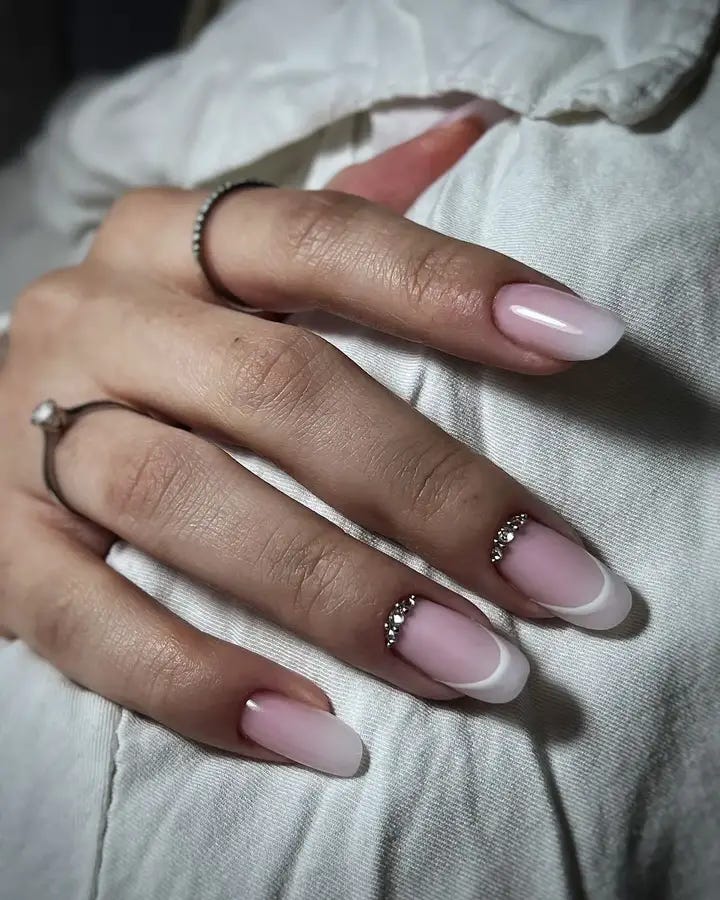
Pink With A Twist Of Art
Professional Manicurist’s Take: Dive into the playful side of summer with this lively pink oval design. The nails are adorned with a funky art stroke, adding a splash of creativity. It’s fun, flirty, and perfectly short, embodying the carefree spirit of summer days.
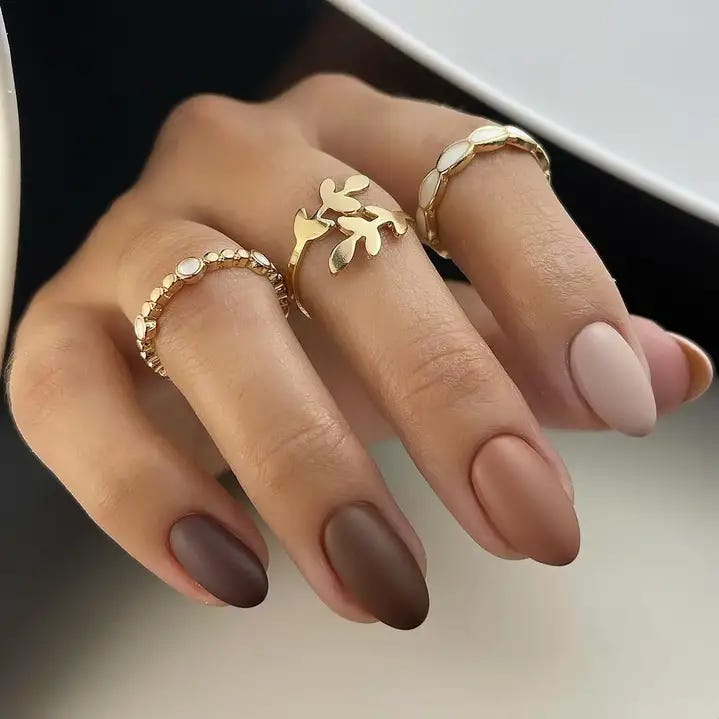
Matte And Gloss Duo
Professional Manicurist’s Take: A combination of matte and gloss finishes can redefine the concept of neutral nails. This oval nail design showcases an exquisite pairing of a matte chocolate polish alongside a glossy pale pink. It’s a classy, modern take on a French manicure, blending tradition with trendy innovation.
Spring Florals And Pastel Greens
Professional Manicurist’s Take: These nails are a breath of fresh air, blending soft pastel tones with delicate floral art. The design reflects the essence of spring transitioning into summer, with oval tips serving as the perfect backdrop for the designs spring vibes and lively pastel touches.
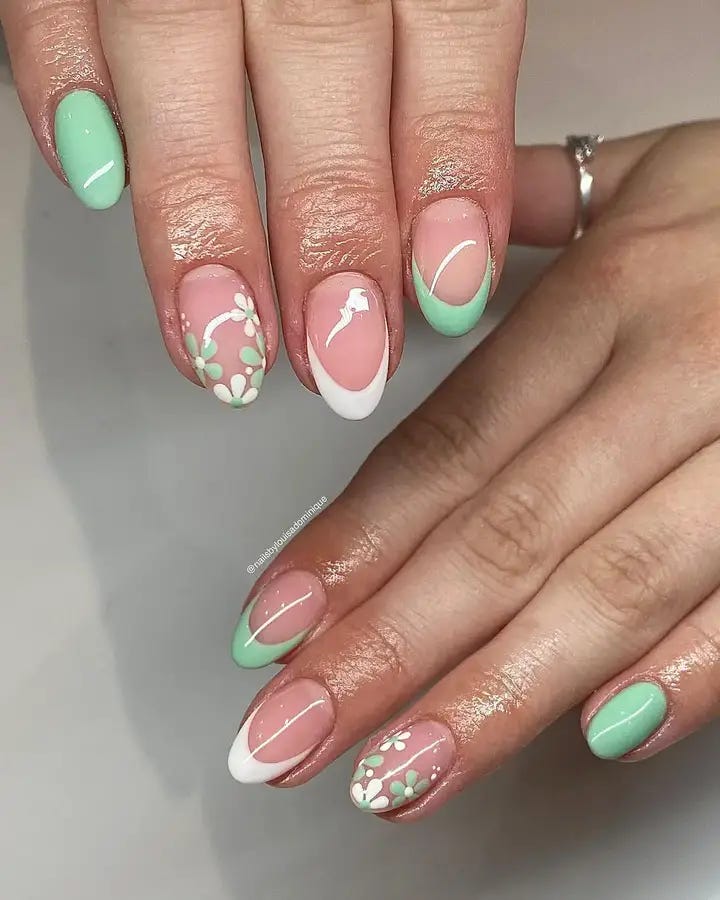
Consumables:
- Base Coat: Essie All in One Base
- Pastel Green Polish: Essie in Mint Candy Apple
- White Polish for Florals: Sally Hansen White On
- Detailing Brush for Art
- Top Coat: CND Vinylux Long Wear Top Coat
DIY Guide: Begin with Essie’s All in One Base. Apply two coats of Mint Candy Apple, letting each dry. Use a detailing brush with White On to paint your floral pattern. Once the art dries, protect it with CND’s top coat for a lasting finish.
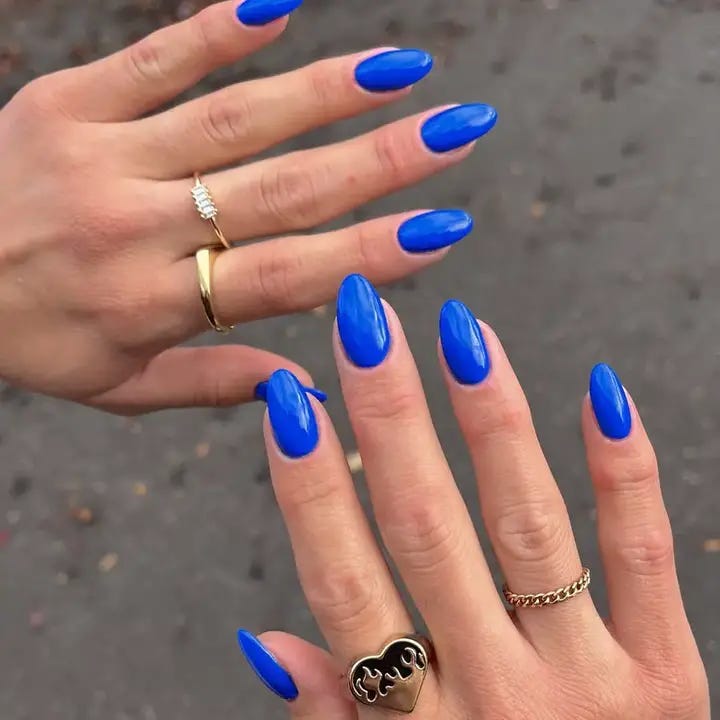
Bright Blue Summer Skies
Professional Manicurist’s Take: Nothing says summer like the color of a clear sky. These bright blue, long oval nails are not just a statement — they’re a bold proclamation of all things summer. The vibrancy of the blue is striking, perfect for those who love a pop of color.
Sparkling Gems On Sheer Pink
Professional Manicurist’s Take: Adorning a sheer pink base with sparkling rhinestones transforms a simple manicure into a dazzling summer statement. This design epitomizes the neutral trend with a touch of inspo from the stars above. Each gem catches the light, creating a subtle yet captivating art piece on each nail.
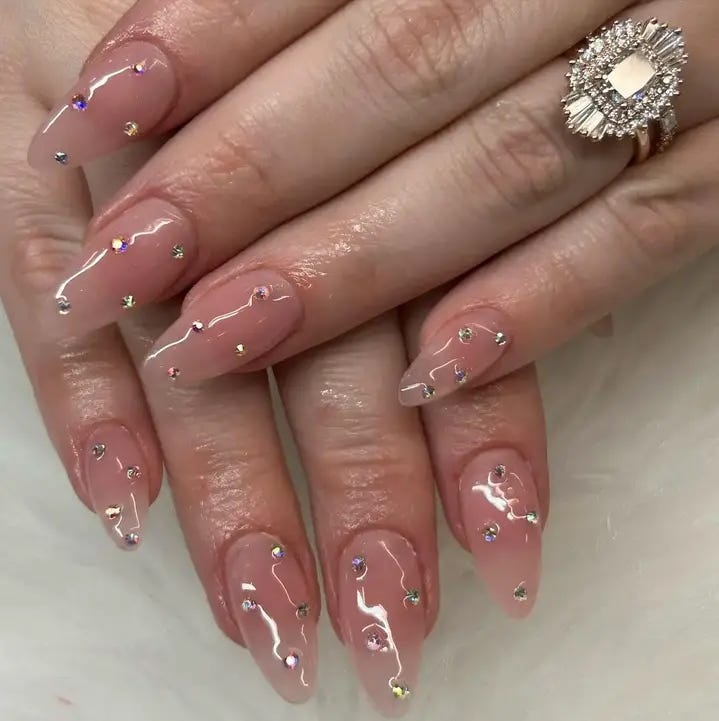
Consumables:
- Base Coat: CND Stickey Base Coat
- Pink Sheer Polish: OPI Bubble Bath
- Rhinestones: Swarovski Clear Crystal Mix
- Adhesive: Nail Glue or Clear Gel Top Coat
- Top Coat: Glisten & Glow Top Coat
DIY Guide: Apply a base coat to protect your nails, then two coats of OPI Bubble Bath for that perfect pink canvas. Use a dab of nail glue or a clear gel top coat to affix each Swarovski crystal in place. Finish with a top coat for added shine and protection.
White Lace Elegance
Professional Manicurist’s Take: The essence of lace on nails is timeless. Here, the white detailing on a neutral base exudes an aesthetic reminiscent of delicate summer dresses. Accents of gold add a hint of luxury, making it a classy choice for any sophisticated event.
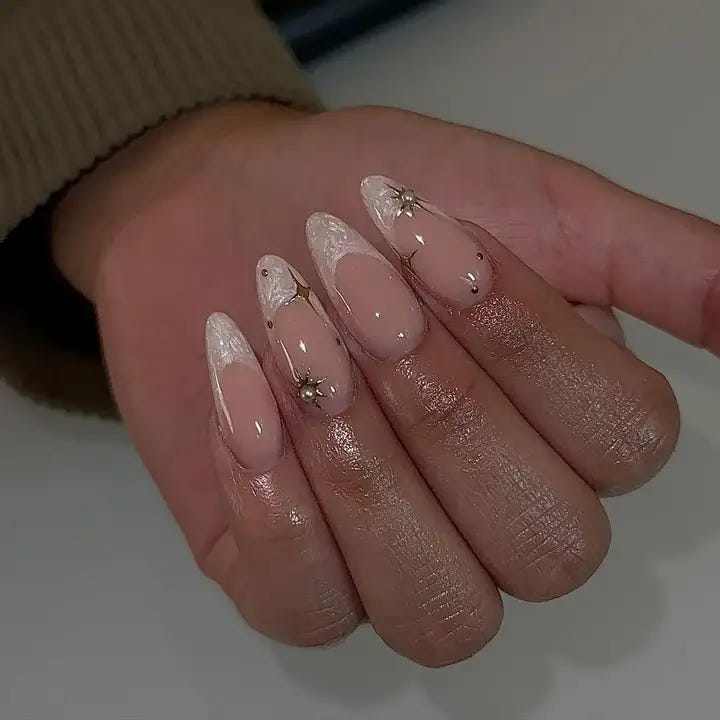
Consumables:
- Base Coat: Essie Here to Stay Base Coat
- Neutral Polish: Zoya in Bela
- White Lace Stickers or Decals
- Gold Studs: Mini Gold Star Nail Art Studs
- Top Coat: ORLY Glosser Top Coat
DIY Guide: After your base coat, apply Zoya’s Bela for a flawless neutral backdrop. Place the lace decals carefully, pressing them flat against the nail. Add the gold studs for a chic focal point. Finish with a glossy top coat for durability and shine.
Sunset Ombré Blaze
Professional Manicurist’s Take: Capturing the vibrant colors of a summer sunset, this ombré design blends neutral and bright tones for a fiery edge. The oval shape is a canvas for the gradient transition from colors short to long, creating an inspiring look that’s both bold and seamless.
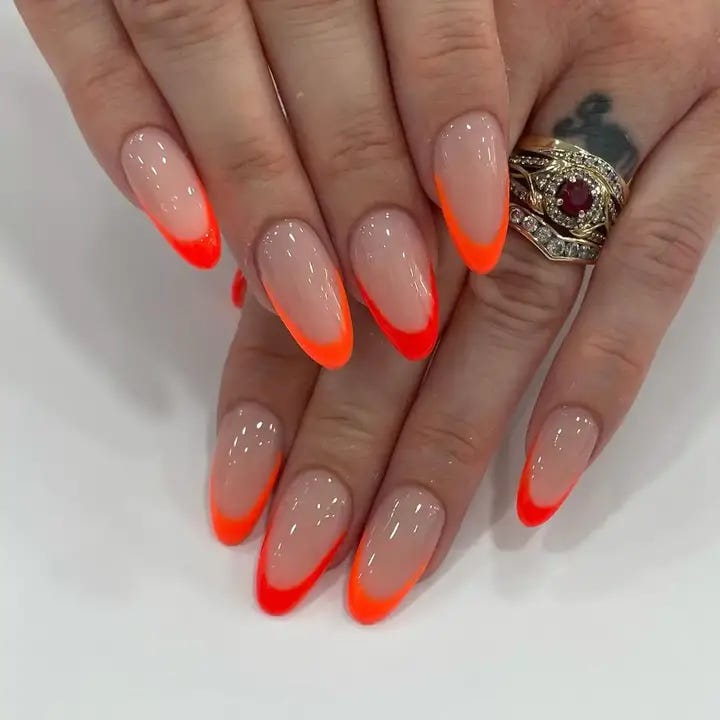
Consumables:
- Base Coat: ORLY Bonder Rubberized Base
- Neutral Polish: OPI Samoan Sand
- Orange Polish: Essie in Tangerine
- Sponge for Ombré Technique
- Top Coat: China Glaze Fast Forward Top Coat
DIY Guide: Start with the ORLY base coat for grip. Apply OPI Samoan Sand as the base color. Then, using a sponge, dab on Essie Tangerine at the tips, gradually blending it upward to achieve the ombré effect. A swift application of the top coat will seal in the design.
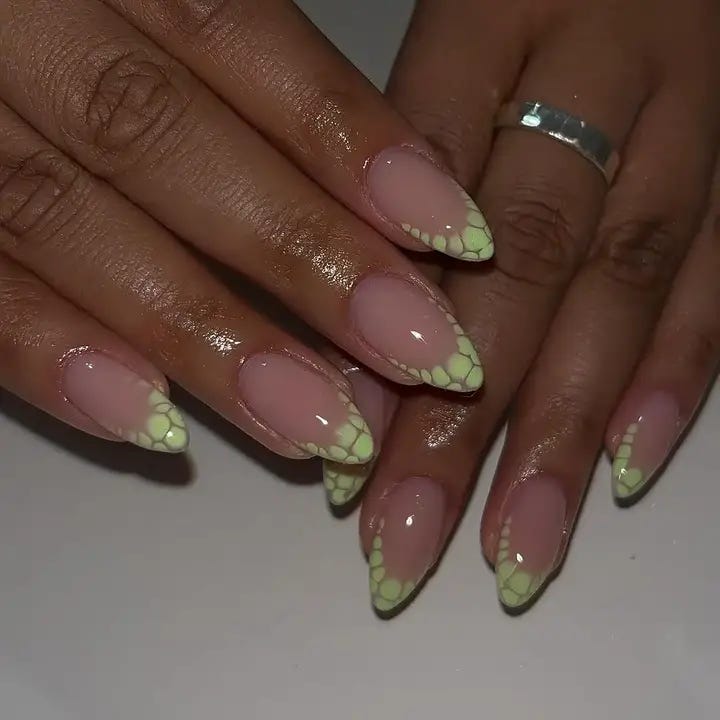
Yellow Lace On Pink
Professional Manicurist’s Take: This playful yet simple lace-inspired art offers a unique twist to designs short. The yellow lace patterns are a vibrant choice against the soft pink background, making this design a sweet and trendy pick for those warm, lazy summer days.
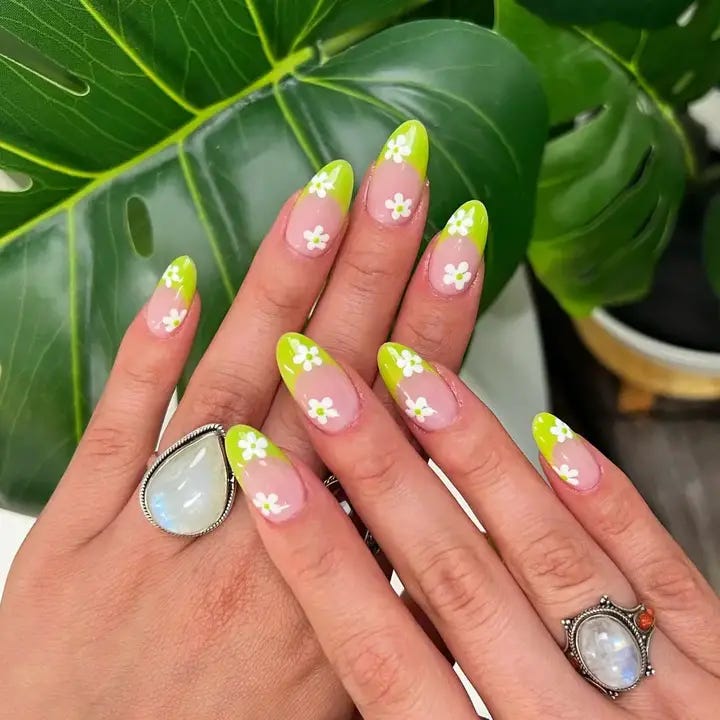
Daisy Delights On Lemon Zest
Professional Manicurist’s Take: The vivacity of a summer garden comes to life on these oval nails. A lemon-yellow gradient meets charming white daisies, suggesting fun under the summer sky. It’s a look that’s at once playful and polished, simple in its design, yet inspirational in its bright, trendy execution.
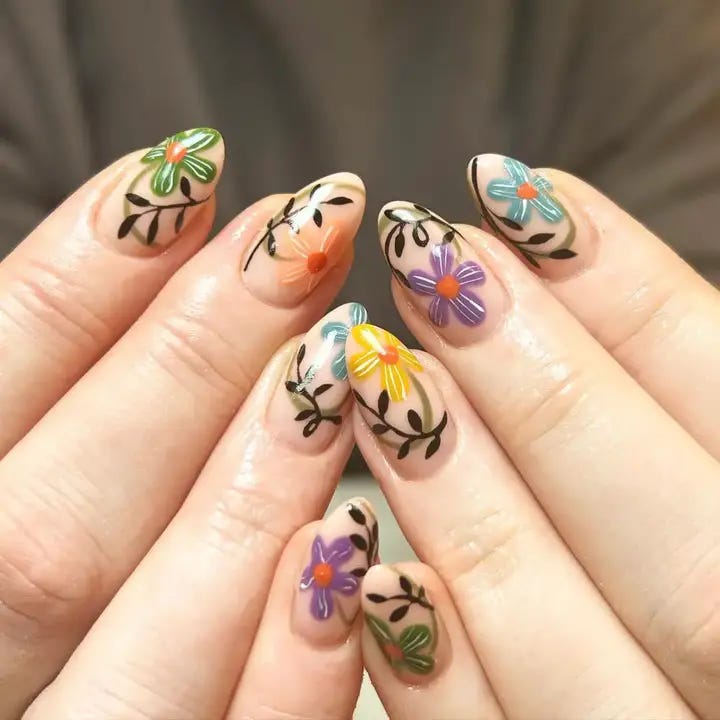
Blooming Artistry
Professional Manicurist’s Take: These nails are a canvas showcasing a bouquet of summer flowers. The artistic flair on display is colorful, aesthetic, and inspo-worthy. With a round and short shape, these nails are perfect for showcasing detailed art without overwhelming the senses.
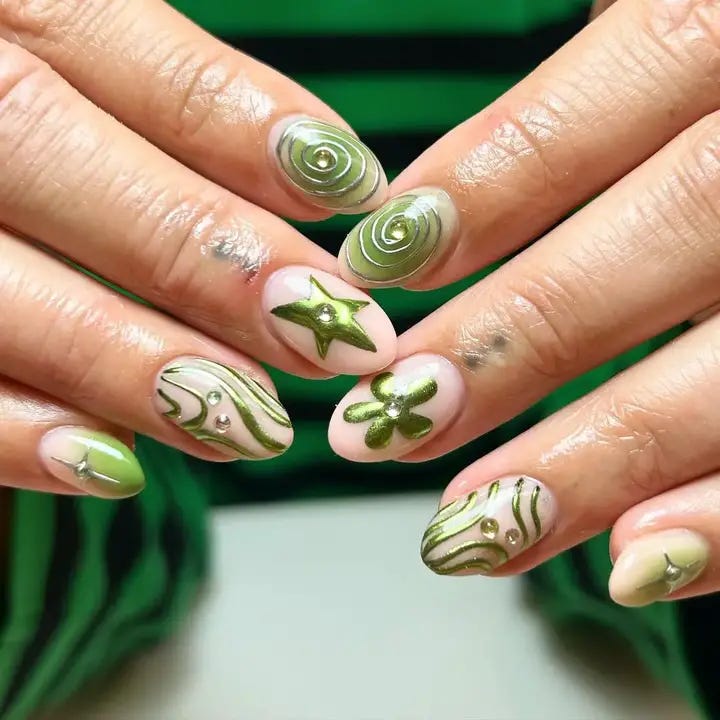
Swirling Greens And Stars
Professional Manicurist’s Take: This design is a whimsical play of swirling greens and embellished stars, reminiscent of a midsummer night’s dream. The green shades range from soft pastels to deep emerald, giving depth and fun to the designs. The inclusion of simple stars adds a touch of magic.
Playful Pop Art
Professional Manicurist’s Take: These nails scream fun and eclectic art with a vibrant mix of patterns and emoticons, reminiscent of pop art’s most iconic pieces. Each nail features a different design, making for a playful and trendy collection that’s bound to turn heads and spark conversations.
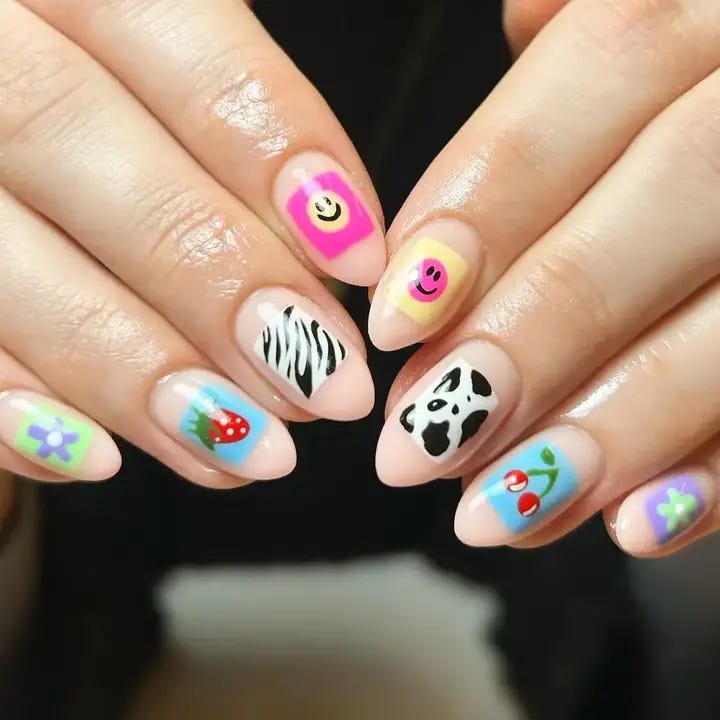
Consumables:
- Base Coat: OPI Natural Nail Base Coat
- Variety of Polish Colors: OPI Collection
- Black Polish for Detailing: Essie Licorice
- Fine Detailing Brush
- Top Coat: OPI Top Coat
DIY Guide: After your base coat, apply a neutral polish as the foundation. Select different colors and designs for each nail, using a fine brush for detail work like zebra stripes or emoticon faces. Seal with a top coat for a glossy finish.
Love In Bold
Professional Manicurist’s Take: Embrace a bold statement of love with these oval nails, each adorned with a single letter to spell out ‘I LOVE U.’ The hot pink hue against the nude base exudes confidence and a modern romantic vibe, perfect for expressing one’s style and affection.
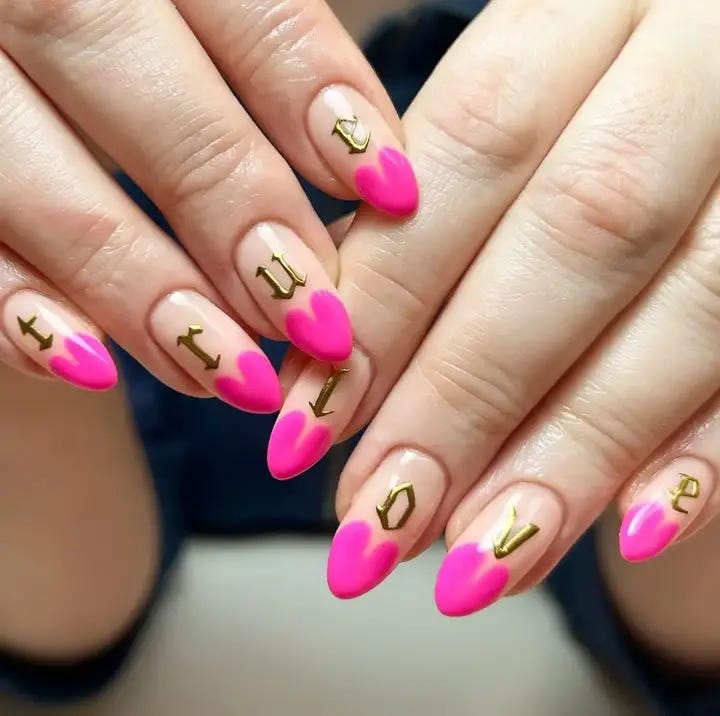
Consumables:
- Base Coat: Deborah Lippmann Gel Lab Pro Base Coat
- Nude Polish: Zoya Avery
- Pink Polish: OPI Short-STOP!
- Gold Stickers: Nail Art Alphabet Stickers
- Top Coat: Sally Hansen Miracle Gel Top Coat
DIY Guide: Begin with the base coat for longevity. Apply the nude polish as the base, and then paint the tips with a vibrant pink. Once dry, apply the gold stickers to each nail. Apply a gel top coat for a durable, shiny finish.
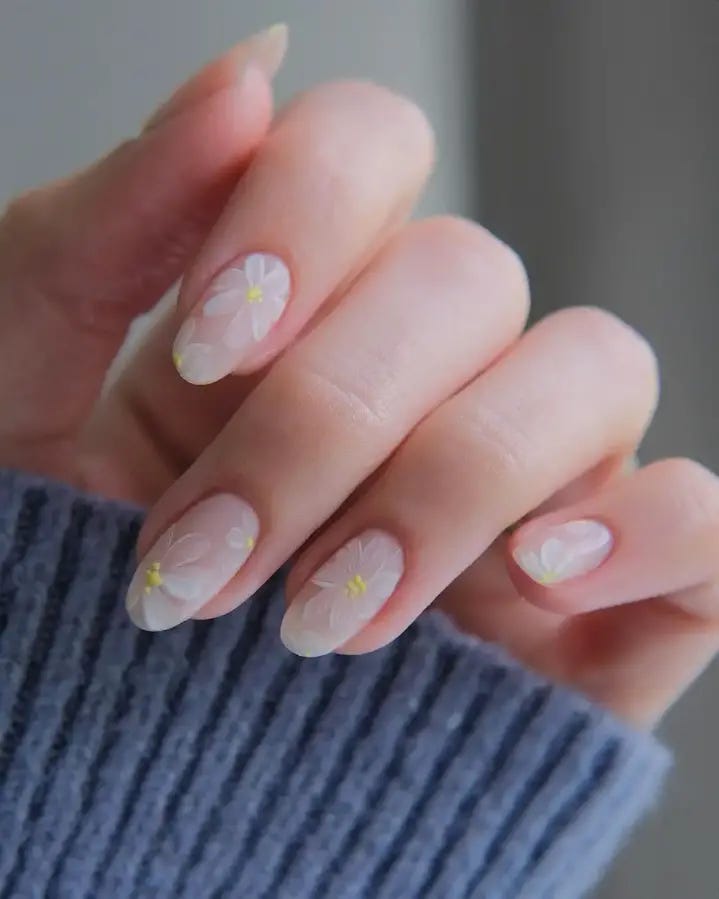
Soft Floral Whisper
Professional Manicurist’s Take: These oval nails present a gentle whisper of spring with delicate floral decals over a clear base. It’s an aesthetic choice for those who prefer subtlety and elegance, with a neutral backdrop that makes the flowers appear to float ethereally on the nails.
Whispering Botanicals
Professional Manicurist’s Take: In a dance of nature and grace, these nails present a delicate botanical design that is both trendy and timeless. The sheer base allows the natural beauty of the nail to shine through while the green foliage accents give a nod to the lushness of summer gardens.
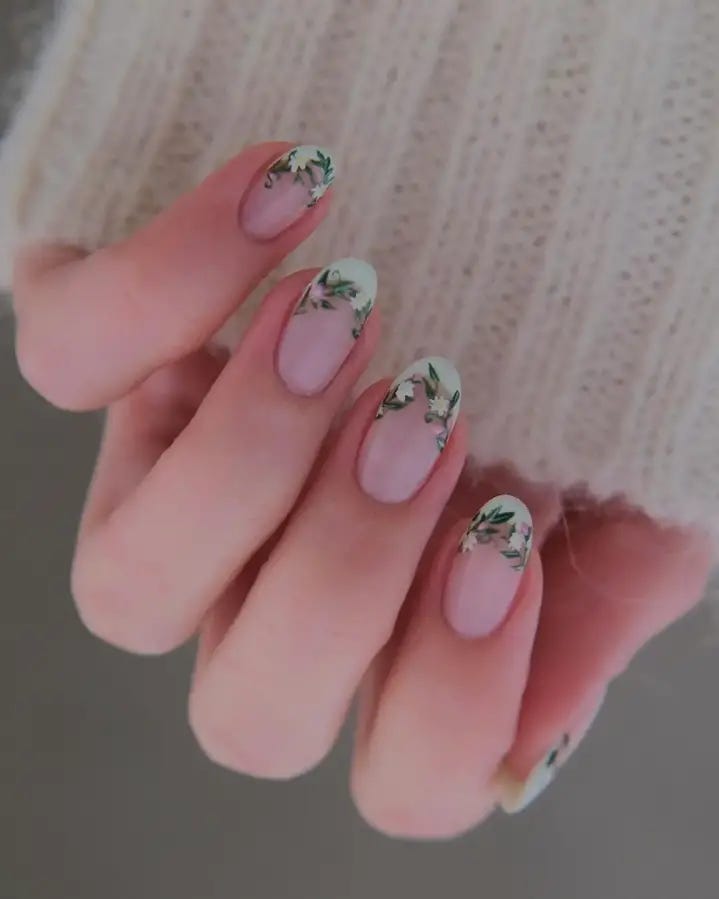
Consumables:
- Base Coat: CND Sticky Base Coat
- Sheer Pink Polish: OPI Bubble Bath
- Green Polish for Leaves: Essie Off Tropic
- Detailing Brush
- Top Coat: Essie Good to Go Top Coat
DIY Guide: Start with the sticky base coat for a secure foundation. Apply a coat of Bubble Bath for a hint of pink. With a fine brush, create the leaf patterns using Off Tropic. Complete the design with a top coat for lasting wear and shine.
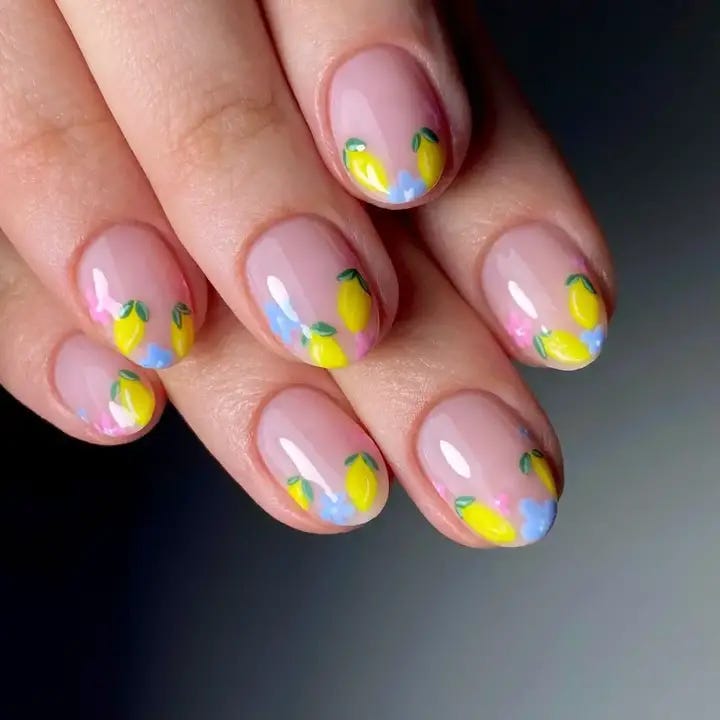
Summer Blossom Festivity
Professional Manicurist’s Take: Celebrating the vibrancy of summer, these nails are adorned with joyful floral patterns that are full of life and color. The playful mixture of yellows, blues, and pinks captures the essence of a summer fun, making for a lively and bright addition to any look.
Abstract Floral Dream
Professional Manicurist’s Take: These oval nails are a modern take on floral patterns with an abstract twist. The dynamic pink strokes set against the translucent backdrop create an artistic and inspiring display that’s both simple and aesthetic.
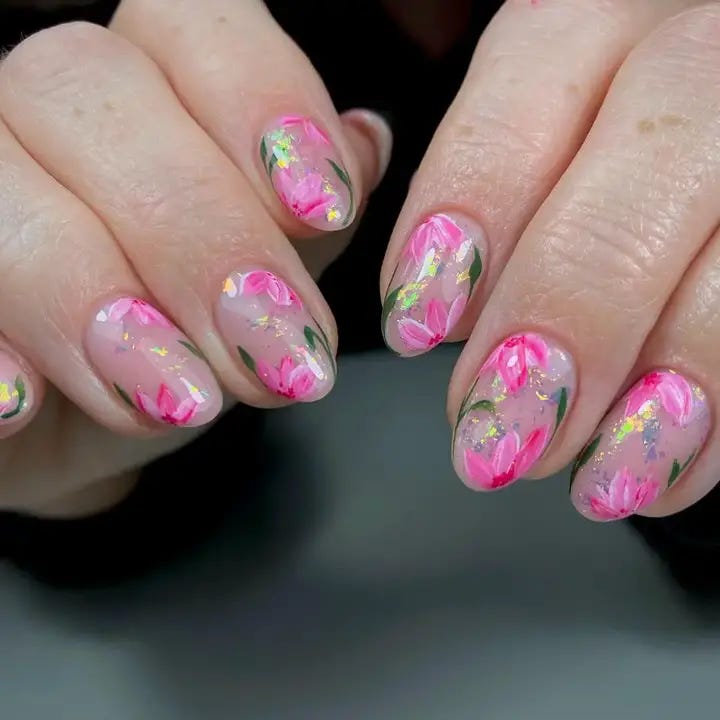
Consumables:
- Base Coat: Sally Hansen Double Duty Base & Top Coat
- Sheer Pink Polish: OPI Put it in Neutral
- Pink Acrylic Paint for Abstract Flowers
- Gold Leaf Pieces
- Top Coat: OPI Top Coat
DIY Guide: Begin with the base coat to protect your nails. Layer a sheer pink polish for a subtle hue. Dip a thin brush into pink acrylic paint and sweep across the nails for an abstract floral effect. Add small pieces of gold leaf for a touch of elegance. Finish with a protective top coat for a glossy, lasting finish.
Pink Ombré Dream
Professional Manicurist’s Take: These nails capture the ombré trend flawlessly, with a seamless transition from soft white to striking pink. They are a fresh and fun addition to any summer wardrobe, providing a pop of color while staying short and sweet.
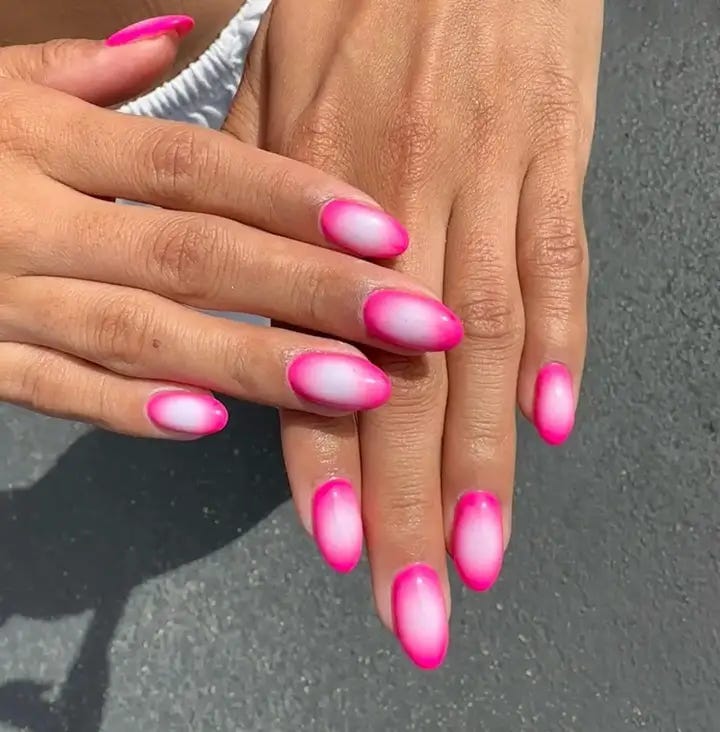
Consumables:
- Base Coat: Essie All in One Base
- White Polish: OPI Alpine Snow
- Pink Polish: Essie Fiesta
- Sponge for Ombré Effect
- Top Coat: Sally Hansen Insta-Dri Top Coat
DIY Guide: Apply the all-in-one base, followed by Alpine Snow at the tips. Using a sponge, dab on Essie Fiesta, blending upward to achieve the ombré look. Finish with the insta-dri top coat for a quick set and high gloss.
Pink Blooms On A Sheer Canvas
Professional Manicurist’s Take: Delicate pink blooms on a sheer canvas are the epitome of understated elegance. The subtle floral design is perfect for those who prefer a more classy, minimalist approach to nail art but still wish for a touch of inspo from nature’s beauty.
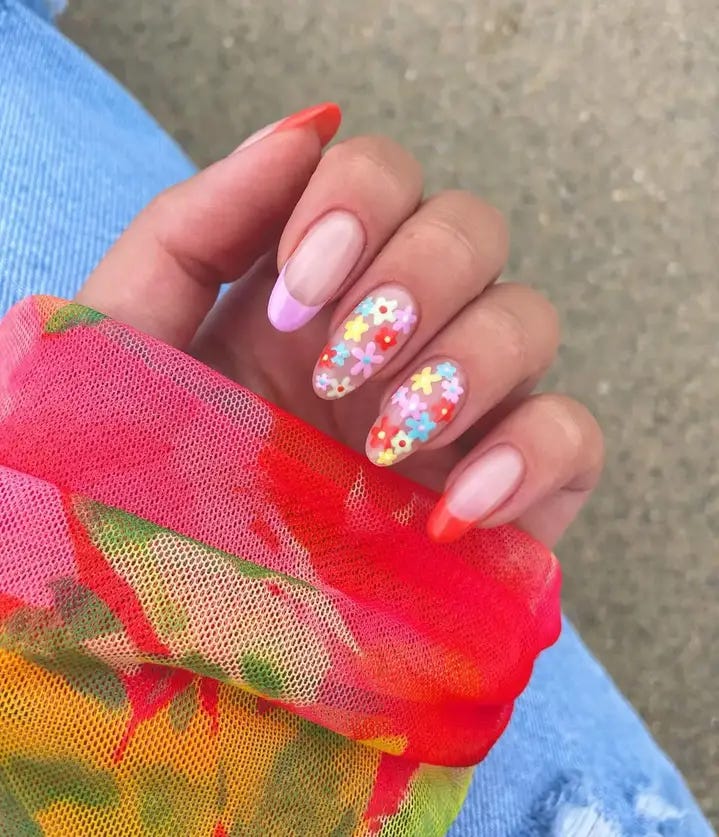
Consumables:
- Base Coat: Zoya Anchor Base Coat
- Sheer Polish: OPI Bubble Bath
- Pink Polish for Blooms: OPI Pink Flamenco
- Dotting Tools for Flower Details
- Top Coat: OPI Rapidry Top Coat
DIY Guide: Start with the Zoya base coat. Apply two coats of OPI Bubble Bath for a translucent look. With a dotting tool, create the pink floral accents using Pink Flamenco. Finish with a rapid-dry top coat for a lasting manicure.
Sprinkles Of Color On Neutral
Professional Manicurist’s Take: This playful design features a neutral base sprinkled with colorful shapes, evoking the joy of summer treats and festivities. The cheerful accents make it a fun yet simple choice for a summer day out, adding just the right amount of color to a neutral palette.
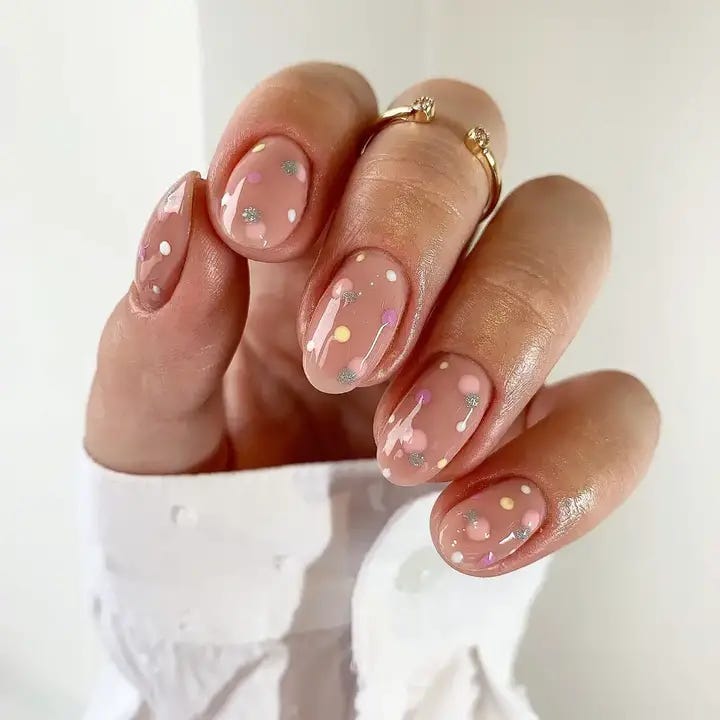
Consumables:
- Base Coat: ORLY Bonder
- Neutral Polish: Essie — Sand Tropez
- Colored Polishes for Shapes: Various shades from OPI
- Dotting Tool or Small Brush
- Top Coat: Essie Gel Setter
DIY Guide: After your base coat, paint a neutral background with Sand Tropez. Then, use a dotting tool or small brush to add colorful dots and shapes with your chosen shades. Seal the design with a gel setter top coat for a smooth, shiny finish.
Modern Art On Oval Nails
Professional Manicurist’s Take: A homage to modern art, this design uses the oval nail as a canvas for abstract shapes and vibrant colors, striking a balance between boldness and designs short in length. It’s a fresh and trendy way to wear art on your fingertips.
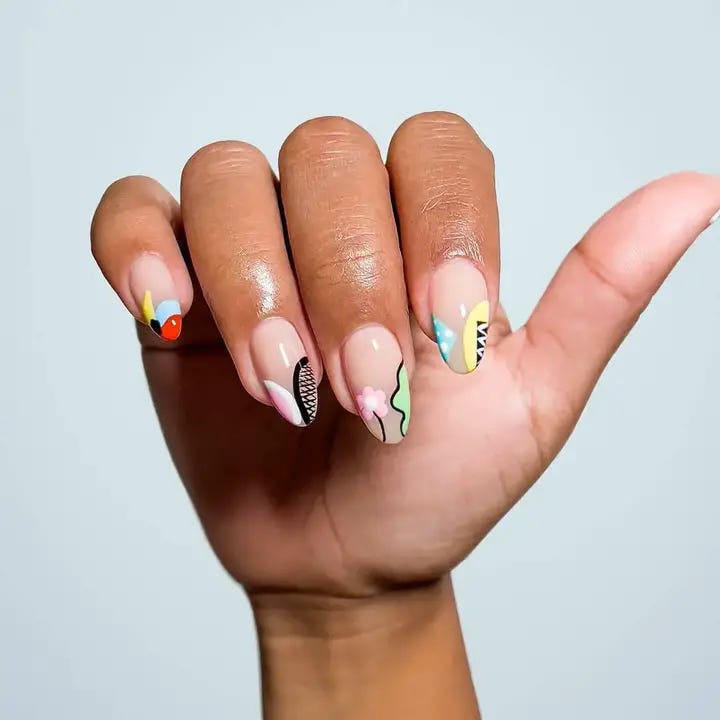
Consumables:
- Base Coat: Butter London Nail Foundation
- Neutral Polish: Essie Tuck it in My Tux
- Assorted Colors for Art: OPI Color Paints Collection
- Detailing Brushes
- Top Coat: Seche Vite Dry Fast Top Coat
DIY Guide: Apply the nail foundation as a smooth base. Then, put on a coat of the neutral polish for a clean slate. Use detailing brushes to add abstract designs with the OPI Color Paints. Each nail can be a different piece of art. Finish with Seche Vite for a fast dry and high gloss.
Night Blossoms On Glossy Black
Professional Manicurist’s Take: These long nails present a striking contrast with their glossy black surface, creating a night sky effect. The floral designs seem to emerge like rare blossoms under moonlight, offering an aesthetic that’s both trendy and timeless. It’s perfect for someone who loves a dramatic, yet elegant look.
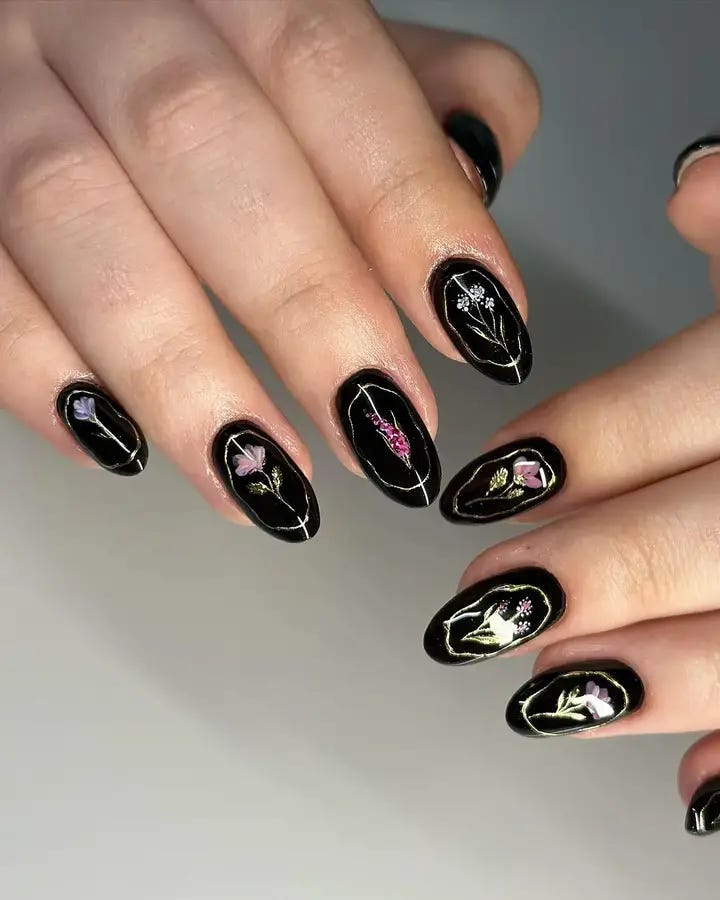
Consumables:
- Base Coat: OPI Natural Nail Base Coat
- Black Polish: Essie Licorice
- Various Polishes for Floral Design
- Fine Detailing Brush
- Top Coat: OPI Top Coat for high shine
DIY Guide: Start with a smooth base coat, followed by two coats of Licorice for a deep black. Using a fine brush, add the floral details with soft pinks and whites. Finish with a glossy top coat for a luxurious shine.
Marble Elegance
Professional Manicurist’s Take: Marble nails are a form of wearable art, and these oval nails with their swirls of pink and white over a sheer base are no exception. The marbling effect is sophisticated and neutral, perfect for someone seeking a simple but striking nail design.
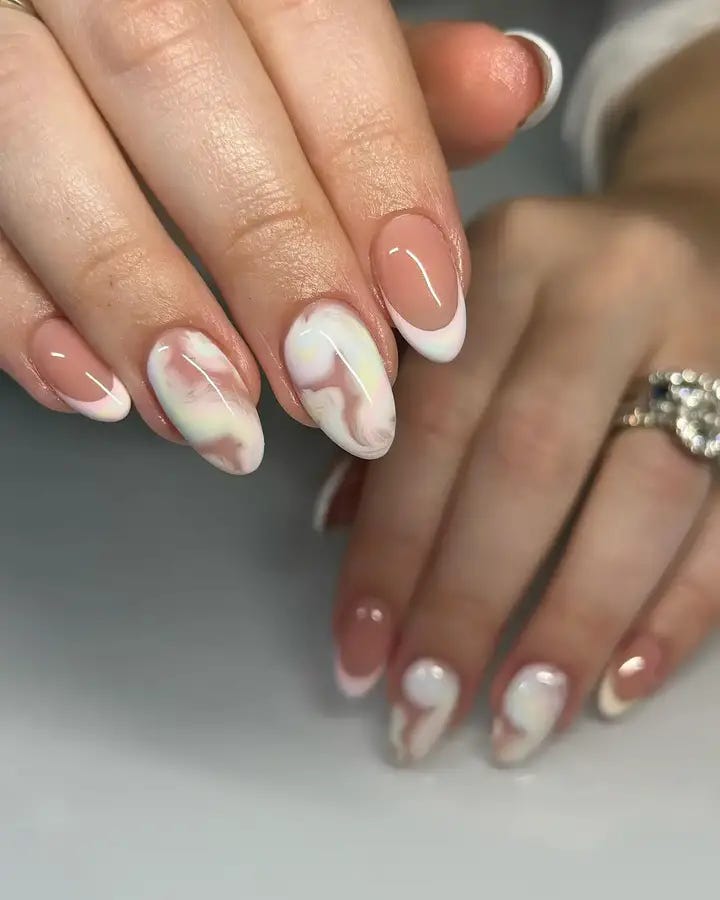
Consumables:
- Base Coat: CND Sticky Base Coat
- Sheer Pink Polish: Zoya in Bela
- White Polish: OPI Alpine Snow
- Marbling Tool or Toothpick
- Top Coat: Seche Vite Dry Fast Top Coat
DIY Guide: Apply your base coat for adhesion. Layer on a sheer pink base, then while wet, dot on white polish. Use a toothpick or marbling tool to swirl the white into the pink. Seal the design with a top coat for durability and shine.
0 Comments