Summer Ombre Nails with Short Almond Shapes! Feel the Tropical Vibes: Bright Blue and Green Ombre Nails for Summer! Immerse yourself in the essence of paradise islands with these vibrant ombre nails, mirroring the clear ocean and lush foliage. Whether you prefer short or medium-length nails, this refreshing ombre effect adds a cool touch to your summer look, accentuated with a subtle hint of sparkly gel for that sunlit shimmer. Dive into summer with style!
Advertisement
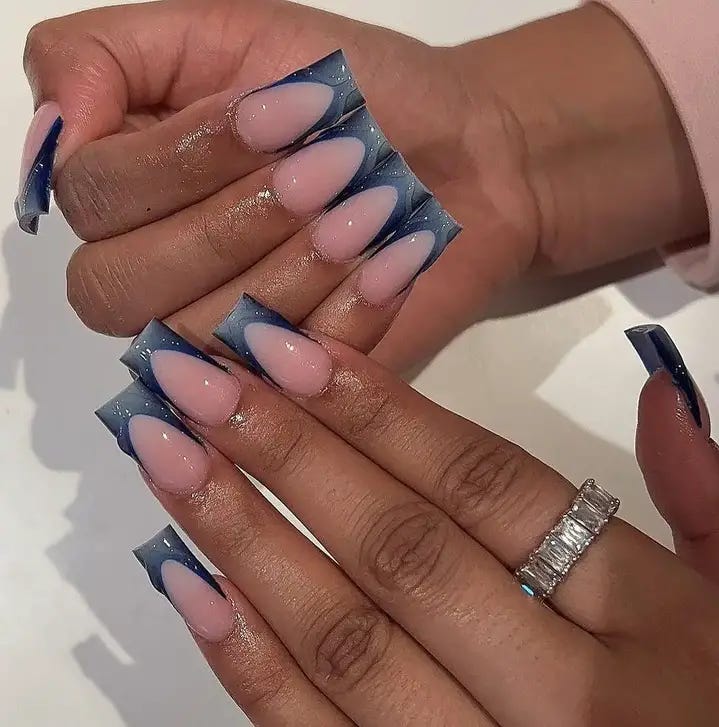
Blue Illusion: Negative Space Elegance
These nails are an innovative twist on the classic gel with a touch of blue. The coffin shape is drenched in a glossy shade of nude, covered in abstract blue designs that give the impression of floating art on a clear sky.
You’ll need:
Advertisement
- Deborah Lippmann Gel Lab Pro Base Coat
- Sally Hansen Miracle Gel in “Bare Dare”
- Gelish “My One Blue Love”
- Deborah Lippmann Gel Lab Pro Top Coat
To provide durability, start by applying the base coat. Then use Sally Hansen’s nude gel polish as your base color. Afterward, grab a fine brush to paint the blue abstract patterns. Leave parts of the nail transparent for negative space. To wrap it up and make it last longer, apply a coat of the glossy top coat.
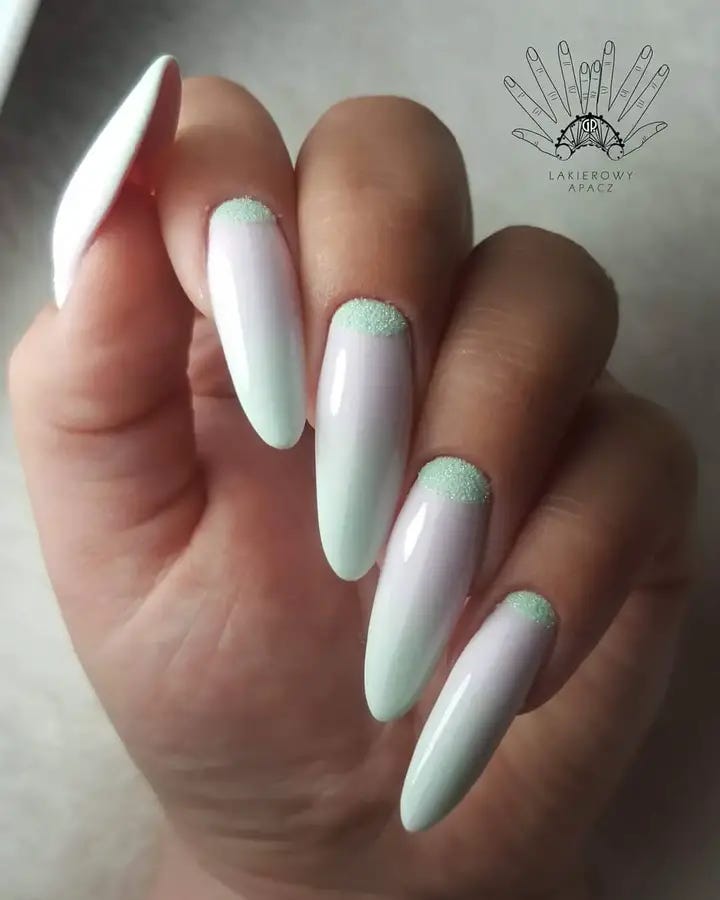
Minty Fresh: Soft Touch With Glitter Accents
The nails are shaped like almonds, which clearly shows the quiet style of gel nails with a minty base and sparkling glitter highlight on the tips that represents freshness of summer.
Here is what you need to make this nail design:
Advertisement
- ORLY Breathable Treatment + Color (base coat)
- LeChat Perfect Match in “Mint Cocktail” (mint gel polish)
- Martha Stewart Crafts Glitter in “Sugar Cube” (glitter)
- ORLY Breathable Treatment + Shine (topcoat)
To protect your nails, start with applying a base coat. Apply light mint polish for the background then when it becomes sticky put on some thin glitters at the end to look a bit frosted. For blend of health and beauty, use breathable topcoat.
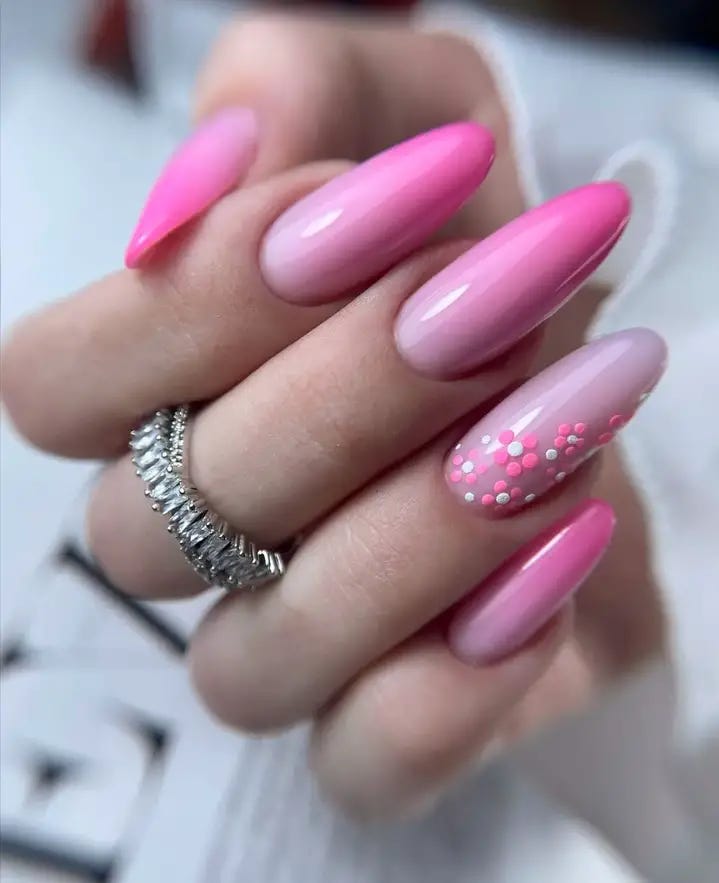
Pink Perfection: Ombre And Polka Dots
With a bright pop of color, these nails are the perfect mix of fun and playful. The gradient pink with soft polka dots is super trendy and cute right now.
Items used:
Advertisement
- Base coat: Smith & Cult Base Coat
- Pink polish: Color Club “Pinking Out The Window” and OPI “Strawberry Margarita”
- White polish for dots: OPI “Alpine Snow”
- Topcoat: CND Vinylux Long Wear Top Coat
After the base coat, use two pinks to create an ombre effect. Sponge them on to get a smooth blend. Then, use white polish to add some cutesy polka dots with a dotting tool. Finish it off with topcoat to keep your design fresh and intact.
Pastel Palette: A Soft Almond Symphony
A blend of pink, blush, and slimey blue pastels. These almonds are as chic as they are calm. Each one tells a different story of summer skies and hints of flowers — a true trend expression.

Consumable:
- Jessica Cosmetics Reward Base Coat
- Essie “Muchi, Muchi”
- Essie “Bikini So Teeny”
- Sally Hansen Nail Art Pen in White
After applying your base coat, alternate your nails with pastel pink and blue. For the nails with line art, use a precision pen after the base color has dried and apply top coat to seal it off.
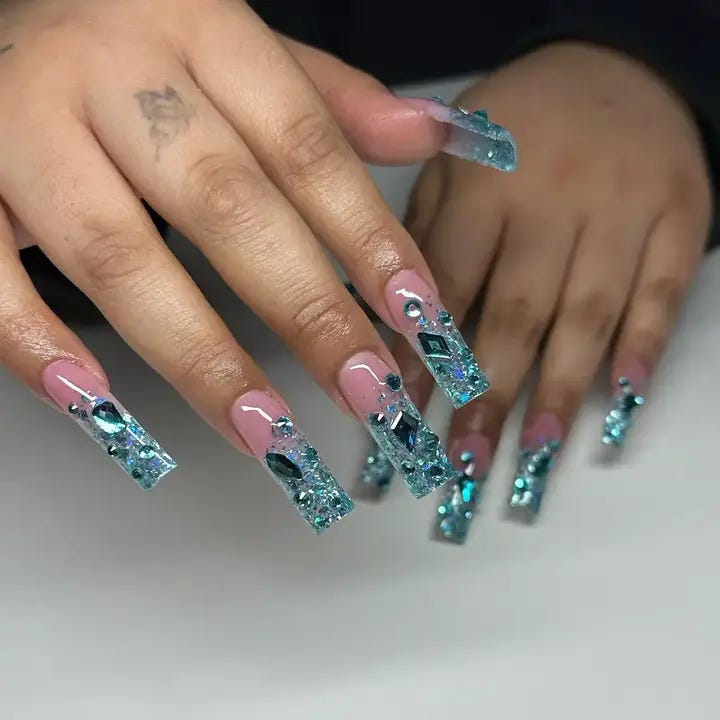
Glacial Glamour: Sparkling Icy Tips
Picture the glimmering reflection of sunlight on the sea’s surface. This look is classy with its glitter sparkle and rose gold details. The coffin shaped tips give us a bold canvas to work with so we can go all out to create this glamorous summer getaway inspired design.
What you’ll need:
- Base coat: Gelish Foundation Base Coat
- Pink polish: Gelish “June Bride”
- Glitter: Loose glitter in rose gold and silver
- Gems: Swarovski Crystals in assorted sizes
- Topcoat: Gelish Top It Off Sealer
Start off by applying the base coat to make sure your masterpiece stays put. Apply a thin layer of pink polish, then while it’s still sticky, dust your chosen glitter over top. Use a fine detail brush to place the Swarovski crystals. Put them wherever you feel fit! Cure under a UV lamp and finish off with the topcoat for that glass-like shine you’re looking for.
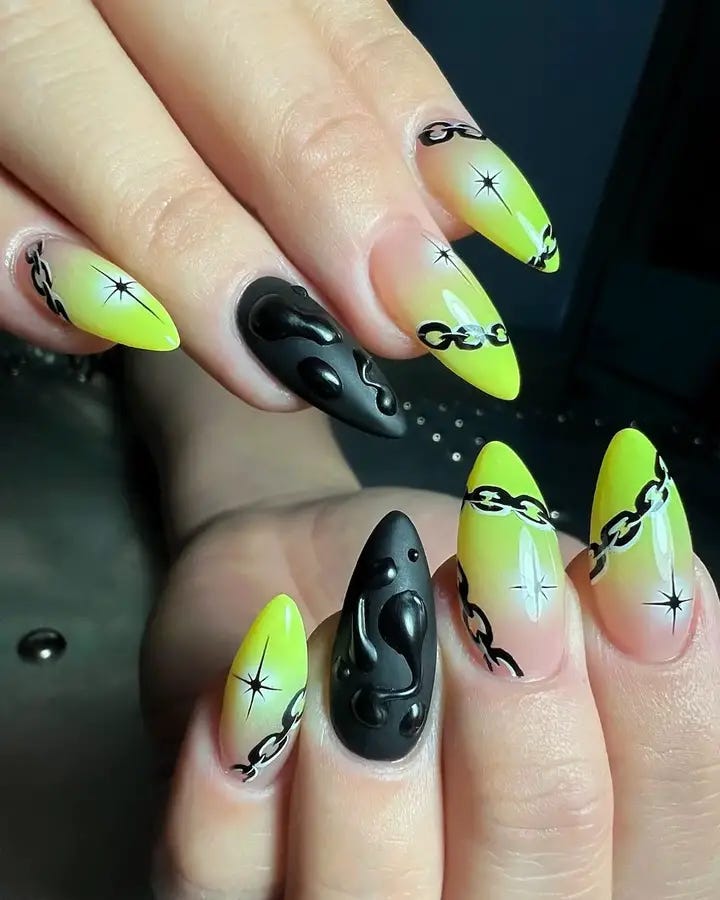
Electric Edge: Neon & Black Contrast
The contradiction of the vibrant neon with the dark black shade makes for a very bold statement. The almond-shaped nails flaunt a bright neon base and are sharply contrasted by slick black artistry. To finish it off, I painted on a glossy coat that catches the light and everyone’s attention
Consumables:
- Base coat: ORLY Bonder Rubberized Basecoat
- Neon polish: China Glaze “Highlight of My Summer”
- Black polish: OPI “Black Onyx”
- Topcoat: Essie Gel Setter Top Coat
To achieve this look, first apply your base coat and follow it up with two coats of the neon polish. After they’ve dried, go in with a fine brush to create black designs. Look at the nail as if it were a canvas and your polish was your brush! Perfect is imperfect here, so be bold and try abstract shapes. Finally, once everything’s dry seal the art in place with a topcoat for some shine!
Pastel Dreams: Soft Ombre & Line Art
A cool variation on the traditional summer ombre manicure, these hot designs combine a gentle pastel fade with playful line art. It is within the coffin shape that creativity can flourish and make it become beautiful and sophisticated.
Necessities:
- A base coat: CND Stickey Anchoring Base Coat
- Pastels nail paints: “Mint Candy Apple” and “Fiji” from Essie
- Black liner nail polish: Sally Hansen Nail Art Pen in Black
- Glossy top coat: Glisten & Glow Top Coat
Start by applying a base coat to protect your nails. Using a sponge, create an ephemeral gradient with your pastel colours. Use a nail pen to draw some whimpy line art — only let imagination take control of you. Finally, use topcoat to preserve this image on your nails and add sheen to them.
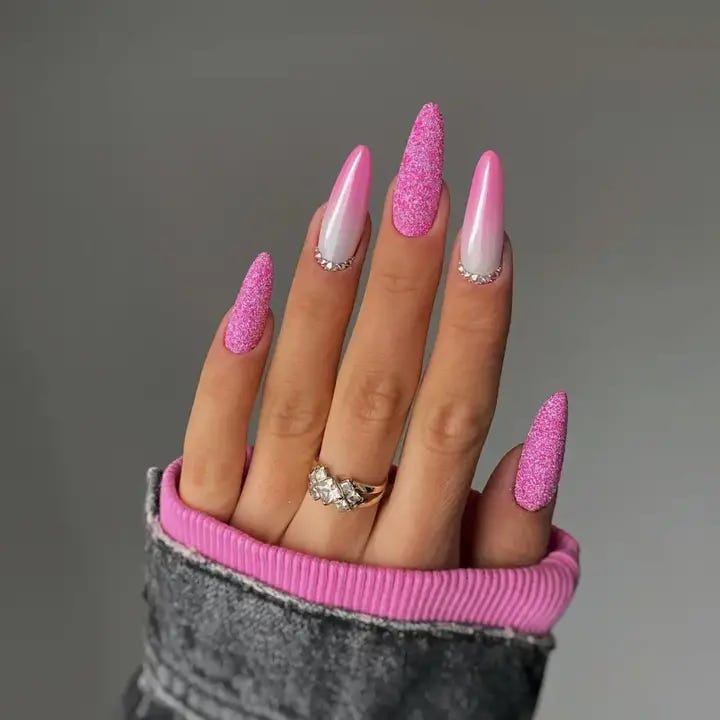
Pink Glitter Paradise: Sparkly Meets Sleek
Be immersed into a pink paradise with these long, coffin nails. It combines a smooth ombre blend with the textured glitter finish. The nail beds start with a soft pink that transitions into an explosion of sparkles giving off rose gold vibes.
Materials:
- Base coat: Orly Bonder Rubberized Basecoat
- Pink polishes: Essie “Ballet Slippers” and “A Cut Above”
- Glitter: Loose pink glitter
- Rhinestones: Silver nail studs
- Topcoat: INM Out the Door Top Coat
Start by applying your base coat to increase staying power. Apply the lighter polish at the base and then apply the darker polish towards the tip. While it’s still sticky, sprinkle on some loose glitter for added depth. Add silver studs at the transition line for a jeweled effect. Finish off with your top coat to help keep those sparkles in place!
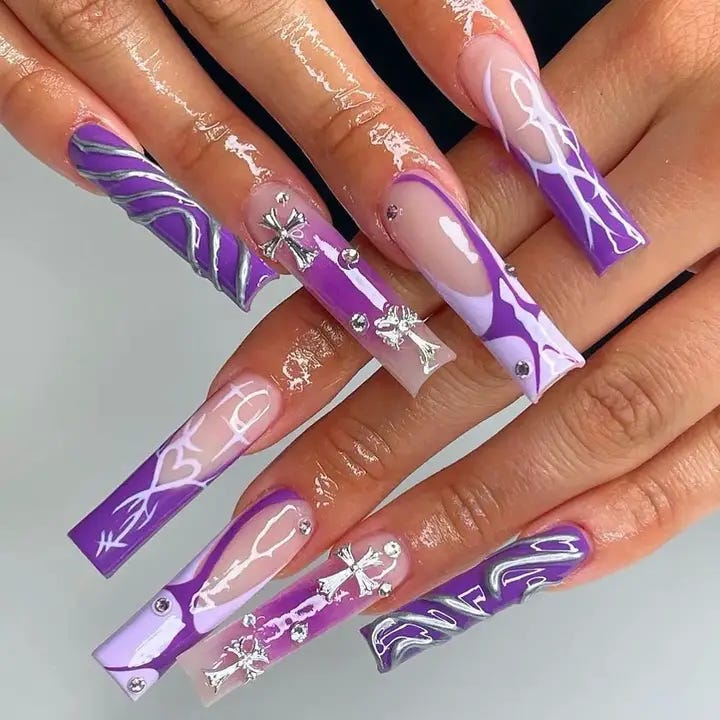
Royal Flair: Purple Marble & Sparkle
Purple and white marble with shimmering rhinestones. It’s a long nail design that you don’t see every day. One that feels luxurious, blending art designs with an air of nobility. Ideal for those who wish to mix trendy and classy.
Essentials:
- Zoya Anchor Base Coat
- OPI “Do You Have this Color in Stock-holm?”
- OPI “Alpine Snow” White Polish for marbling
- Premium Nail Art Rhinestones
- Zoya Armor Top Coat
Start by applying the base coat, then purple polish. For the marble effect, dot on white polish and swirl it together with a fine-tipped tool. Once the polish is tacky, add rhinestones to finish it off with elegance. Seal in the beauty with a topcoat.
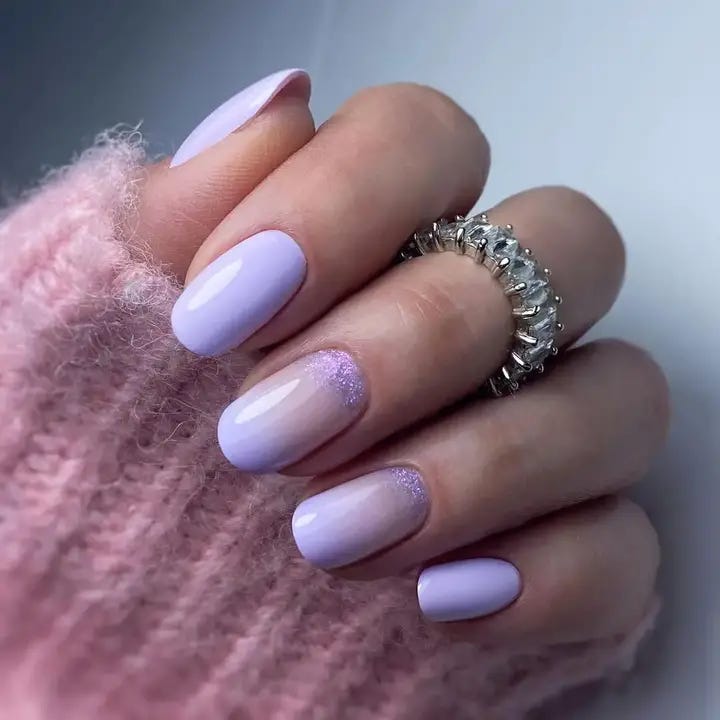
Whispering Lilac: Subtle Elegance
Get a soft summer feel with these short nails, kissed by whisper of lilac and glistened with glitter. It’s simple yet classy look that gives your everyday wear a touch of understated elegance.
Materials:
- Base coat: Butter LONDON Nail Foundation Priming Basecoat
- Lilac polish: Essie “Go Ginza”
- Glitter polish: Essie “Sparkle On Top”
- Topcoat: Butter LONDON Hardwear Shine UV Topcoat
Start by applying base coat, after which two coats of the lilac polish should be applied to create an even and smooth canvas. Add the glitter polish either at the tips or one nail. Finally, cover it all with topcoat to keep off acetone and shine for long.
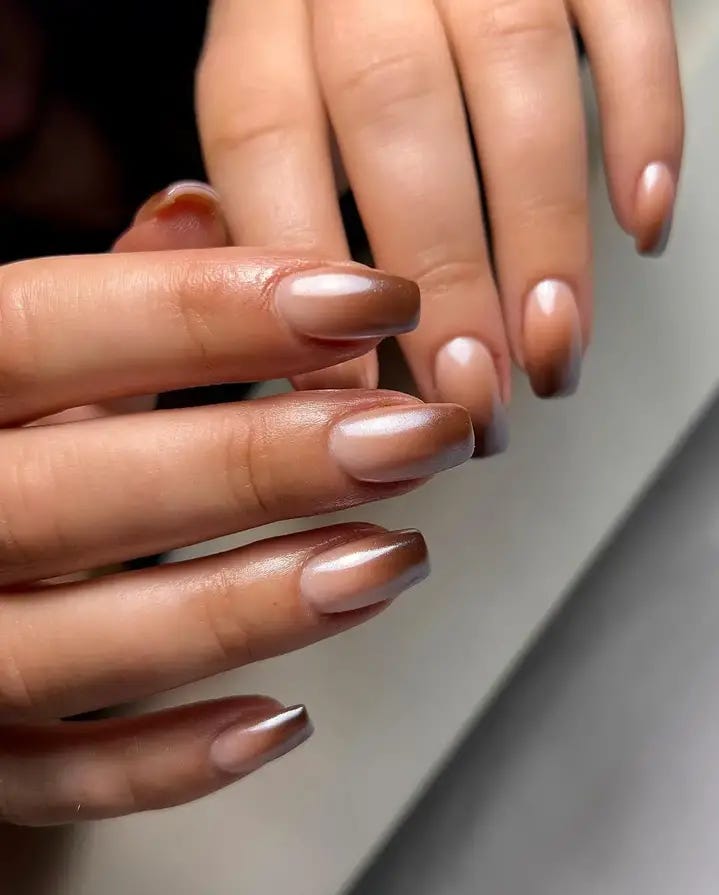
Nude Shimmer: Chic & Sheer
This nail style is a shiny and shimmery twist on a nude look. The base color is classic with a bit of twist, while the shimmer overlay adds an irresistible glow to the final finish. It’s trendy and subtle at the same time.
Nail polish used:
- Base coat: OPI Gel Color Base Coat
- Nude gel polish: OPI “Bubble Bath”
- Shimmer gel polish: OPI “Princesses Rule!”
- Topcoat: OPI Gel Color Top Coat
To get started, apply a layer of gel base coat to help your work last longer. Then paint on a layer of the nude gel polish, followed by another layer with the shimmer one. Make sure you cure each layer under a UV lamp before adding another one. Finish it all off with a topcoat for that long-lasting glossy shine.
Sunset Sparkle: Gradient And Gems
Summer ombre nails — Hot designs. The dazzling gradient of these nails moves from a pink sun to a peachy sunset fused with sparkling glisters. It’s pretty, it’s bright, and it’s pure joy!

Essentials:
- Base coat: Essie All-in-One Base
- Pink polish: “Mod About You” by OPI
- Orange polish: “Freedom of Peach” by OPI
- Glitter: OPI “Princesses Rule!” for the sparkling dots
- Gemstones: Small round rhinestones
- Topcoat: Essie Gel Setter.
Start with your base and then build the gradient with pink and orange polishes using a makeup sponge. Apply glitter dots, add gemstones wherever you like while the top layer is still sticky, and seal it all in with a topcoat for a sparkly sunset effect.
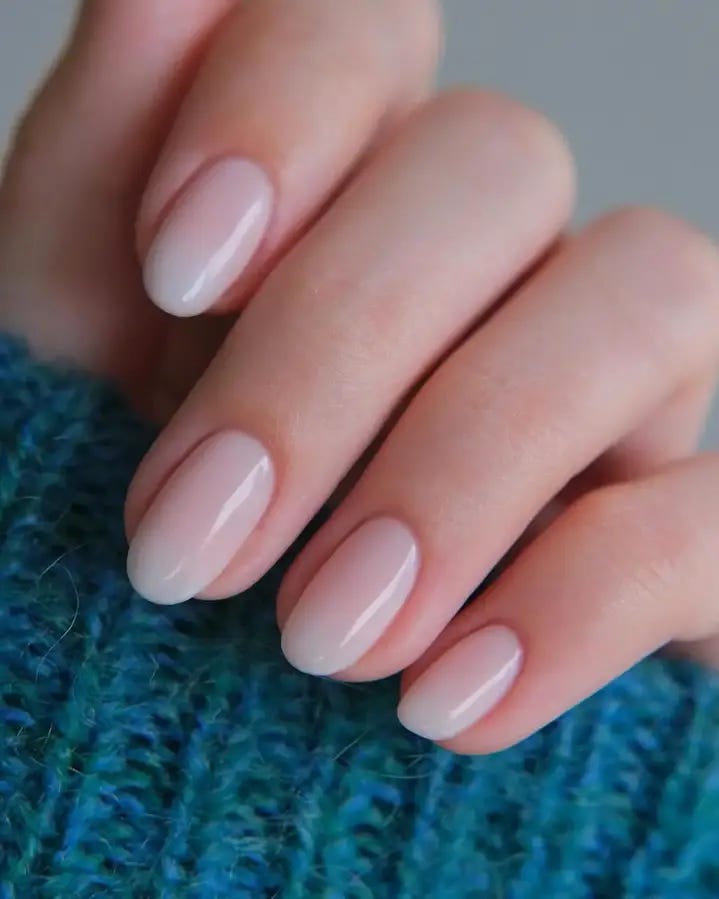
Sheer Elegance: Classic French Manicure
For this design, the French manicure has been given a modern twist by employing the gel method which leads to a durable and perfect appearance. It is elegant and timeless; it is neutral sophistication.
Consumables:
- Base coat: Gelish Foundation Base Gel
- Pink gel polish: Gelish “Simple Sheer”
- White gel polish for tips: Gelish “Arctic Freeze”
- Topcoat: Gelish Top It Off Gel Sealer
Start off with a base of gel before adding the light pink nail color. To cover the tip part properly, apply some white gel using a brush without making any errors. Afterward, cure them under UV light, and finally seal the shine while making it last longer.
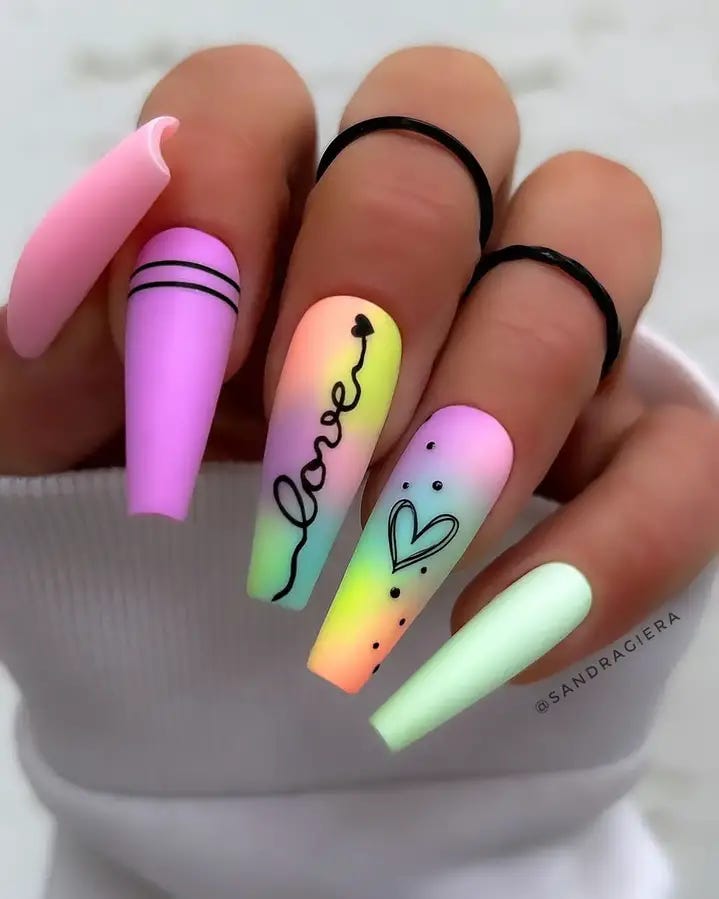
Pastel Rainbow: Softly Blended Splendor
Who said that you only have to pick one color? These nails are the perfect way for you to let your imagination run wild! A pastel rainbow of blue, pink, purple, and yellow is painted on these long nails softly. This design gives a beautiful soft display that will make anyone feel ethereal all summer long.

Materials:
- Base coat: Sally Hansen Double Duty Base & Top Coat
- Pastels: Essie pastel range (a selection)
- Topcoat: Sally Hansen Miracle Gel Top Coat
Start with a clear base coat. Then gently sponge each pastel shade on in a random order. While doing this, you will want to blend as go along so that there is no break or bubble in each color transition. Once you reach the final layer of colors add on a final glossy topcoat. This topcoat not only makes these dreamy colors pop even more but it also helps them stay on for any summer adventures!
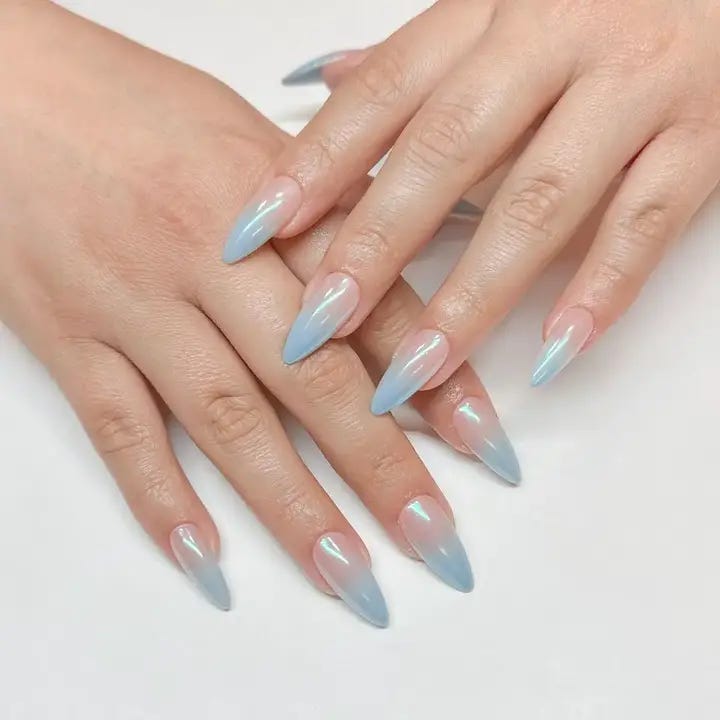
Modern French: Sky Blue Twist
Reinventing the French manicure by adding a transparent base with a sky blue tip. It’s an updated take on the traditional look, which is just perfect for those hot summer days when you want the color of the ocean to be reflected on your fingernails.
Materials:
- Base coat: OPI Natural Nail Base Coat
- Sky blue polish: China Glaze “I Sea The Point”
- Topcoat: Seche Vite Dry Fast Top Coat
Start off with a base coat and then apply an aquamarine polish to the tips, which will give a contemporary twist to a timeless style. Smooth out every nail using quick-hardening varnish.
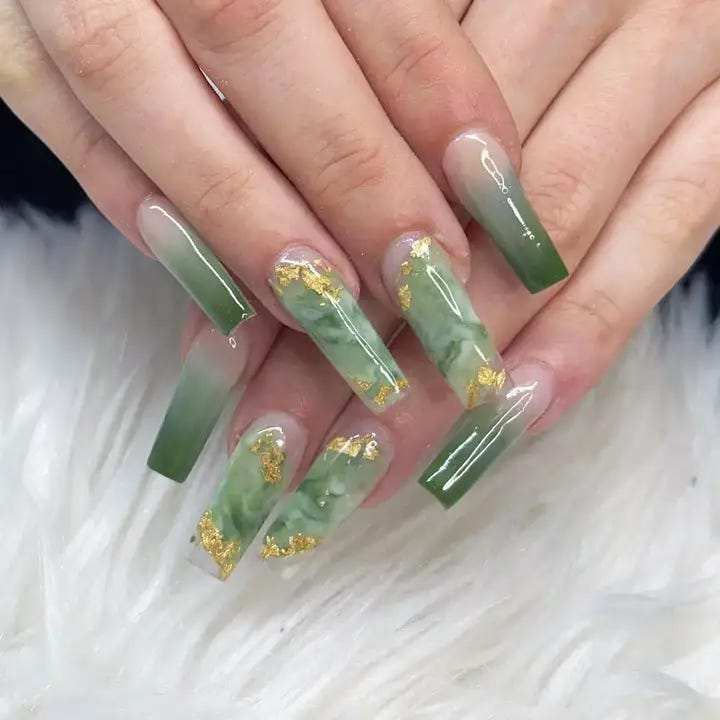
Green Marble Majesty: Natural Elegance
These nails are like having the garden in your fingers. The green marble effect covered with gold leaf creates a balanced mix of earth and luxury.
Nail Polish:
- Base coat: ORLY Bonder
- Green polish: Essie “Off Tropic”
- White polish for marbling: Essie “Private Weekend”
- Gold leaf flakes
- Topcoat: CND Vinylux Long Wear Top Coat
Start by applying the base coat to get it sticking. Use a thin brush to marble green and white polishes on the nail, but don’t forget to add those flakes of gold before they dry out! Once you’re ready, finish it off with one last topcoat.
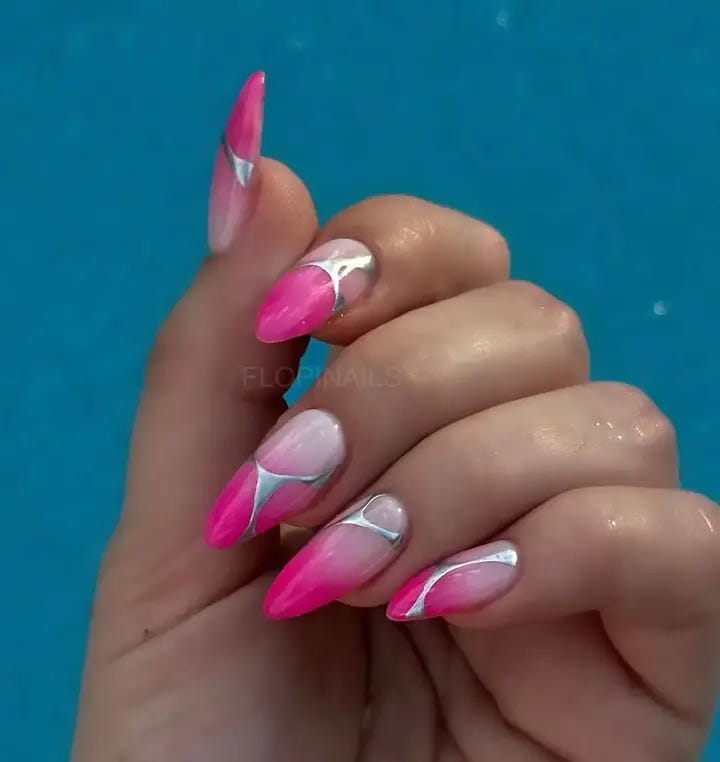
Fluid Pink: Watercolor Waves
What do you get when you combine pink polish with white, and apply them to a detailed brushstroke? These stiletto nails. They’re just as bright as summer clouds at sunset. Plus, they feature some nice silver accents too.
Stuff you’ll need
- Base coat: China Glaze Strong Adhesion Base Coat
- Pink polish: “Pink Voltage” by China Glaze
- White polish: “White On” by Sally Hansen
- Silver striping tape
- Topcoat: INM Out The Door Top Coat
Start off by preparing your nails with a protective coat of base paint. Then take a detail brush and create the pink and white watercolor effect before sealing everything together with the topcoat. Add some elegance with the sliver striping tape.
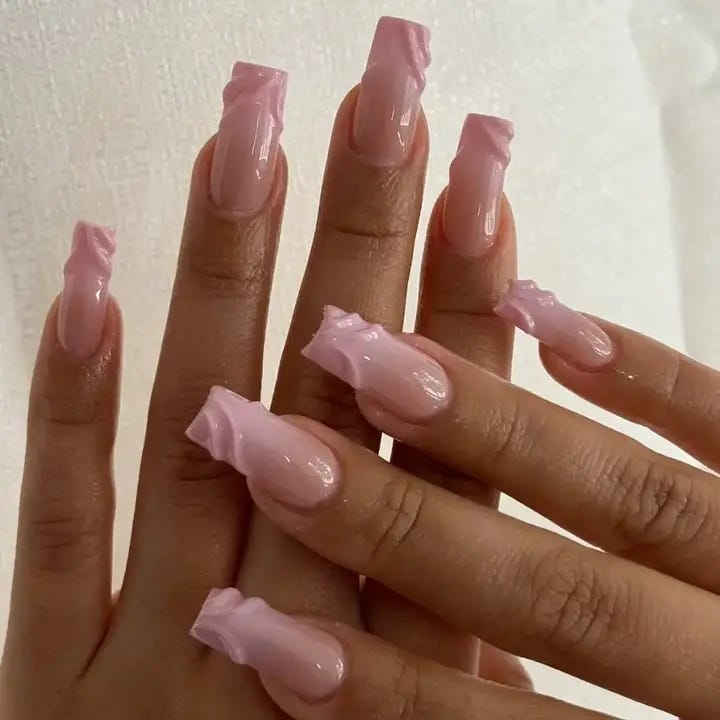
Glossy Drizzle: Gel Artistry
This gel nails have clear glossy base and above that there is pink polish which looks like it’s melting candy. It’s fun, it’s sugary, and it makes you want to touch it
Materials:
- foundation coat: Gelish Foundation Gel Base Coat
- transparent nail polish: Gelish “Clear Gel”
- pink nail polish: Gelish “Pink Smoothie”
- sealing layer: Gelish Top It Off Gel Sealer
First of all apply the gel basecoat then cure. Next with the help of a dotting tool drizzle on pink gel in a zig zag pattern then cure again. Finally finish by putting a top coat that will make your nails look wet and sleek.
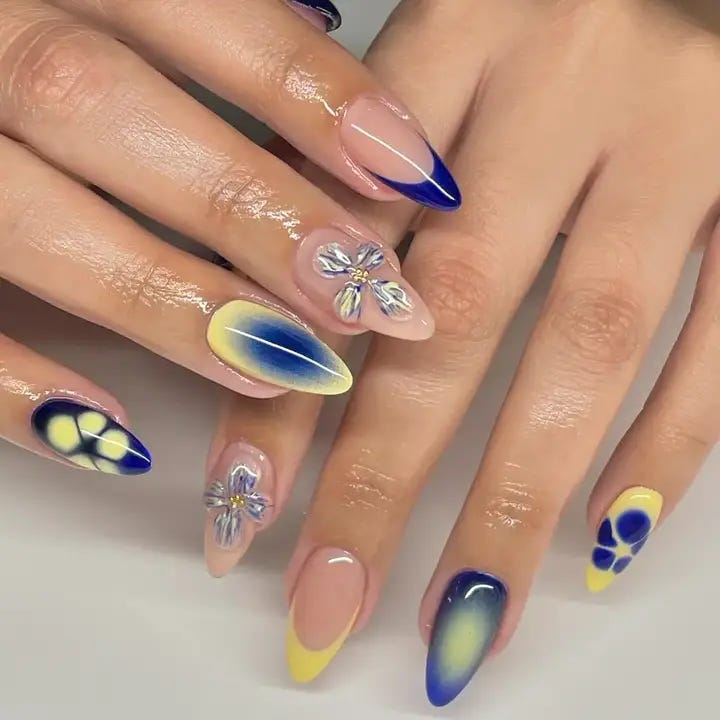
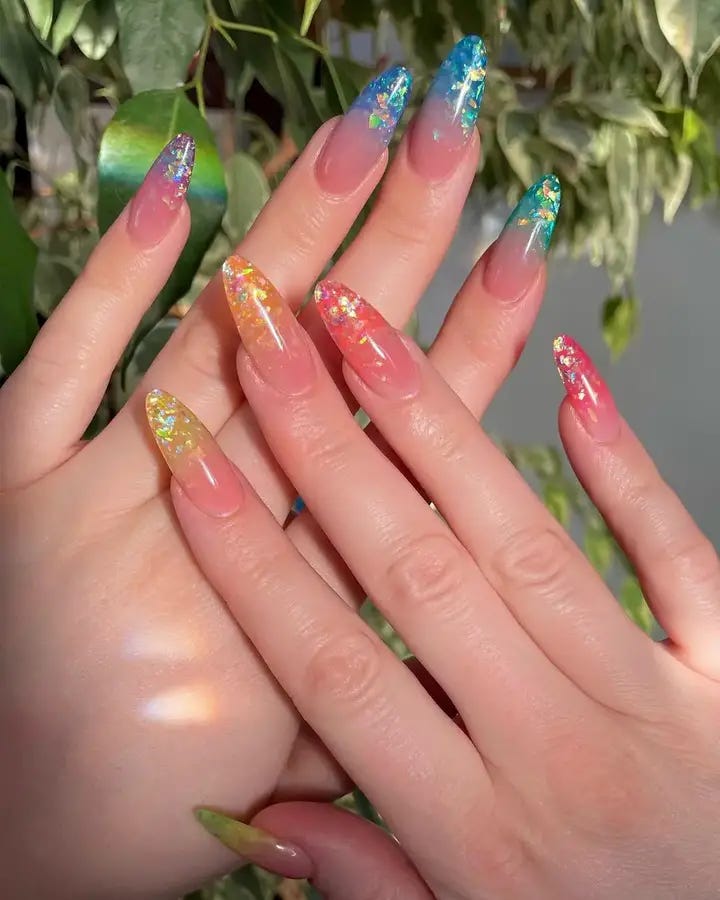
Artistic Expression: Blue And Yellow Nail Art
Dive into a sea of art with these gel nails! They’re designed with swirling blues and yellows, topped off with some cute floral designs. Each nail is its own little masterpiece, perfect for the creative spirit in you.
Kaleidoscope Glitter: A Spectrum Of Sparkle
Jump into a sparkling pool of coffin nails that is emblazoned with all the colors of the rainbow. Each nail is decked in a sheer base, covered in sparkly bits that fades from blues to pinks and yellows, tinting under every ray of light.
Supplies:
- Base coat: Essie Grow Stronger Base Coat
- Sheer polish: Essie “Ballet Slippers”
- Glitter flakes: Mixed hexagon glitter in various colors
- Topcoat: Sally Hansen Miracle Gel Top Coat
Start off by applying a protective base coat. Use a sheer polish for a subtle touch then, while it’s still wet, add on the mixed glitter flakes. Cap it off with a glossy topcoat for durability and reflection.
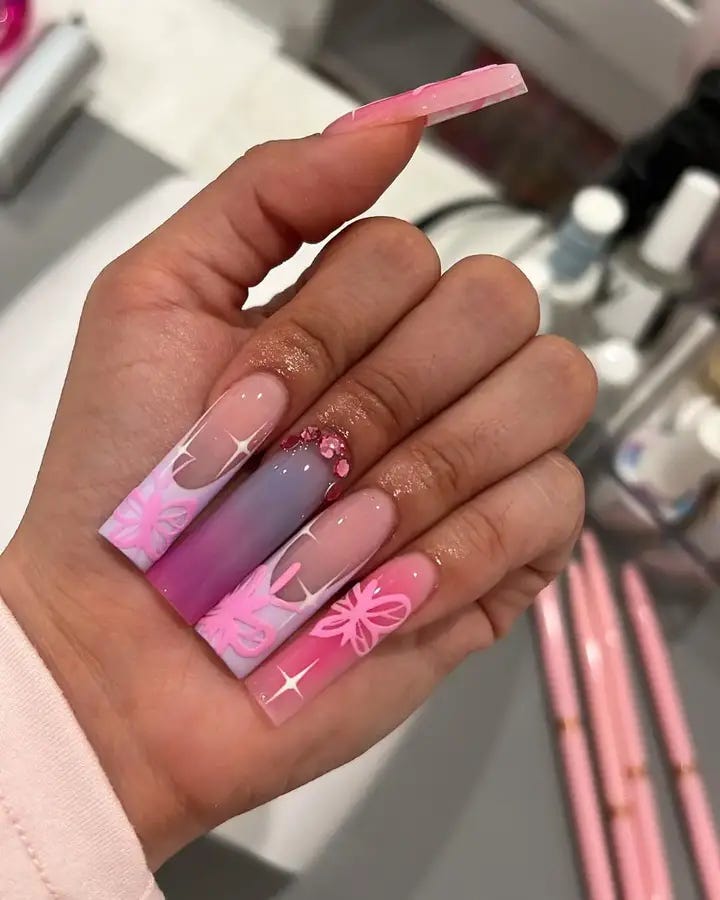
Pink Ombre Bloom: Delicate Floral Elegance
These nails are a beauty to behold because of their pink ombre’s softness and white floral art that is so gentle. In addition, it has a pop of pink glitter that injects some playfulness to create the balance between sophistication and fun.
Products:
- Base coat: OPI Natural Nail Base Coat
- Pink polishes: OPI “Shorts Story” and “Mod About You”
- White polish for art: OPI “Alpine Snow”
- Pink glitter: Fine pink glitter dust
- Topcoat: OPI Top Coat
Start by applying base coat and then paint on a gradient ombre effect with your pink polishes. Furthermore, you can use white polish to do hand-painted floral designs, then add some touch of pink glitter on certain nails. Finally, apply topcoat for shine and protection.
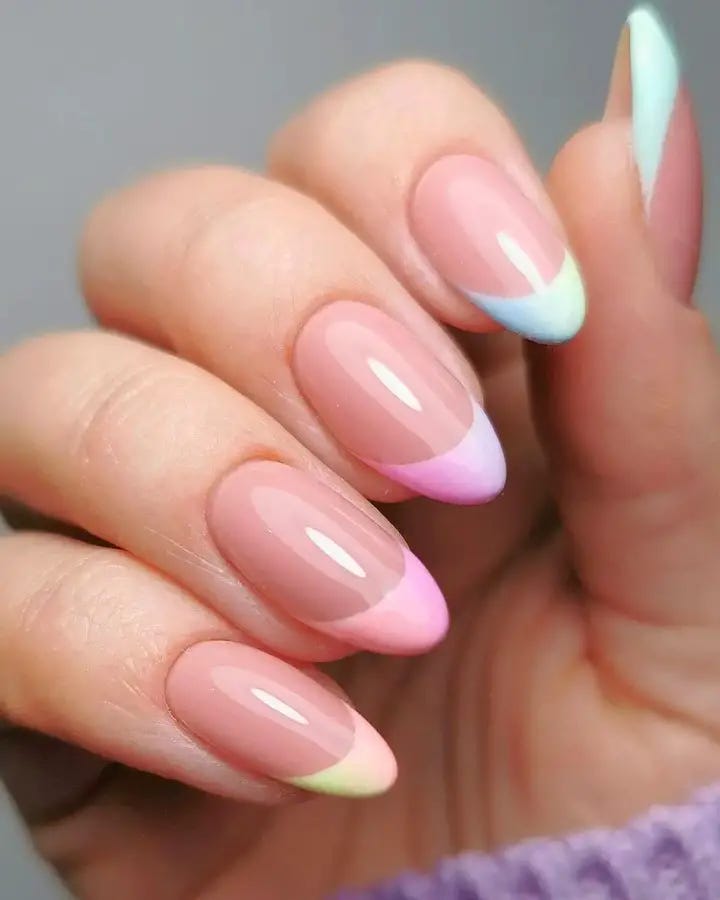
Pastel French Fade: Soft Gradient Elegance
Get ready to put a spin on the everyday French manicure! By using gel, we’ve created a soft look that features pink and blue polish fading into a creamy blush. This trendy pastel fade is sure to make you feel like there’s sunshine at your fingertips!
Materials:
- Base coat: Bio Seaweed Gel Base Coat
- Pink gel polish: Bio Seaweed Gel in “Candy Apple”
- Blue gel polish: Bio Seaweed Gel in “Blueberry”
- Blush gel polish: Bio Seaweed Gel in “Peach”
- Topcoat: Bio Seaweed Gel Diamond Shine Top Coat
Begin by applying the base coat. Then, use a sponge to dab on each color — starting with pink, then blue, and finally blush — until you have a nice gradient. Once all layers are complete, cure your nails under UV light and apply the topcoat for a long-lasting finish.
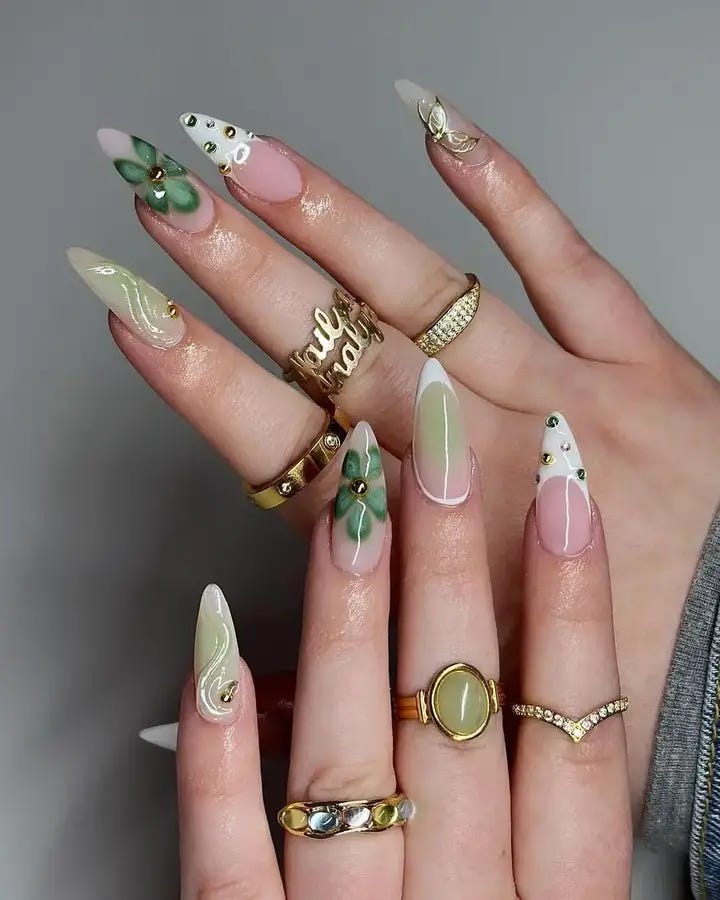
Majestic Green: Emerald Elegance
These stiletto nails are absolutely divine, with their emerald green and soft pink colors covered in gold accents and detailed floral pictures. These aren’t just nails; they’re a fashion statement of style and class.
Items you’ll need:
- Base coat: OPI Natural Nail Base Coat
- Pink polish color: OPI “Sweet Heart”
- Green polish color: Essie “Off Tropic”
- Gold foil
- Floral decals or stickers
- Topcoat: Essie “Good To Go” Top Coat
Begin by using the base coat to shield your nails. Then apply a few coats of pink polish on some nails and green on others. For the accent designs, stick the gold nail foil and floral stickers onto the nails. Finally, put on a topcoat to seal everything with a beautiful shine.


0 Comments