Short Summer Nail Ideas Beach Vibes: Bright & Breezy Short Summer Nails. Embrace summer’s essence with lively and beach-inspired short nails. Dive into shades of blue and green mirroring the sea, or go for neon pink and yellow for a playful, vibrant vibe. These effortless summer designs are ideal for adding a pop of color to your beach days or spring break getaways.
Neon And Monochrome: A Daring Duo
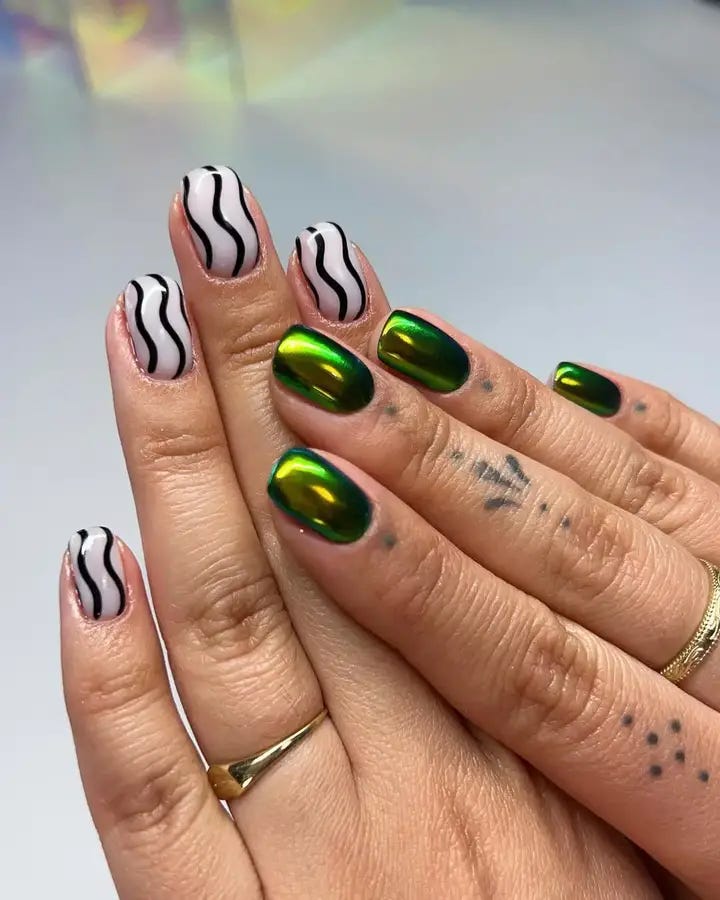
The combination of monochrome zebra stripes and bright neon green is really striking in contrast. This daring statement is meant for the bold trendy girl who would dare to embrace grunge undertones or gothic flair with a touch of neon energy, perfect for spring break fun and beachy days.
List of Materials:
- White enamel: an ideal backdrop for these stripes.
- Black striping enamel: To create this look.
- Neon green enamel: Ensure it has that wow effect.
- Matte top coat: Contrasting the shine of the neon polish.
Paint your nails white and let them dry. Use stripe polish to draw zebra patterns on the other nails. Apply two layers of neon green polish on all other nails. For instance, use a matte top layer over the stripes but apply shiny one over the green colour to mix up finishes.
Pop Art Playfulness: Bold Shapes And Colors
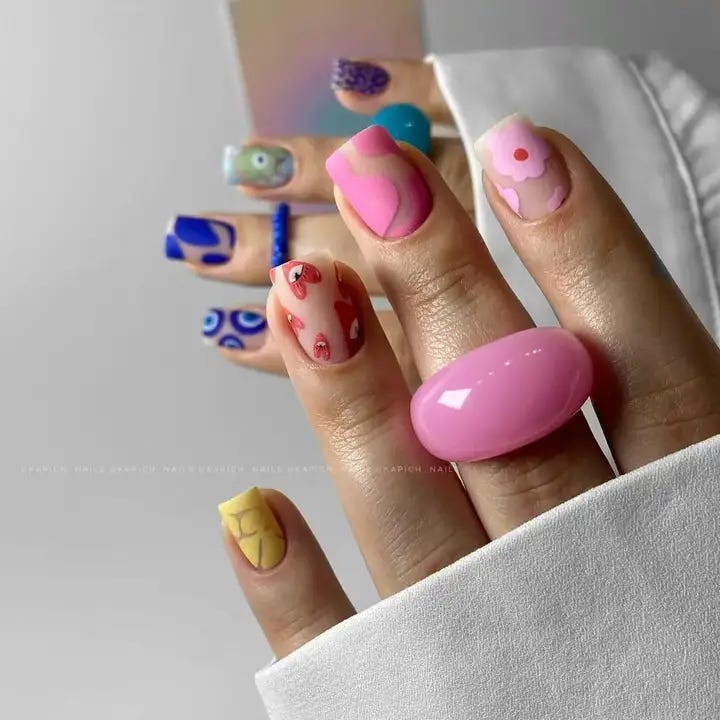
Getting artsy with your nails is easy with this whimsical look. The vibrant colors and abstract shapes are a playful way to show off your creativity. It’s a trendy style full of life that’s perfect for summertime.
Metallic Messages: Chic And Personalized
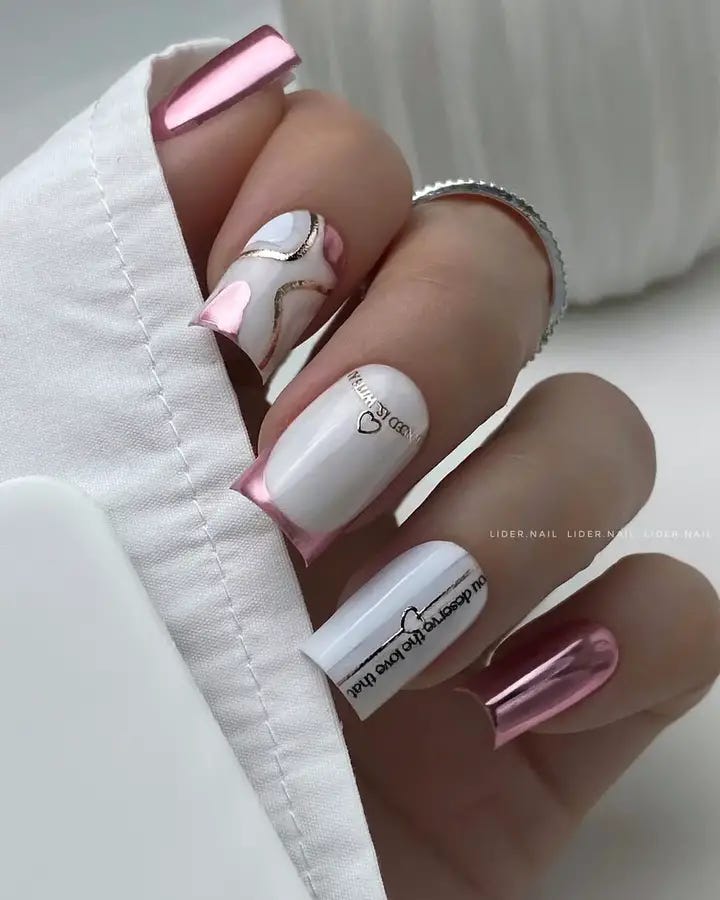
Personal expression knows no bounds with this nail art design. It’s where metallic shine meets messages that are customized to your liking. The clever leveraging of empty spaces and smooth typography gives you a look that’s just as unique as your signature. It’s aesthetic sophistication at its best, so you can send a message that’ll last longer than time.
Here’s what you’ll need:
- White polish: A blank slate for your message.
- Metallic striping tape: For that glossy edge.
- Nail stickers or decals: So personalize it feels like your own handwriting.
- Pale pink polish: To soften up the metallics.
- High-gloss top coat: For long-lasting shine.
Use the white polish to coat your nails. After they’re dry, add on the striping tape along the tips or wherever you’d like. Stick on your chosen stickers or decals. Then paint over them with pale pink polish, allowing parts of the white and metallics to peek through. Lastly, seal it all in with a high-gloss top coat.
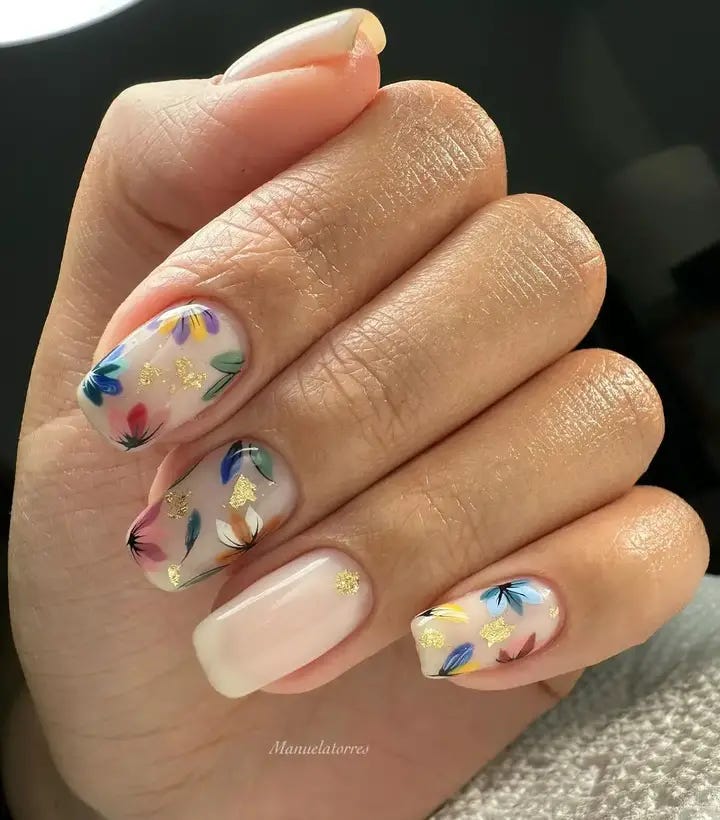
Garden Whimsy: A Touch Of Spring
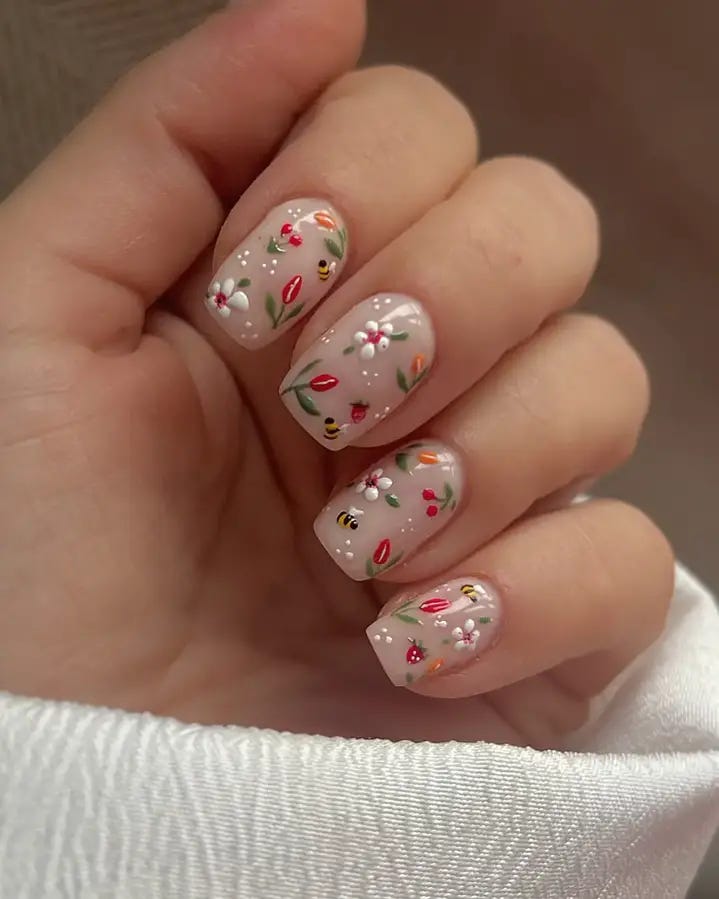
This design is a playful nod to the blooming gardens of springs, bringing a touch of nature’s joy to your fingertips. Delicate floral art over a sheer base suggests innocence and whimsy, ideal for sunny days and simple gel applications. It’s cute, it’s springy and it’s absolutely pretty.
Consumables List:
- Sheer base coat: To enhance the natural nail.
- Floral nail art stickers or hand-painted with nail art brushes.
- A variety of polish colors: To create the floral designs.
- A top coat: To seal in your miniature garden.
Start with a sheer base. Choose your floral design — stickers for an easy application or hand-painted for a personal touch. Apply each element carefully, using a variety of polish colors for bright spring acrylic look. Seal with a top coat as necessary.
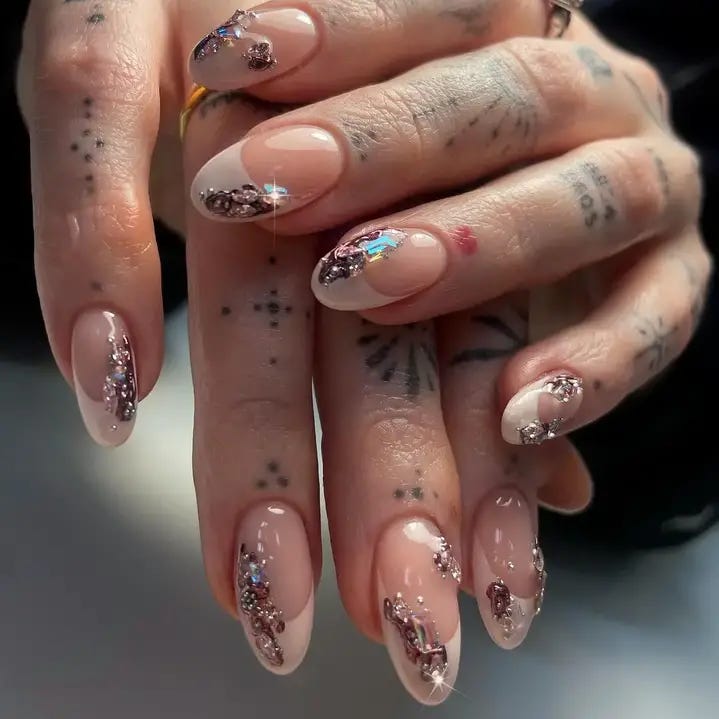
Crystal Charm: The Allure Of Subtle Sparkle
A sheer, neutral base sprinkled with crystals do the job of looking chic and enchanted. It’s a perfect balance between being understated, but still having its glitzy touch. This summer evening look is a match made in heaven for those who want to feel fancy during their night out.
Consumables List:
- Sheer neutral polish: To enhance the nail bed’s natural color
- Assorted crystals: Pick different sizes to make it custom
- Nail glue: The hold has to be strong for the crystal application
- High-gloss top coat: Locks in shine, ideally with gel-like finish
Apply two coats of your sheer polish, then put dabs of glue where you want your crystals. After they’re set, put top coat on to secure them and keep them glossy for longer. Trust me when I say this finishes off easily while looking gorgeous!
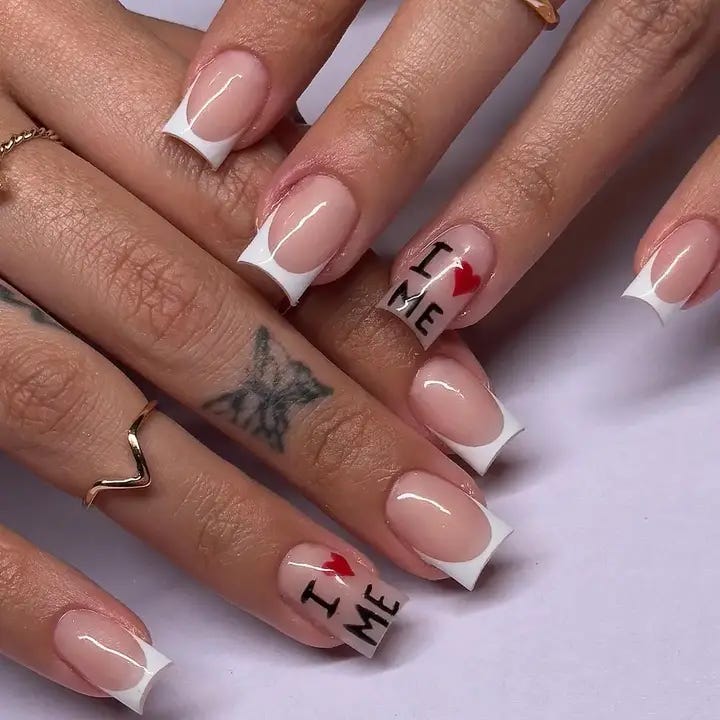
Statement Love: Bold And Personal
In a nail design that is both playful and personal, bold lettering set against a classic french tip speaks volumes. Stark contrast makes this design stand out while a little heart detail gives a cute feel to it. Perfect for the expressive soul, it’s an exceptional acrylic option for someone with something to say.
Consumables List:
- Pink gel polish: As you would like it to appear natural
- White polish: To enable sharp French tips
- Black nail art pen: So as to be accurate when writing letters.
- Red polish: This is done so that you can accentuate the heart.
After drying, begin with pink base and then paint white tips on them. Utilize nail art pen in writing your message after which apply red heart using small brush. Finish off with clear gel top coat to seal everything up.
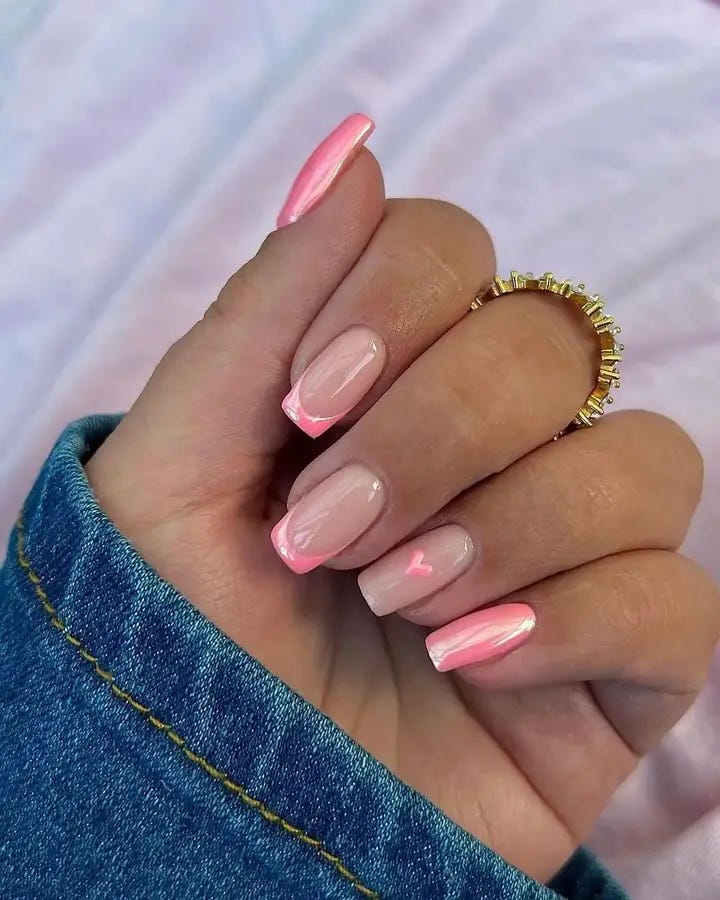
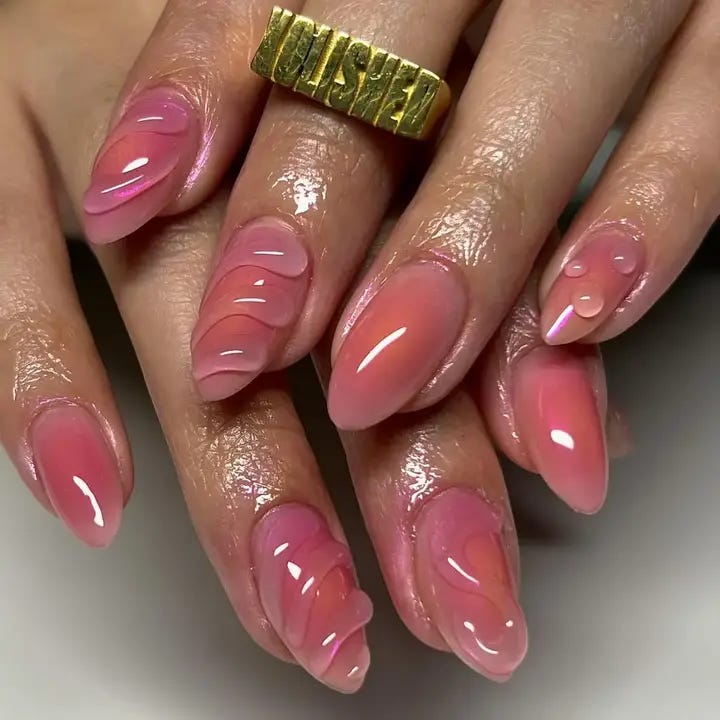
Playful Pink: A Touch Of Whimsy
This playful design is set by a pink wash, but one of the nails has a pearly sheen that is subtle, and yet catches the light. It’s cute and simple, but still trendy for this summer — easy to wear and easy to love.
Consumables List:
- Polish in pastel pink: Use it as the base for the look you want
- Iridescent top coat: This will give your nail a statement piece.
- Tiny heart stencil: You’ll need this stencil for some adorable accents.
- Quick-dry top coat: Wait no more than a few minutes to put this on after you put on everything else
First thing that needs done is apply pastel pink polish onto your nails. Once you finish with that go ahead and choose which nail you want to put iridescent top coat on. Use the stencil to get some cute little hearts on each nail, then quickly dry everything with high-quality top coat.
Amber Waves: The Golden Gradient
Nails with a gradient finish are really popular right now. You can see why in this design, which uses warm, amber hues to give the impression of a summer sunset. Bold gold outlines make it look stylish and sophisticated too.
You will need:
- Sheer nude polish — this compliments every skin tone
- Yellow to orange gradient polishes — to create the glowing sun effect
- Gold striping polish — for the outline detail
- Detailing brush — because you need precision for that!
- High-shine top coat — to make your nails glow
Start with the nude base color. While it’s still sticky, blend your gradient shades from the cuticle. Once dry, use the detailing brush with gold polish and outline each nail. Finally, finish off with a top coat for a gel shine that’s easy on the eyes.
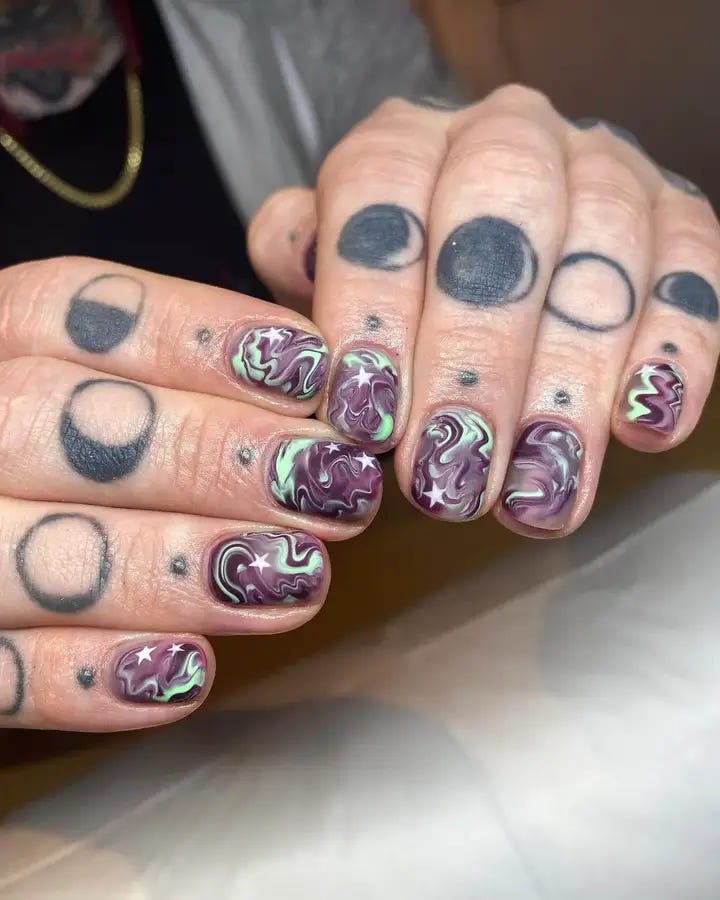
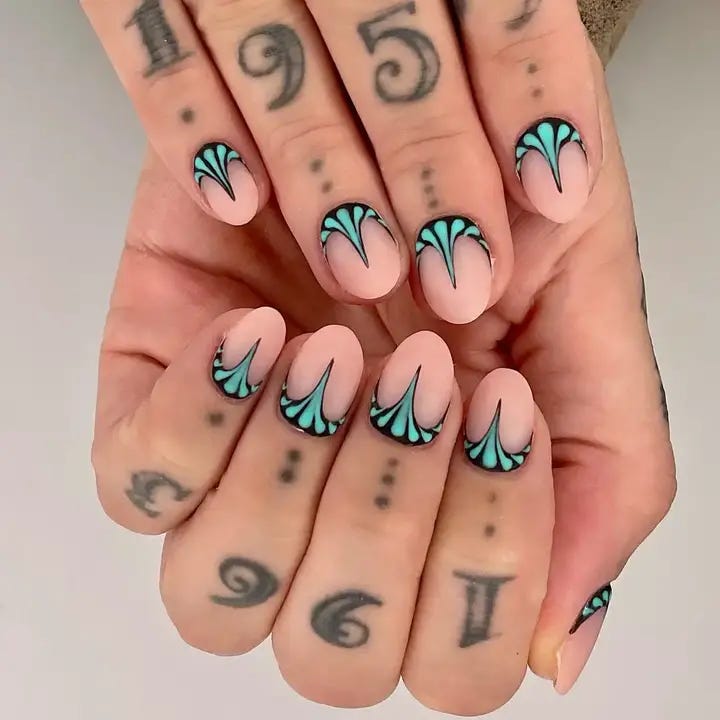
Psychedelic Swirls: Edgy And Mesmerizing
This design is a fun color explosion. A great way to grab attention with its bold and captivating swirls. The edgy mix of purples and greens are sure to have people taking second looks at your nails. With its goth-like energy it creates an intriguing combination, giving you a trendy look for spring break. It’s a design that wants the spotlight.
The list of things you’ll need:
- A dark base polish: Adds depth and intensity.
- Purples and greens: Creating this marble effect.
- A small dish of water: To use one step in the marbling technique.
- A toothpick: To blend the colors together.
- A top coat: Makes it all perfect and shiny.
First paint your nails with the dark base color. Then drop your chosen colors into the water dish and use a toothpick to create swirls out of them. Dip each nail one at a time into the design. Clean up the edges, then apply a top coat for a mesmerizing finish.
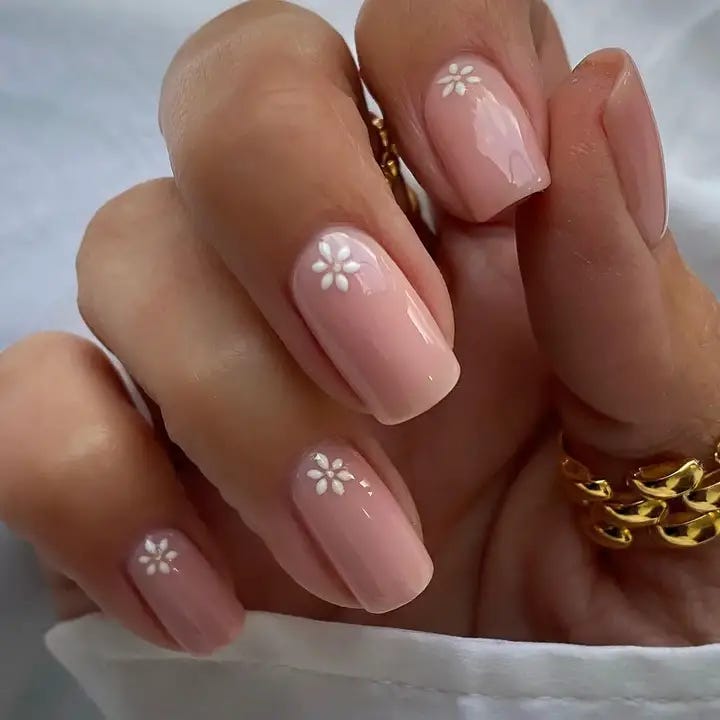
Petal Soft: Gentle Elegance
There is an art to nails that speak softly and leave a big impact. Here, the light pink base quietly complements the tiny white flowers, which were painted on individually. It’s a look that is both minimalistic and natural, invoking thoughts of spring blooms — a pretty and sweet choice for any occasion.
Supplies:
- Light pink polish: A soft, feminine base.
- White nail art pen: For drawing the delicate flowers.
- Clear top coat: Adds shine while protecting your design.
Start with the light pink polish as your base color. Once it has dried completely, use the white nail art pen to create small flowers on each nail by painting two sets of petals and filling in their centers with dots. Finally, seal everything in place with the clear top coat so that you can enjoy your handiwork for days
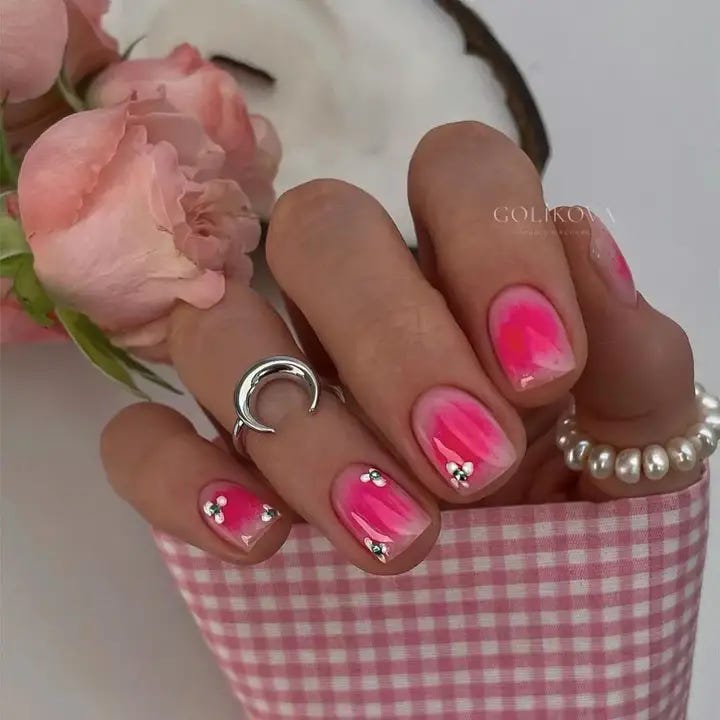
Vivid Strokes: Bold Watercolor
Let’s take a moment to imagine that your nails can be transformed into a vivid watercolor painting. This design takes the bright, pastel palette of summer and twists it with bold, sweeping strokes. On each nail there is pink blush adding classiness and funness through fine crystal rhinestones.
Consumable list:
- Neon pink polish: As an outstanding base.
- Sponge tool: That’ll fade the neon away giving a look of watercolor
- Rhinestones: For occasionally classy glitter.
- Jelly pink polish: Adds depth by using an overlaying technique.
- Top coat: To add shine and keep rhinestones in place.
Start with a neon pink base. Use sponge to apply jelly polish for water colour effect. Put rhinestones as desired while the polish is still sticky. Finish off with a top coat to give it a shiny appearance and keep the stones intact.
Fluttering Fancy: A Touch Of Whimsy
This particular nail design is simple and striking, featuring delicate butterfly wings and golden flakes that seem to be fluttering in a gentle breeze. It perfectly embodies a simple summer, easy-peasy and whimsically beautiful. The art takes center stage on this one with a natural pink base, making it a cute and trendy choice.
Materials:
- Pale Pink Polish — for a simple and natural base.
- Butterfly wing decals or stickers — very easy to apply.
- Gold leaf flakes — adds a bit of luxury.
- Clear polish — to apply the gold flakes.
- Long-lasting top coat — keep your nails looking whimsical longer.
Put on the pale pink polish first, then put on the butterfly decals. Afterward, take the clear polish and start adhering gold flakes randomly for that magical effect. Finish with top coat to make it last!
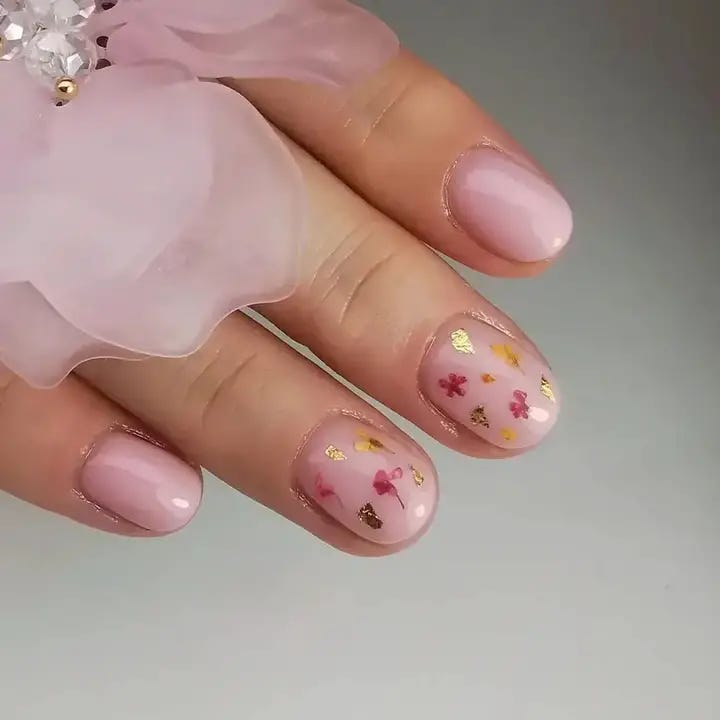
Blossom Breeze: Nature’s Touch On Your Nails
The delicate arrangement of petals and gold flecks beautifully captures the essence of a garden in bloom on your nails. Each nail is like a petal bathed in sunlight, creating a luxurious and elegant acrylic piece that screams spring. It’s cute, classy, and without a doubt pretty.
Materials:
- Sheer pink polish: To imitate the gentle feeling of petals
- Flower decals or hand-painted with nail art brushes: For your blossom design
- Gold flake polish: A taste of luxury
- A top coat: Locks everything in place while adding that much-needed glossy finish
Begin by painting your sheer pink base. Then add on your flower decals or paint your blossoms using nail art brushes. To give it an additional flair, sprinkle some gold flakes on top. Lastly, seal everything together with the top coat for an enduring and smooth finish.
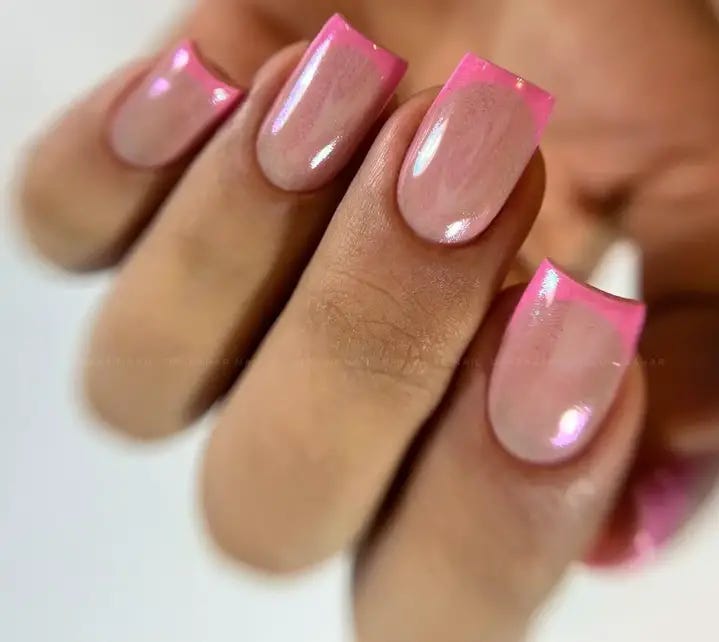
Pink Waves: A Modern Take On French Tips
A modern twist on the classic French manicure, the design has a wavy, jelly-like look which gives depth and fun to the nails. It is trendy, natural and fun at once with gradient pinks that epitomize simple summer mood.
Items needed:
- Gradient base of light pink polish
- Jelly effect sponge
- Different shades of pink
- Jelly-like glossy topcoat
Firstly, apply a base color of light pink. Using a sponge, dab different pinks for an ombre effect. Next, add a jelly top coat so that it appears like the nails are wet.
Bold Geometry: Sharp Lines And Luminous Charm
This nail design has a futuristic feel with its sharp metallic lines. Against the shimmering base, the bright pink tips shine incredibly bright. This is perfect for someone who wants to make a bold statement while keeping it simple. It’s unique, it’s aesthetic, and it’s perfectly on trend for any basic gel manicure.
List of supplies:
- Shimmering base polish: To give your nails a radiant glow.
- Metallic pink polish: For those tips.
- Striping tape: To keep the lines straight.
- Top coat: To help everything stay in place.
Apply a shimmering base polish to each nail. When dry, use striping tape on each nail to map out where you want your metallic tips to go. Apply pink metallic polish over the area not covered by tape. Immediately after applying the polish, remove the striping tape before it dries and hardens. Finish with top coat for extra durability and shine.
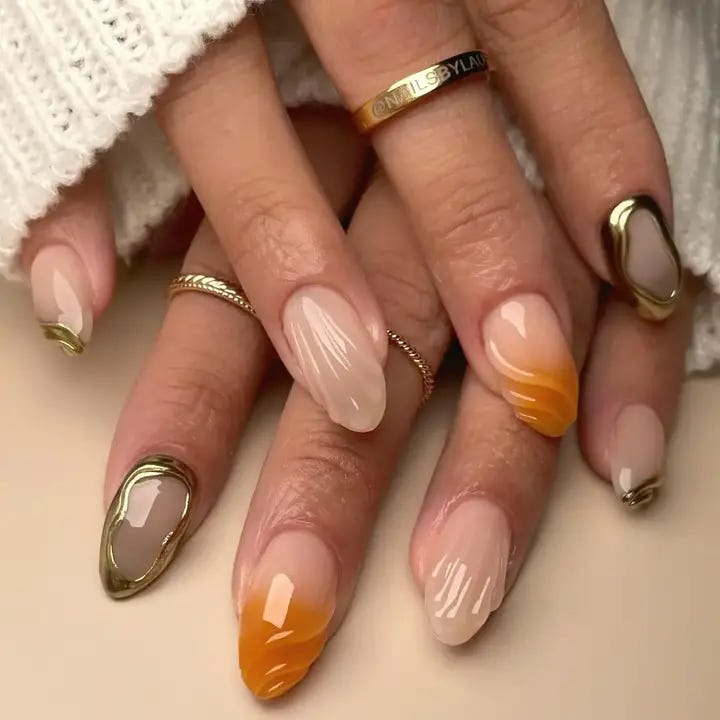
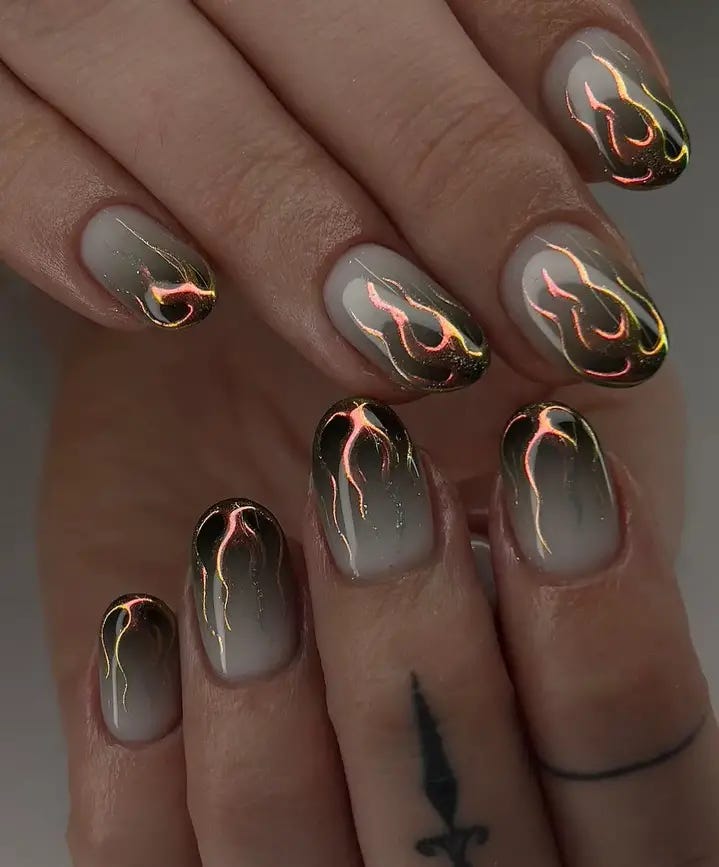
Liquid Lure: A Glimpse Into Modern Art
This design is like a lava lamp, with sinewy shapes and metallic colors that will make your nails look like pieces of contemporary art. The undulating forms in gold and copper against the matte backdrop are like abstract sculptures, making this look ultra on-trend.
Materials:
- Matte nude polish: For the understated base.
- Gold and copper striping polish: To create the liquid metal effect.
- Fine brush: To draw the fluid shapes precisely.
- Matte top coat: To maintain the modern vibe of this manicure.
Apply two coats of matte nude polish as your base. With a fine brush, draw organic, flowing shapes with the gold and copper polishes. Let it dry, then seal it with a layer of matte top coat to subdue any glossiness and enhance its arty feel.
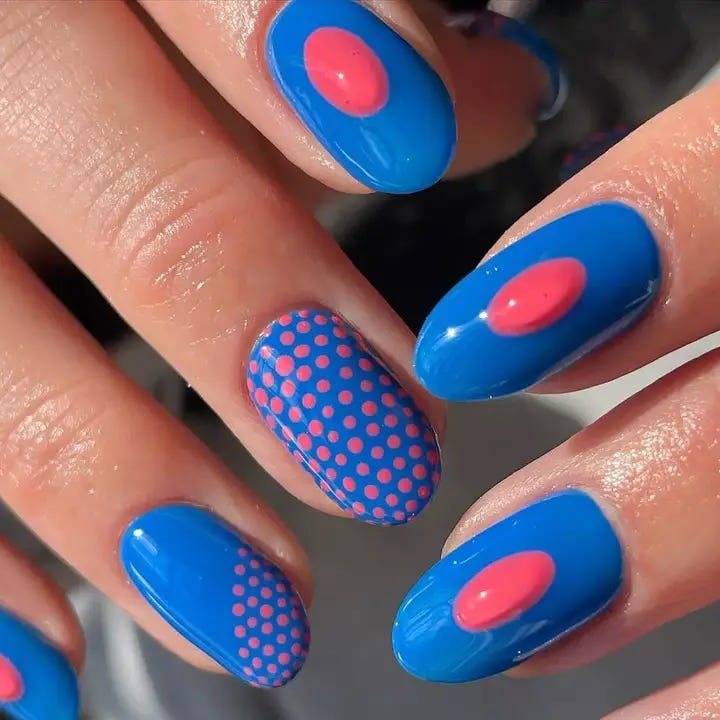
Dot Matrix: Retro Vibes With A Modern Twist
This nail art is a dynamic bow to retro design with a modern twist. The bright blue makes an amazing background for the pink spots, creating a cool pop-art look. Each has its own special pattern, one that can be worn by anyone who loves to mix and match old and new styles.
List of article:
- Bright Blue Lacquer Polish: As A Base Color
- Pink Nail Polish: For Dotting Details
- Dotting Tools: Uniformity and Precision are Achieved Through This Procedure.
- Glossy Top Coat: To Make Colors Pop And Last.
Paint your nails using the vivid blue polish. After drying, use dots made from dotting tools to create even spaces on each finger. Finally, gloss up your artwork so that it has a shiny appearance.
Aquatic Flair: Under-The-Sea Fantasy
These nails possess the physical embodiment of oceanic waves by their design. The fading teal to pink tints resemble the gentle lapping of sea water against a sandy beach. It’s a fun and imaginative look, similar to mermaid tales and underwater adventures.
Tools Needed:
- Teal polish: For the wave tips.
- Sheer pink polish: To blend with the natural nail.
- Detailing brush: For wave designs
- A top coat: Protects desgin and adds shine.
Use sheer pink as a base to imitate your actual nail color. With a detailing brush, paint teal waves at the tips. Apply top coat to protect design and add shine.
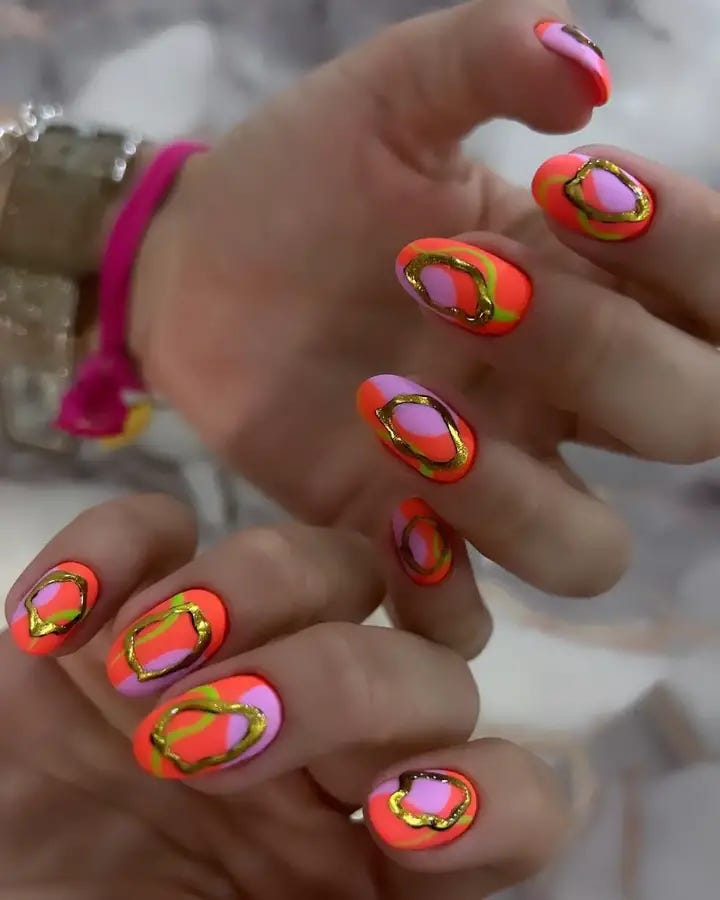
Neon Groove: Electric Contours
Immerse yourself in a neon fantasy with these thrilling nails. The vibrant outlines of bold neon shades border the delicate pastel fillings, producing an energetic contrast that is undeniably enjoyable and stylish. It’s a look that suggests you’re ready to have a good time, at any time!
Materials List:
- Pastel base polishes: A soft backdrop for the neon.
- Neon striping polish: To make the daring outlines.
- A fine detail brush: For clear lines.
- A glossy top coat: To boost the vibrancy of the neon.
Paint your nails with the pastel base colors. Once dried, use the detail brush and neon polish to carefully outline shapes on each nail. Then, apply a glossy top coat for a sparkling design.
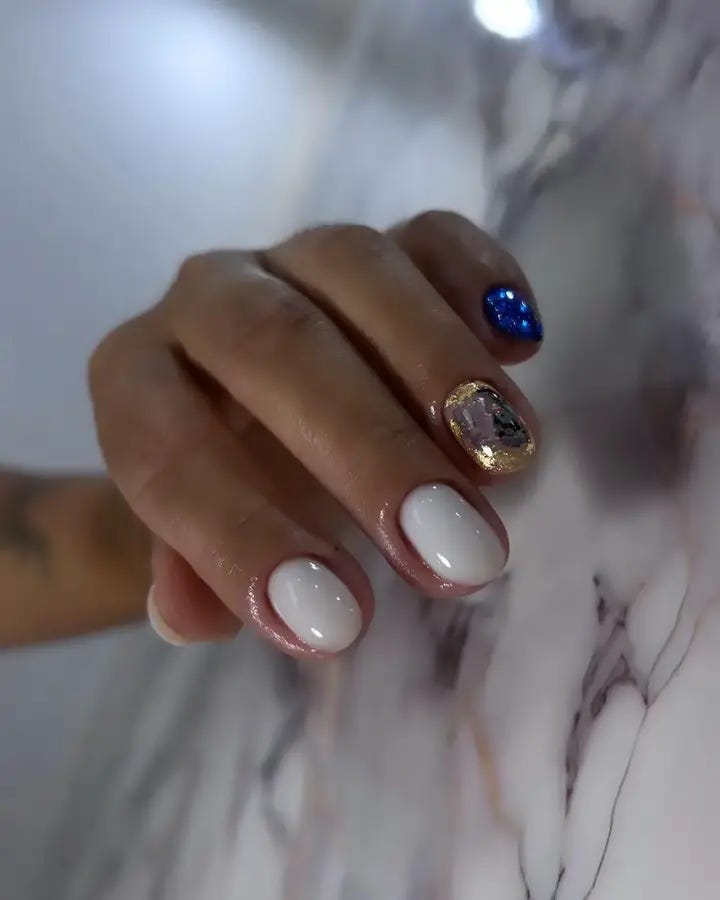
Starry Night: Cosmic Elegance
This design will make you feel the galaxy right on your nails, at the same time adding cosmic effect through using deep blue and gold flake polish. It is a classy and unique nail art, suitable for special evenings with friends or even when you just want to add some magic in your day.
Consumables List:
- Deep blue nail polish: Used as the foundation of this celestial look.
- Gold flake nail polish: Done to represent the stars.
- A clear top coat: Adds dimension and luster to the small universe
Use a base of deep blue nail varnish. While still wet, pat on some gold flake newtonian light interaction for different colors give it that starry look. Finish by applying a glossy top coat which will leave it looking smooth and long lasting.
Whimsical Waves: Soft Elegance
The nail art world has worked itself into a frenzy of late, but we can’t help but appreciate a simple set of nails. These are as dainty as it gets; delicate white waves dance across a creamy backdrop to give the impression of soft ripples on a serene pond. It’s simply minimalist and naturally pretty — an understated manicure that works for any occasion.
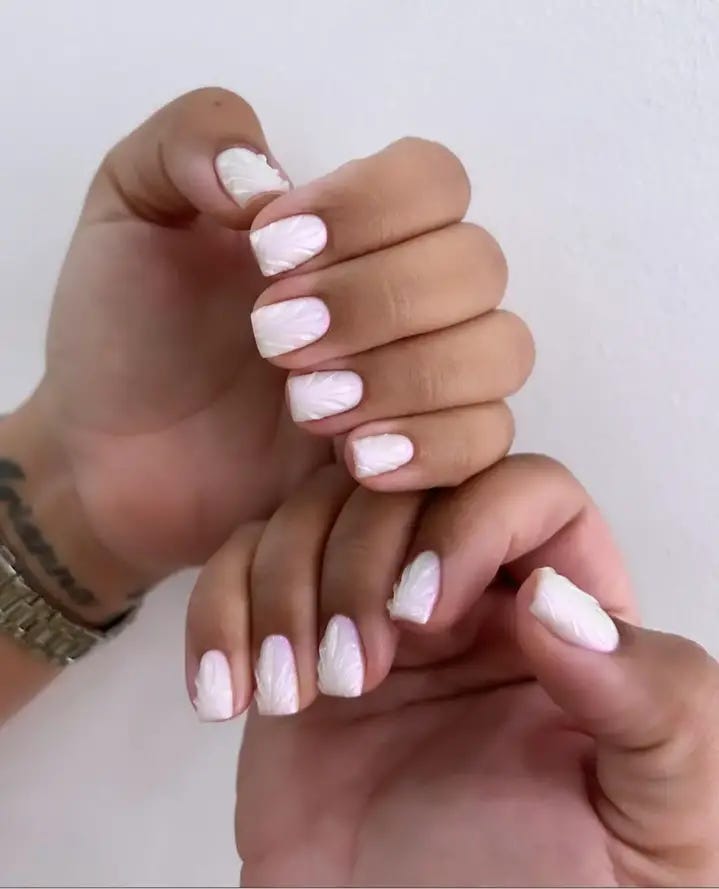
Here are the supplies you’ll need:
- Creamy base polish: Soft and neutral.
- White polish: For drawing the waves.
- Detail brush: Small and precise.
- Glossy top coat: To seal everything in, with some sheen.
- Start with a coat or two of creamy base polish. Wait for them to dry.
- Use your detail brush and white polish to draw wave patterns on each nail.
- Once dry, finish things off with a glossy top coat for subtle elegance.
Neon Orbit: Bold And Bright
If ever there was a design capturing the fun and sparkle of summer, it would be this one. Nails are swirled with neon colors in vibrant orbits, punctuated with playful gem accents. This is a bold, bright and totally fun choice that will definitely attract attention.
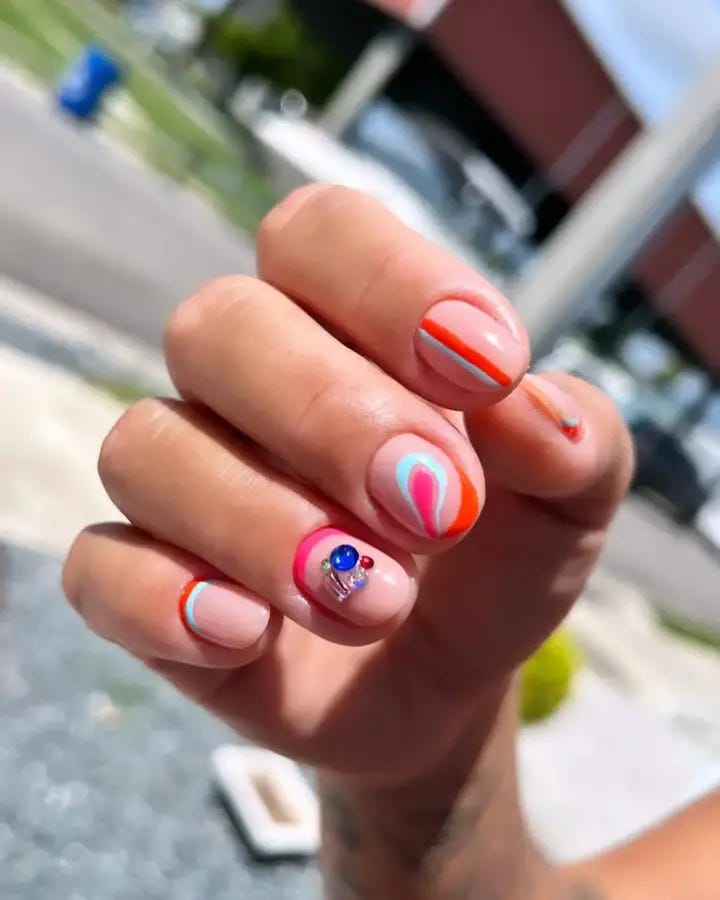
Here’s a list of the stuff you should use;
- Neon nail polishes: For all the colorful orbital revolutions.
- Dotting tool: To get it right on top of the stone.
- Small rhinestones: To give your nails that extra bit of bling.
- Glossy Top Coat: To keep the rhinestone in place and bring out more neon hue.
Start with a base coat; clear polish. Paint neon stripes in random swirls. Use dotting tool to apply little blobs of polish where you want to put rhinestones. Stick on rhinestone then apply glossy top coat everything.
Speckled Serenity: A Dash Of Playful Charm
This nail design takes inspiration from a speckled egg, exuding a sense of calm with its muted tones and subtle speckles. It’s simple, natural, and incredibly cute, offering a sprinkle of playful charm to your everyday look.
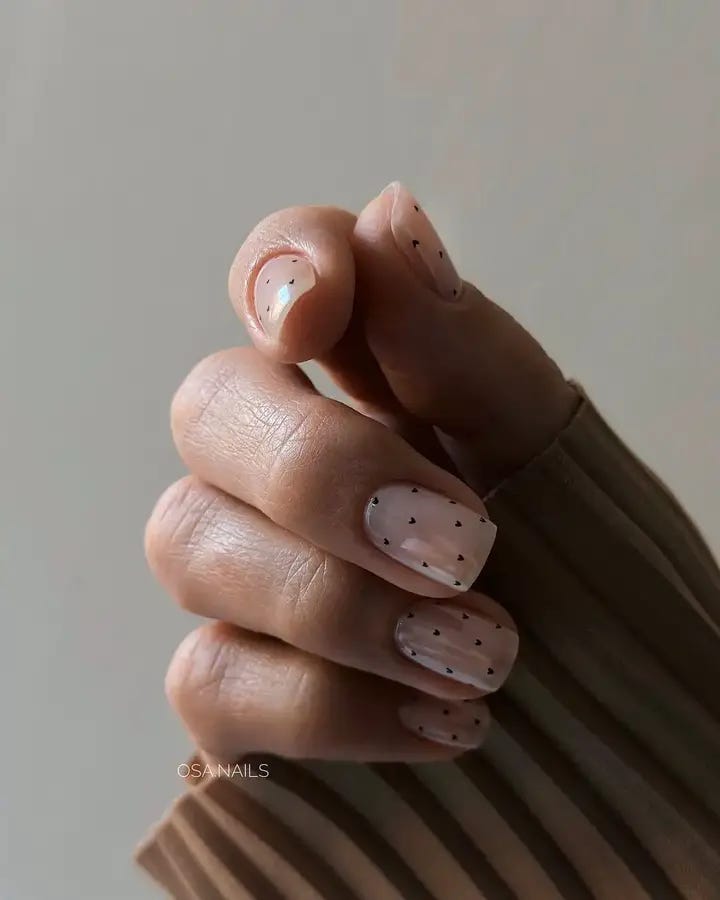
Consumables List:
- Nude polish: For a natural-looking base.
- Black polish: To create the speckles.
- A slim brush or toothpick: For speckling with precision.
- A matte top coat: To give an eggshell finish.
Start by painting your nails with the nude polish for a natural base. Then do some dainty dotting with either the brush or your toothpick that you’ve dipped into the black polish. Try to be gentle as you create the speckled pattern on your nails. Once dry, apply a matte top coat for a soft, eggshell-like finish.
Neon Leopard Print: Wild And Fashion-Forward
Leopard print is a classic design, but it gets a twist with this high-contrast neon version. The eye-popping spots look like they’re glowing against the night sky — and aren’t shy about standing out in a crowd. It’s not just trendy; this style says that you know who you are and aren’t afraid to express yourself — loudly.
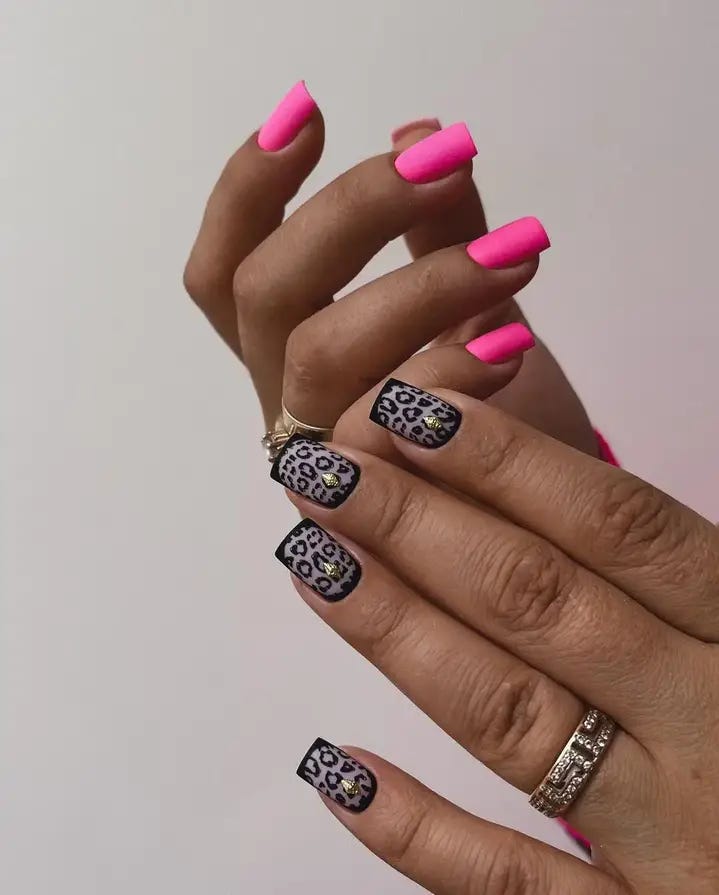
You’ll Need:
- Dark base polish
- Neon pink polish
- Black polish
- Dotting tool or thin brush
- Glossy top coat
Start with your dark base color. Then, using the neon pink polish and dotting tool, add spots of different sizes all over your nails. Next, take the black polish and use either a thin brush or another side of the dotting tool to outline each pink spot. Use wavy lines instead of solid circles to make them feel more interesting. Once dry, finish it off with a glossy top coat for shine and protection.


0 Comments