Neon Summer Nails: Illuminate Your Look with Vibrant Shades & Designs! Feel the pulse of the season with stunning neon nail art! From fiery oranges to fresh greens, discover the colors and patterns that evoke sunny vibes. Dive into a kaleidoscope of neon designs that captivate attention and tell a colorful tale of joy and nature’s beauty. Let your nails be the canvas for your summer adventures!
Advertisement
A Blaze Of Glory
In the world of nails, it is wrongly assumed that neon belongs only to the daring. Nonetheless, I believe that when designed well, neon can show class. Picture a dim sheet against which fluorescent brushes coquettishly stroke with some modesty and create a double-take contrast.
Doing a neons artwork means painting with lights. The trick lies in balancing this art. In such cases, bright neon color like electric blue or fierce pink works well with short nails making them look all-embracing but not less captivating.
Advertisement
- To recreate the glowing magic:
- A highly pigmented neon polish (example Electric Pink by Dnd)
- Shining top coat for high-gloss finish
- Delicate brush with fine bristles for details.
Start by cleaning your nail and shaping it preferably into a short almond shape for modern twist; then apply black base and give it time to dry. Dip your paintbrush into the flurocent polish after removing the excess and create your design on a dark base. Finish off with a top coat which provides durability as well as shine.
Neon French With A Twist
This is one French manicure that goes way beyond the classics! Transparent base with neon green tips shouts modern and chic at the same time adding a touch of boldness to this traditional look. It’s minimalism meets maximalist color, all in one.

- Neon green polish for the tips
- Clear or nude polish for the base
- Protective top coat for a glossy finish
- Tip guides or tape to achieve the perfect curve
French tip requires your steady hand or you can use tip guides to guide you towards a flawless line.
Start with applying your base coat then add either clear or nude polish on top of it. After waiting for this to dry, place a nail art strip down and apply your neon polish to create the tips. Immediately after putting on paint, pull off stickers and coat your nails with shiny top layer.
Advertisement
Geometric Neon Fusion
This modern art-inspired design combines bright colours with precise lines. The contrast between a matte pink and a neon yellow-orangish glow produces electrifying results, attractive to those fond of striking and strenuous architectural forms.
- Use matte pink polish for the base
- Neon yellow and orange are used for the geometric shapes
- Apply a matte top coat for overall finish
- For sharp lines, use precision tape or stencils
Crisp geometrical patterns can only be achieved through precision which includes carefulness in placement and execution.
Start with your matte pink polish as a base, placing your precision tape or stencils carefully. Fill up the shapes using your neon polishes. Once dry, gently take off your tapes/stencils and apply a matte top coat to sustain its contemporary look.
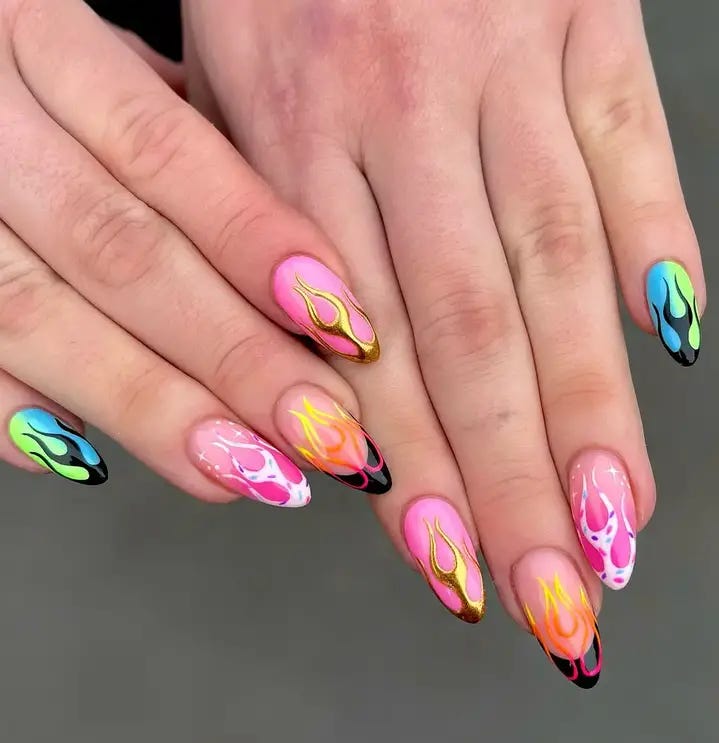
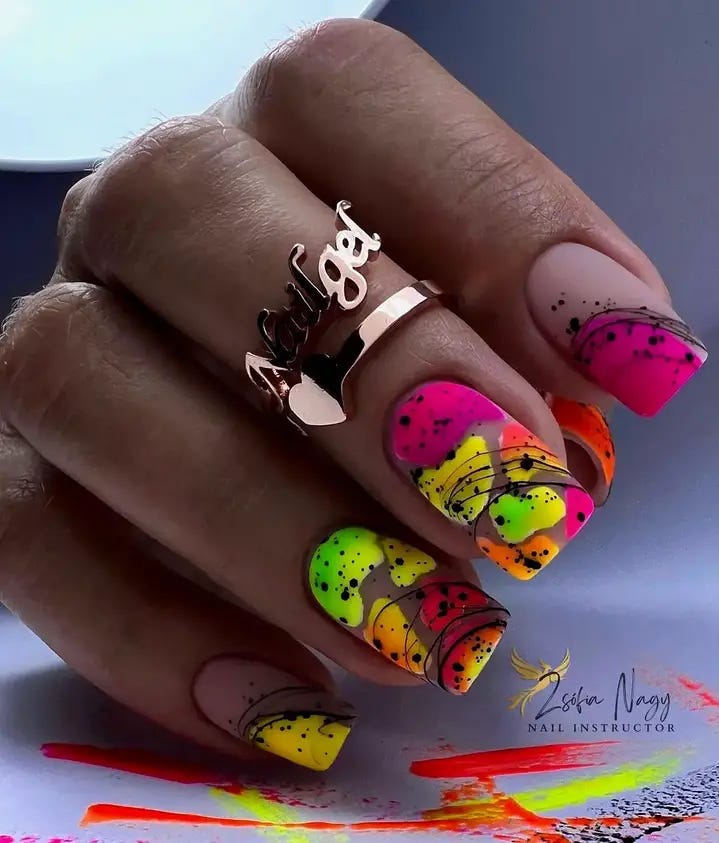
Flame Of Creativity
These neon summer nails create a vivid contrast. The stark black is where fiery orange and yellow flames dance, like tongues with burning passion at the tips to symbolize energy and dynamism. It’s a brave design for the summer nights out.
Advertisement
- Black gel polish
- Neon orange and yellow acrylic paints
- A fine brush for detail work
- Glossy topcoat
How to do it:
- First, apply black gel polish as a base and cure.
- Use fine brush to paint the flames in neon acrylic starting with yellow and adding orange frills.
- Seal in the design with glossy topcoat and add that vibrant shine.
Sweetheart Swirls
These nails scream romance with their delicate pink swirls decorated with little rhinestones that sparkle like dew drops on petals. The hearts also add some whimsy, which makes them perfect for a summer fling or a fun take on the everyday look.
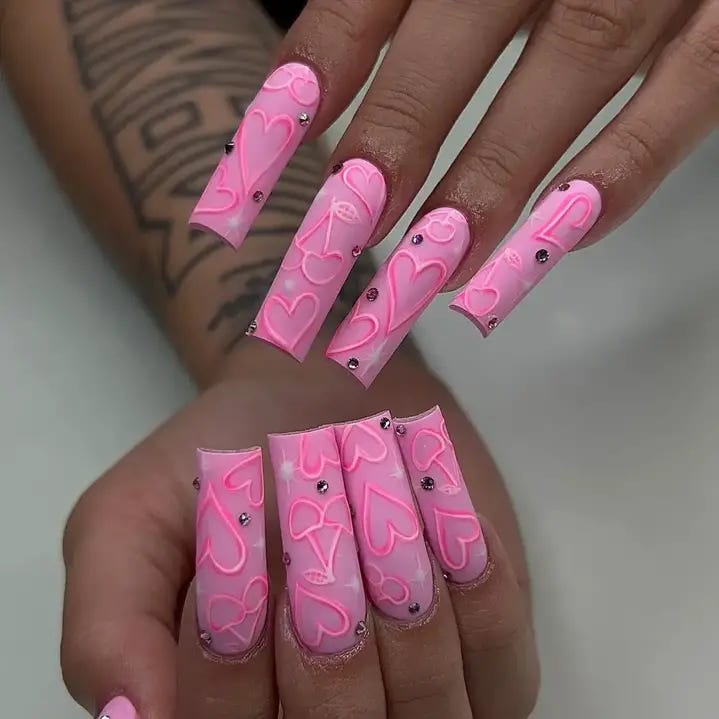
- Pink gel polish
- White gel paint
- Small rhinestones
- Dotting tool/toothpick
- Glossy top coat
Procedure:
- Start out by applying two layers of pink gel polish as a base and cure.
- Make heart shapes using white gel paint and drag the end to produce swirls using dotting tool.
- When paints are sticky, attach rhinestones.
- Put it under UV/LED light then apply topcoat for glossy shine.
The Neon Ombre Effect
Who says ombre can’t be adventurous? Its green to pink gradient is a summer staple that reminds us of tropical fruit and endless sunsets.
The beauty of ombre is in its lack of demarcation. If you painted your nails with an appropriate ombre such as green to pink, it would not only showcase your nails but also your amazing sense of taste.
- Essentials for Creation
- Gather your supplies:
- Two complimentary neon polishes (e.g., a tangy green and a hot pink)
- Make-up sponge for the gradient effect
- Simple nail art brush for clean up
Apply a base coat of pink, then take a sponge and apply both colors side by side. Then, dab it onto the nail blending as you go. Finally, finish off with a gel top coat for long lasting wear.
Oceanic Bliss: Serene Blue Simplicity
When it comes to this blue color, it speaks volumes about combining the calmness of the ocean and the clear summer sky. It becomes a peaceful oasis amidst the stormy heat of summer. Adorned with delicate flower patterned accents, these nails are perfect for a day-into-night look; they bring in fresh gusts of the ocean air.
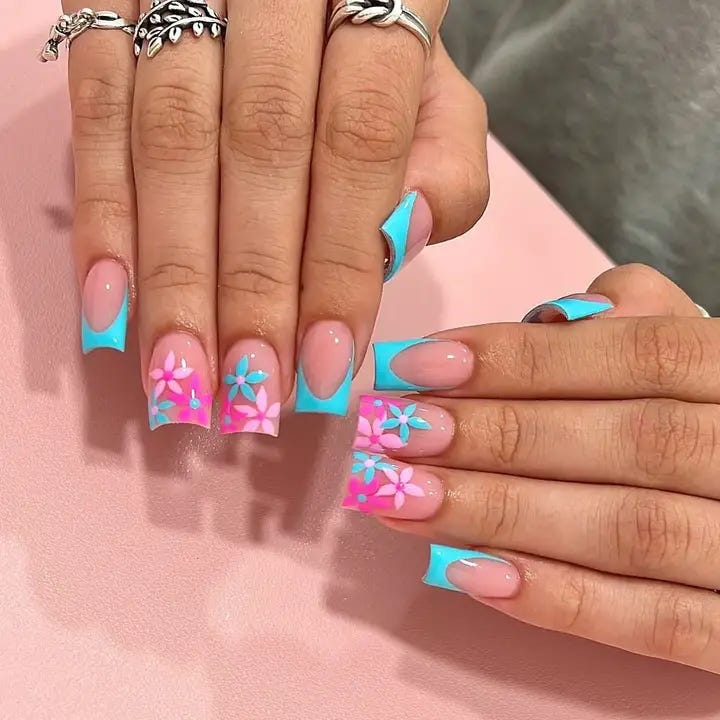
- Sally Hansen Double Duty Base Coat
- China Glaze’s “Too Yacht to Handle” for this serene blue
- Kiss’ Deco Nail Art for floral details
- Seche Vite Dry Fast Top Coat for that shiny finishing touch
Recommendations: Use stickers to give your work a professional edge without much effort.
If you are one of those daring ones wanting to have a go, just layer on top the sky blue, adding stickers while polish is still slightly sticky. Add a final glossy top coat to get that “just stepped off from my yacht” look.
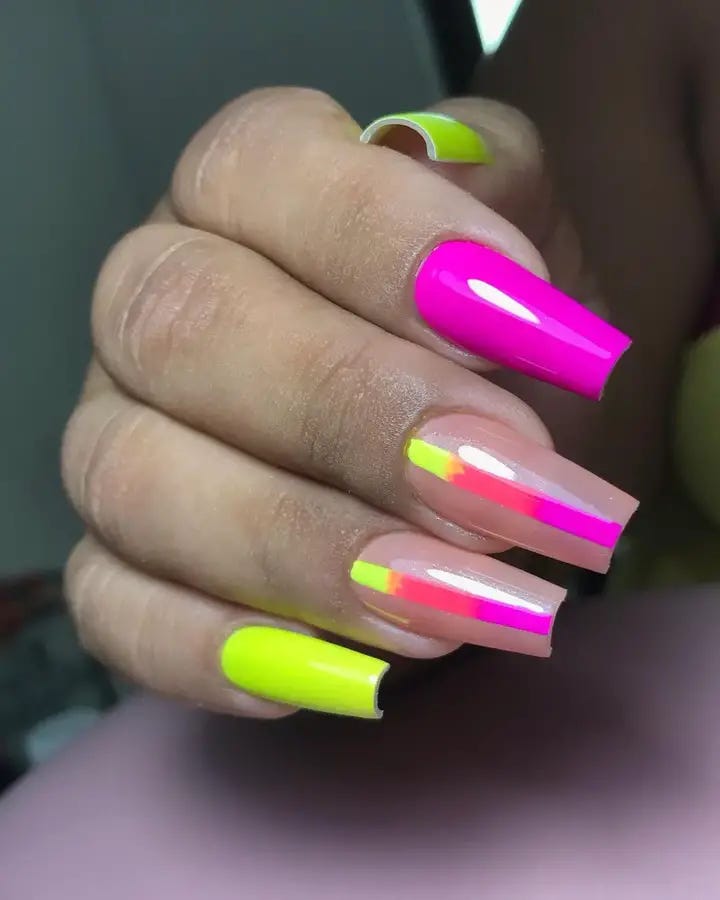
Vibrant Geometry: The Bold Statement
The statement piece of Neon’s answer is this daring combination of orange and pink, geometrically aligned to have the greatest impact. These nails are a call-out to summer’s exuberance, a celebration of audacious shapes and even more audacious colors.
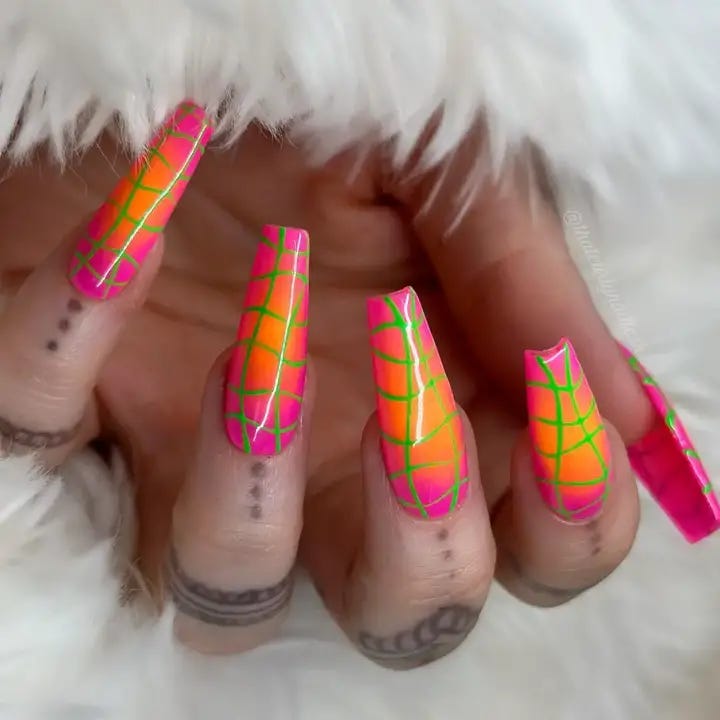
- ORLY Bonder Rubberized Basecoat for long-lasting effect
- The neon palette includes Essie’s “Serial Shopper” and ORLY “Beach Cruiser”
- Glisten & Glow Top Coat for flawless finishing
Recommendations: For sharp lines use striping tape sparingly.
To do it yourself, apply your base, allowing it dry completely. Then, position your striping tape in place and fill in your designs. In order to maintain its bright glossy look use a top coat over your geometric art.
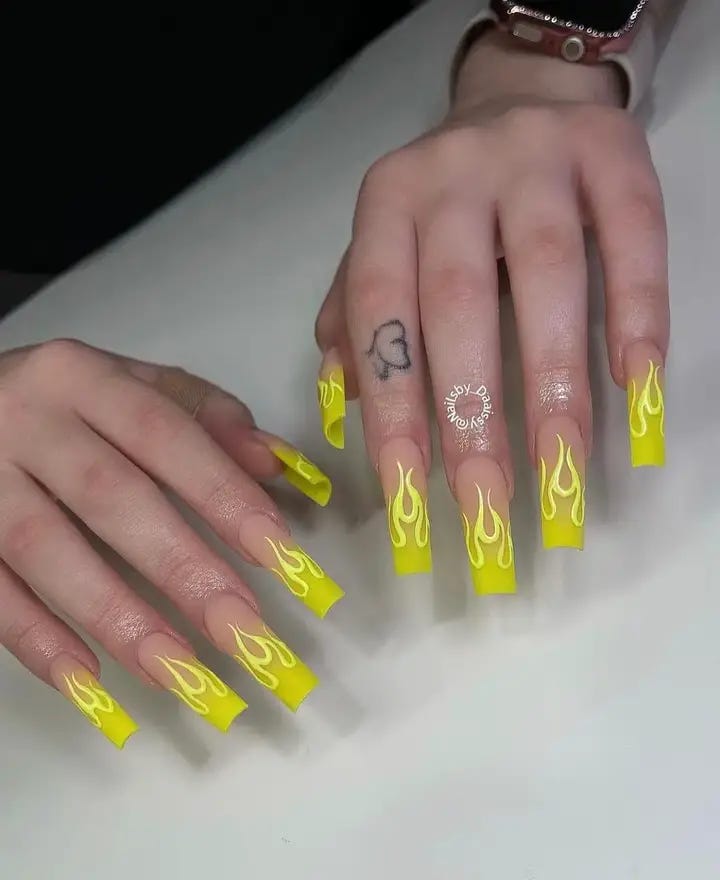
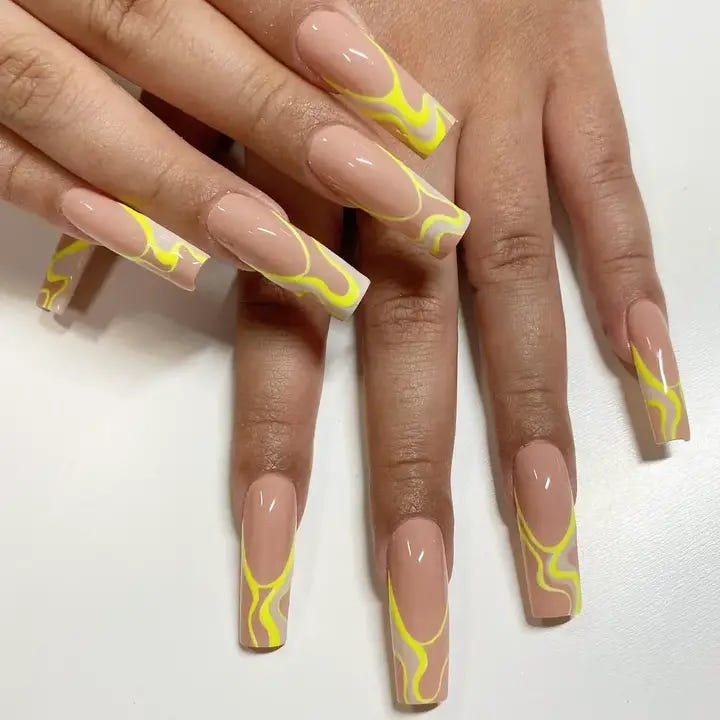
Igniting Flames: A Fiery Play On Nails
Make a statement this summer with nails that are anything but hot. The yellow and pink dance the opposition on a platform of plain black, recalling the spirit of campfire party beneath the starlit sky. These nail decorations go beyond mere supplements; they are an icebreaker for bold individuals who wish to enjoy the heat of that season.
Electric Lime: Zest And Sparkle
Imagine that tangy sharpness of lime on the tips of your fingers. It is all about neon green audacity and rhinestones’ shine. However, this design is about glowing brightly but gently with nude additives in it. This manicure is a dichotomy between color and texture suitable for those who tend to lead through style and follow up with charm.
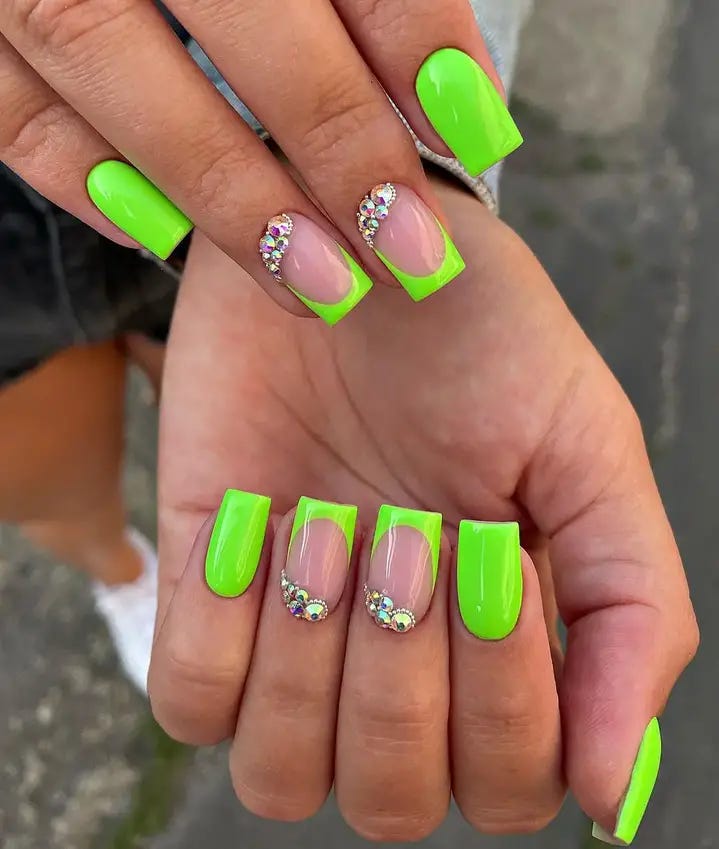
- Base coat: Sally Hansen Double Duty.
- Neon Green: OPI’s “Green-wich Village” for an electric shock.
- Nude Polish: Essie’s “Ballet Slippers” for a mild contrast.
- Rhinestones: Swarovski Crystals for some glittering glamor.
- Top Coat: Seche Vite will offer a gloss finish that also serves as protector.
Recommendations: The secret behind such a look is balance. Apply one drop of top coat every place you would like to place your rhinestone using dotting tool then carefully put them down to give perfect sparkle.
Apply base coat first before neon green coats are applied once dry. Use tape to section off where you will be applying the nude polish, and slowly cover it. Finally, after drying the nail polish completely, have fun by adding rhinestones on them. For your summer escapades, top coat should hold everything together properly.
Dreamy Swirls: Soft Neon Elegance
Lusciously blending swirls of bright orange and pink, these give a softened version of neon trend. It resembles the summer sky with clouds in the evening melting into a natural base for nails. This will be a favorite among those who are very romantic and find beautiful colors in the sky.
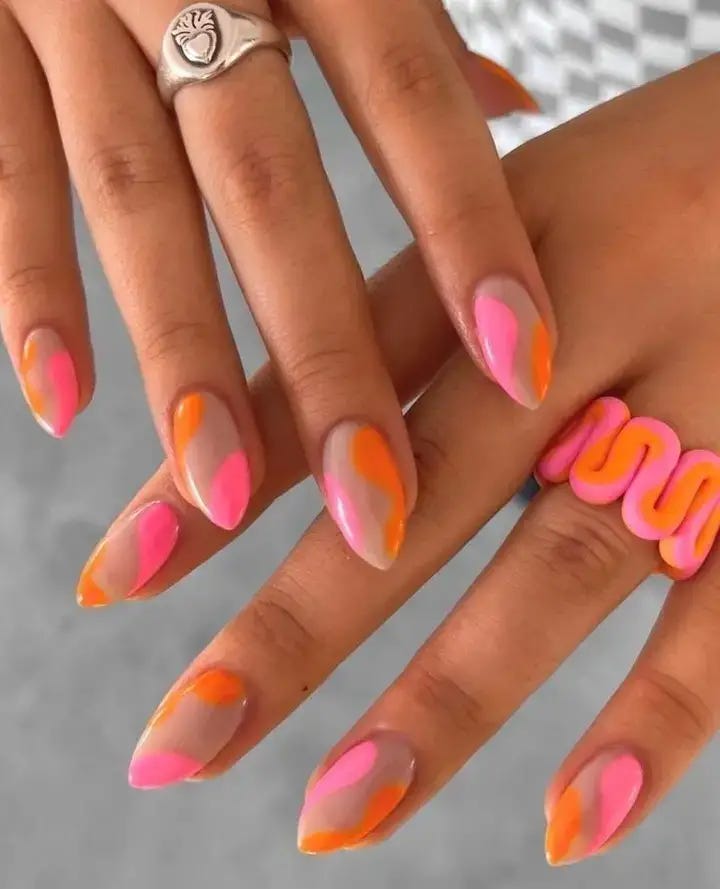
- Base Coat: to stay longer manicure on nails apply CND Stickey Base Coat.
- Neon Orange: get some warmth through Essie’s “Serial Shopper”.
- Neon Pink: have fun using ORLY’s “Beach Cruiser”.
- Top Coat: create glossiness using INM Out the Door.
Recommendations: Use a sponge to blend these neon colours softly and create this ethereal effect/a sponge is used to diffuse these neon shades for an amazing ethereal look.
Firstly, you start with a transparent base then add up more colors with your sponge for that smooth hazy feel. Imagine using your own fingers as paint brushes while sunset is being created. When satisfied with how these colors merge, finalize it by applying one coat at the top layer to make it timeless like twilight during summer days.
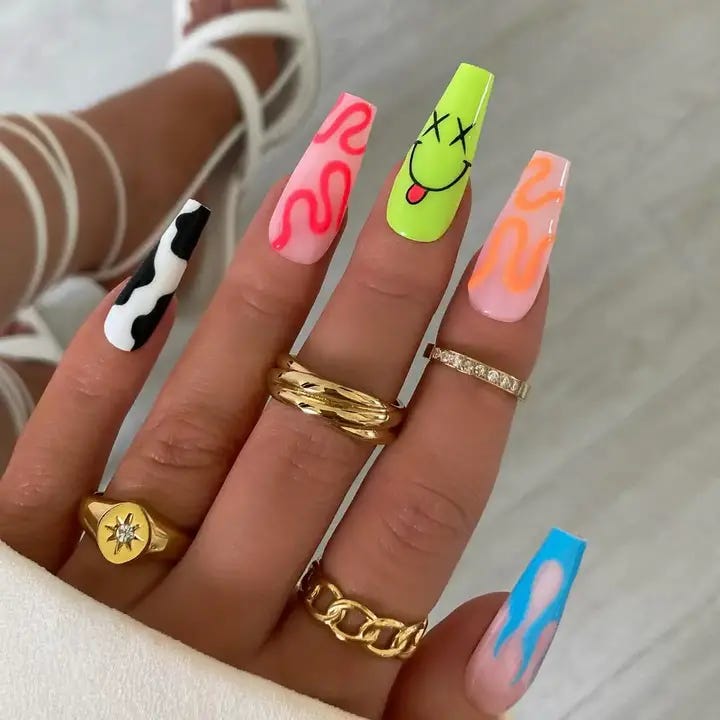
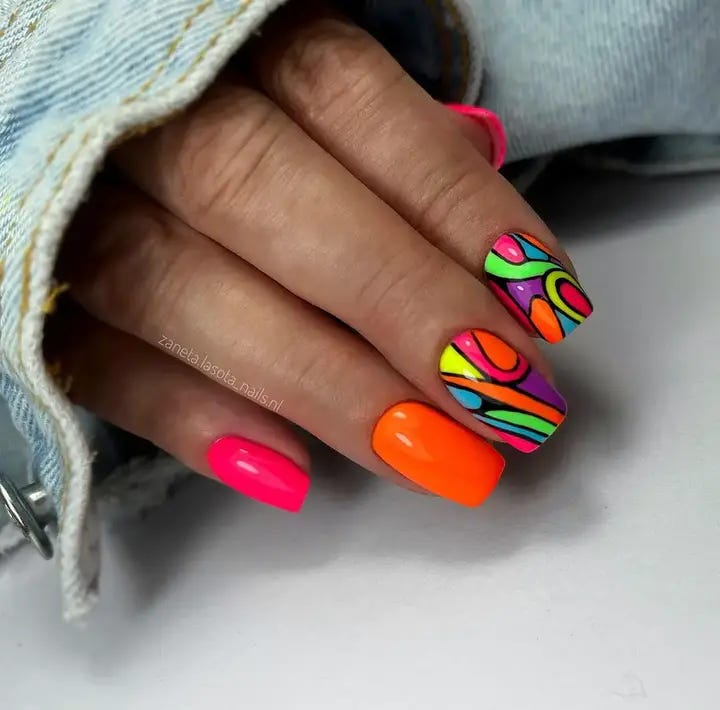
Pop Art Meets Neon: An Eclectic Fusion
Just imagine the noise of the downtown art walk, where every color and shape has a story to tell. That is what we have on these nails; a playful mash-up of pop-art and neon that cannot be seen in any other way than eye-catching. With a mix of daring patterns and an outstanding neon lime, these nails are for those who set trends and make talk during summer.
Electric Lime: Zest And Sparkle
Nothing announces summer like the tangy taste of fluorescent green, most especially when mixed with a slight glimmer of rhinestones. This manicure pairs bold color with modest refinement, incorporating a dash of neon over a nude base. It is an allusion to those who mix daringness and archetypal fashion, ideal for summertime nights out or stylish daytime gatherings.
- Base Coat: To make your neon last longer, use a solid form base coat.
- Neon Green: This shade speaks summer right down to the tips of ones fingers.
- Rhinestones: Go for real shine stones which you can daze on light.
- Top Coat: Make sure it’s glossy and fresh looking.
Suggestions: The art of placing it strategically matters. Place the rhinestones so that they highlight the neon without overpowering it.
Start by painting your nails with neon green at the tips or as accents on a nude base. While the polish is still wet, gently apply the rhinestones. Finish off with another top coat to seal in your shimmering gems.
Sunset Ombre: A Neon Dream
The soft gradation of colors in this ombre design is just as calm and peaceful as that of a summer sunset. Neon hues merge smoothly creating an enchanting or animated dreamy shift. It’s like an artistic nail design for those who love the beauty of summer sky.
- Base Coat: Necessary for a well-prepared surface.
- Neon Polishes: Choose ones that match the color of the sunset.
- Sponge: For blending colours into seamless ombre.
- Top Coat: A top coat will make neon more prominent.
Tips: The longer you blend, the more natural your gradient becomes. Don’t rush this process.
Apply base coat over nails then use sponge to dab on neon colors and press onto nails to create continuous ombre effect. Keep layering until you get desired intensity and finish off with top coat to bring out the sunset effect.
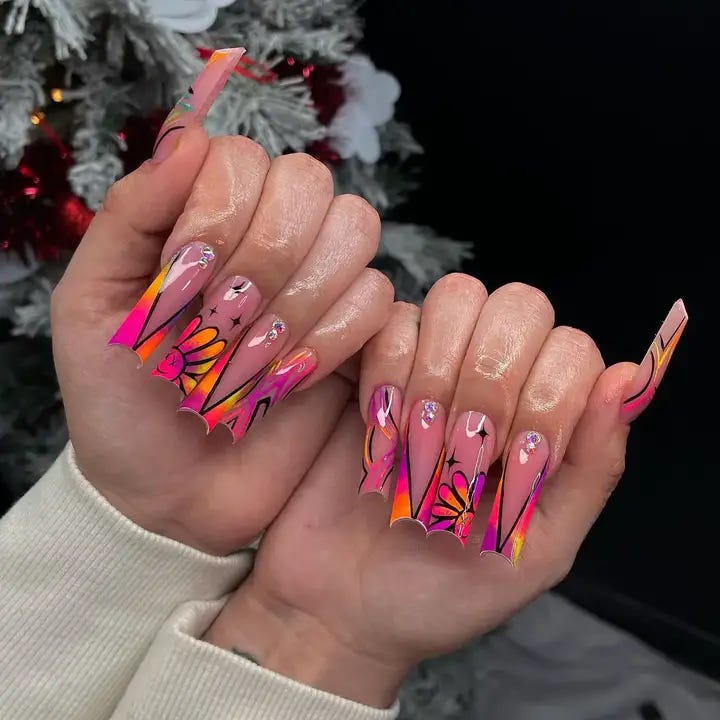
Neon Graffiti Glamour
Think of your nails as though they were the notebook for some vibrant desires of a street artist. The art on these nails portrays the energy of graffiti paintings with its neon pink palette and striking bold outlines. These are ideal accessories to wear for a fashion forward lady who wants to bring the rebellious street art mood into her summer wardrobe.
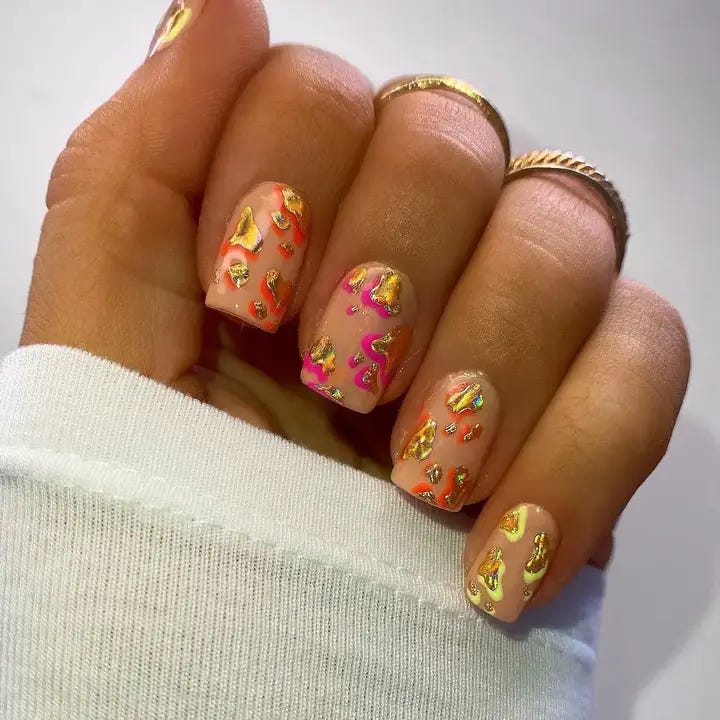
Gilded Neon Dreams
At this point, there is a combination of sophistication and whimsicality because delicate gold leaf meets electric neon. This manicure combines coral with gold accents invoking warm summer nights. It is for those who are youthful at heart but still want some luxury.
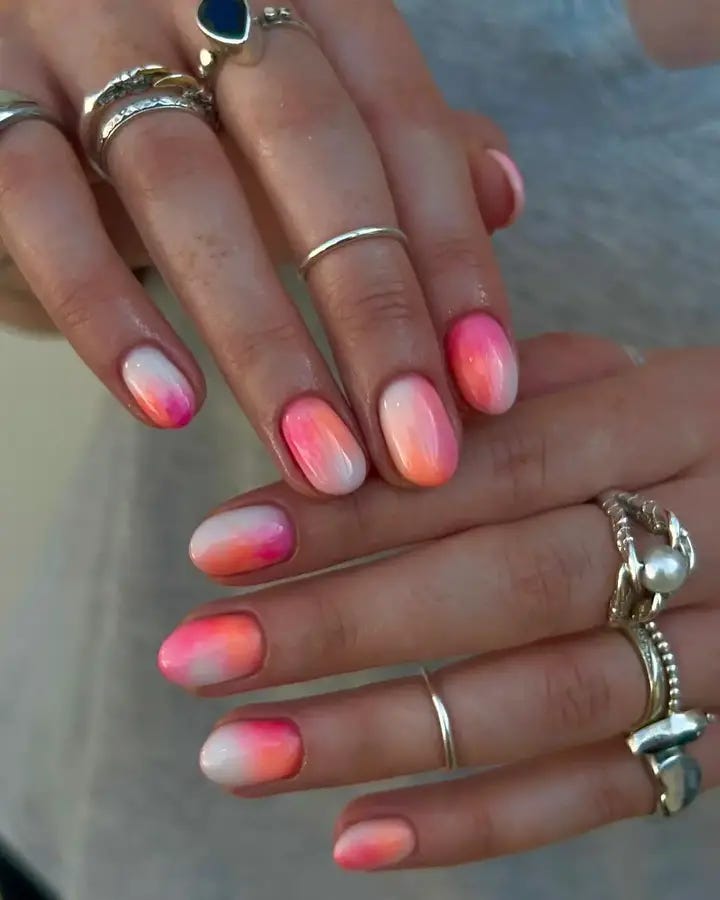
Neon Sunset Blend
Reveal the tranquil loveliness of a setting sundown with this ombre nail design that goes gradually from light warm pink to pale orange. It’s a combination that echoes the restful end of a day bathed in sun, perfect for those who love summertime’s mild hues.
- Pink and Orange Neon Polishes: Gradient purpose.
- Sponge: To pad and combine the colors well together.
- Top Coat: The final step in making your sunset endure forever.
- Suggestions: Mix evenly. Let the sponge give a smooth change from one color into another.
Start with base coat, then cover the sponge with pink and orange and press it over your nail, blending it as you go. In order to have an even transition effect use top coat at the end for a seamless, enduring ombre effect.
The Classic Neon
Neon is not necessarily complicated. A single, solid bright hue on a short nail can tell so much about your confidence and style.
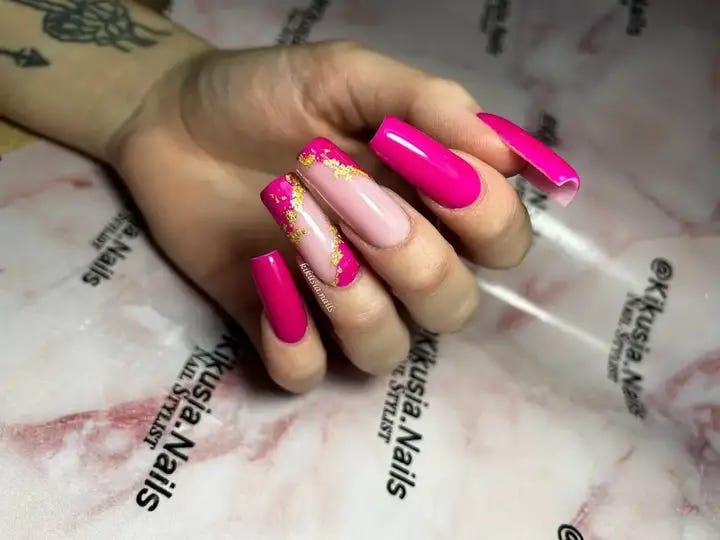
Vibrant Pink With Gold Leaf Accents
The look is absolutely stunning, blending the hot pink’s zinginess with gold leaf’s elegance. As a manicurist, I love the mix of matt vs high gloss textures that adds depth and life to my overall design. The placement of the gold leaf is intentional, creating an organic movement which pulls your eyes down the nail and highlights its graceful shape.
- Hot pink gel polish
- Gold leaf sheets
- Matte and glossy topcoats
- Tweezers with fine pointed ends
To achieve the best results, use a highly pigmented paint in order to get full coverage. Additionally, put gold leaf on when the second layer of colour is still tacky but not fully cure because it will aid in sticking.
DIY Tutorial:
- Prepare the nail using a base coat and cure.
- Apply two coats of your chosen pink polish, curing between layers but leaving the second coat slightly tacky.
- Small pieces of gold leaf can be gently placed onto nails using tweezers while applying light pressure so that they stick properly.
- To finish off curing for sealing purposes apply a glassy topcoat over the gold as well as matt topcoat over pink color filled nails.
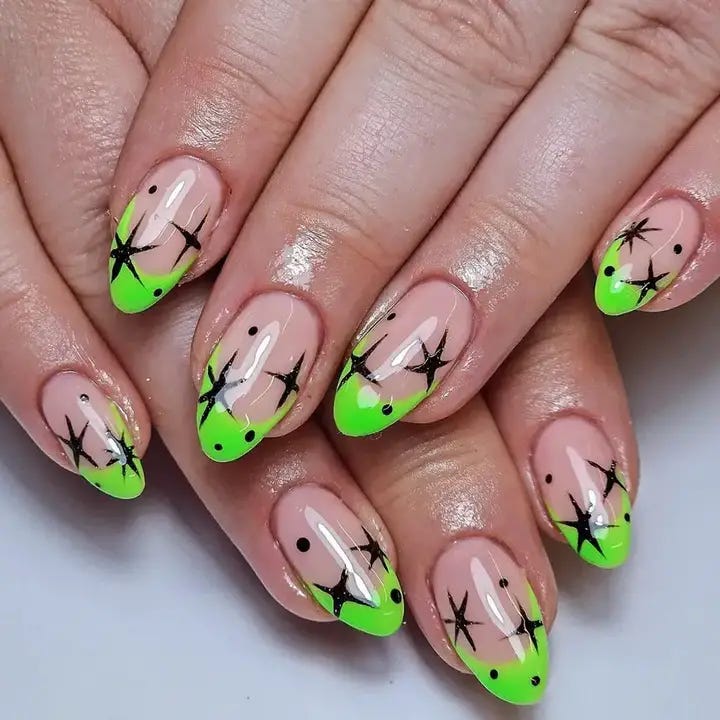
Neon Green French Tip With Starry Accents
The design is a contemporary classic French tip with an edgy neon green color highlighted by whimsical star patterns. Green being bold, the nail-bed translucence softens its look and makes it comfortable for use during day and night times. The introduction of black stars alludes to the playful side of summer nights.
- Sheer pink base polish
- Neon green polish
- Black art paint or polish
- Dotting tool and fine liner brush
French tip needs to be drawn with great precision. Nail guides can help you get straight lines. In order for your stars to have sharper tips, use a dotting tool.
DIY Tutorial:
- Apply a sheer pink polish as your base and let it dry.
- Paint the tips with neon green polish, using guides if necessary, and allow them to dry.
- With a fine liner brush, draw small stars along the line where the green meets the sheer pink.
- Finish with a clear top coat for longevity and gloss.
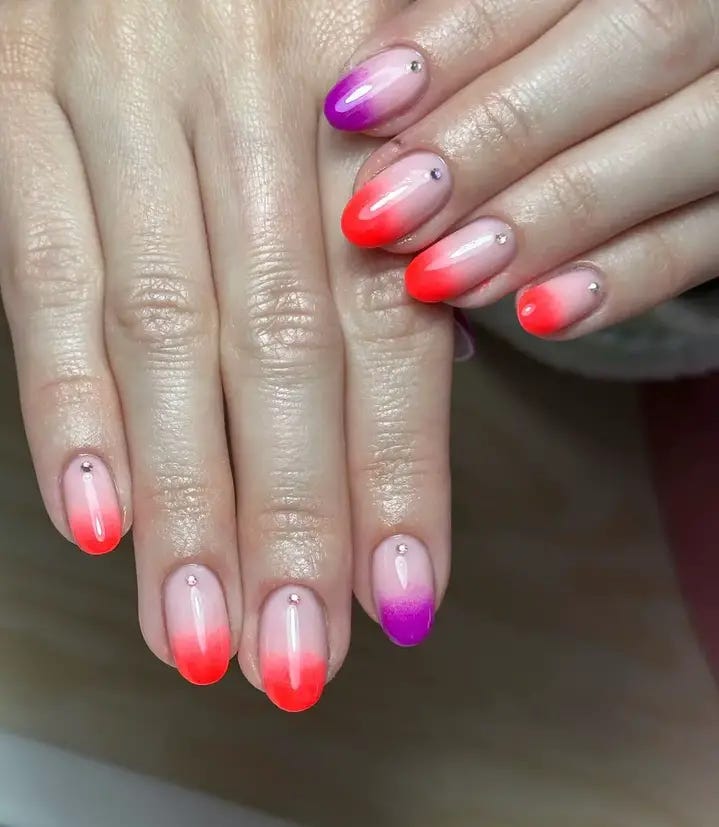
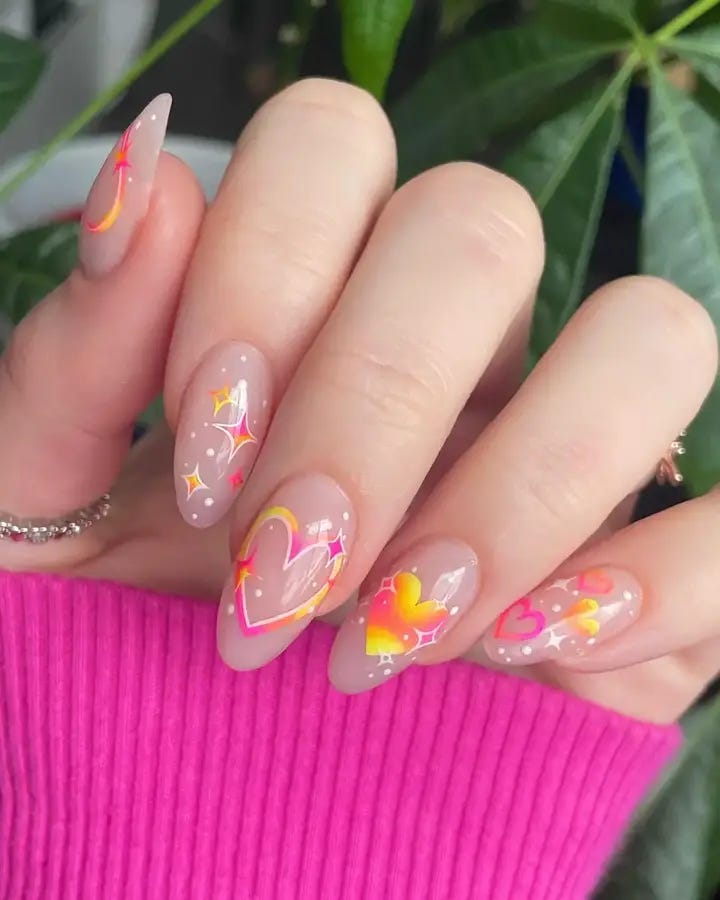
Pastel Ombre With Heartfelt Details
Embracing a softer side of neon, this design’s shades fading from transparent to pastel hues creates a delightful ombre effect. The added hearts and stars are another nonsensical part that symbolizes the happiness and playfulness of young love during summer times. It is delicate but creative, which is perfect for clients who prefer subtle appearance.
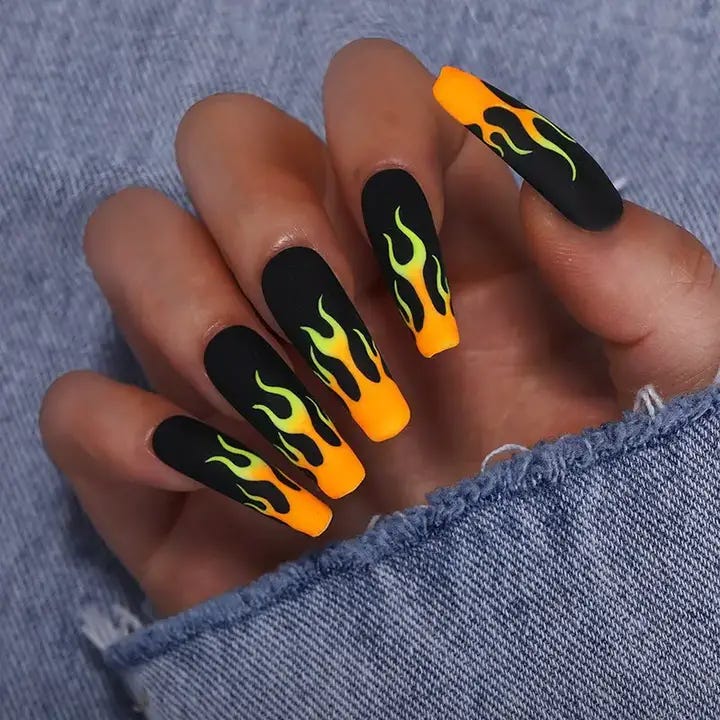
Neon Flames: A Fusion Of Artistry And Technique
This nail design is a sizzling fusion of bright neon complements illustrating the vibrancy of summer. Not only that, the fiery neon flames are carefully done to demonstrate free spirit. The contrast between bright orange and yellow against a black base is dramatic enough to make a statement.
Advertisement
- Neon Orange and Yellow Nail Polish
- A small brush for detailing
- A gel base coat in black for contrast
- A high-shine top coat for protection and glossiness
I would recommend using long-lasting gel polish in case you want your manicure to last. When painting the flames, it takes time. Use a thin brush to achieve these sharp flames.
Start with clean prepped nails; apply black gel base and cure under UV light; dip into neon polish with fine detailers brush and sketch flame design starting from tip; once happy, cure again, seal with top coat for glistening finish.
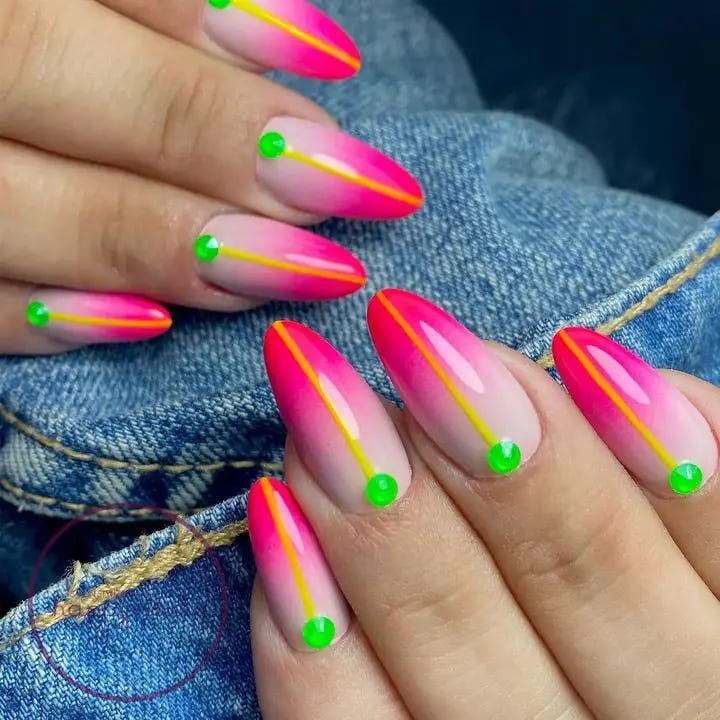
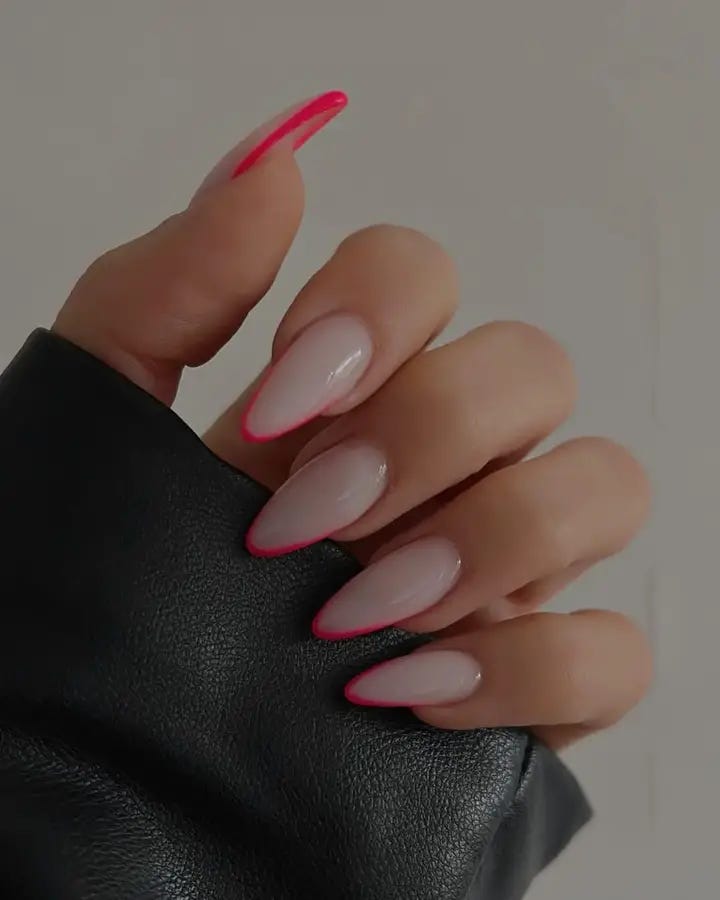
Neon French Tips: Classic With A Twist
A classic twist is given to the neon French tip. The use of a nude base together with neon pink on the tips is new and attractive. This suits individuals who are ardent supporters of traditional styles but want to try something new concerning the neon trend.
- Use a neutral colored nail paint as your base
- Neon pink nail polish for the tips
- Precision striping tape
- A sealing top coat that would give a glossy finish
To prevent chipping, always apply a finishing coat after striping tape has been used on the tips.
Start by applying a nude shade as your foundation colour. When dry, place striping tape at the point where you would like your neon tips to begin. Apply neon pink polish to the tips, peel off the tape while it is still wet and also end with a top coat.
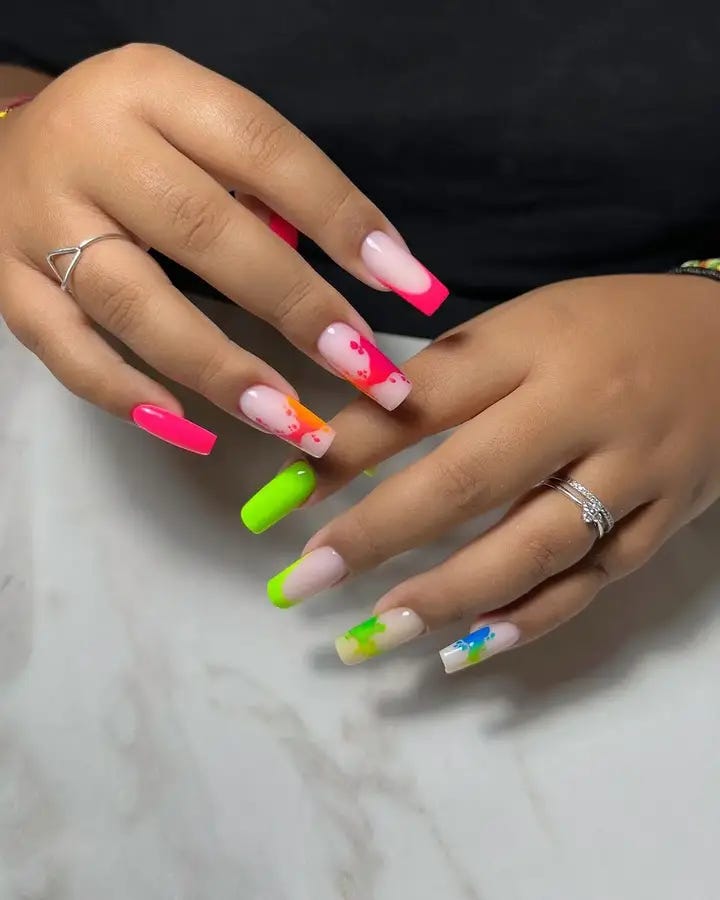
Neon Splatter: A Playful Pop Of Color
Neon splatter nails are a type of abstract art; there is one for each finger nail. The casual but elegant neon splash on clear is a great pick for those summer days when everything seems light and happy.
- Variety of flourescent paints
- A small brush or toothbrush to spray with the colours
- Clear base coat to protect your natural nails
- Top coat to give glossiness and smoothness
Choose neon polishes that stand out against one another. In advance, make sure that you have prepared everything well, because splattering may get dirty.
Base coat first. Take neon polish with a paint brush and flick it onto your nails to create scattered patterns. Allow it dry before applying topcoat all over to preserve the pattern.
Candy Stripe Delight
Candies in Summer, looking like the vibrant neon stripes of rainbow capture the spirit of every candy stripe design. This is a playful spin on nail art and it can be used to give any outfit a shot of colour. These solid neon nails are balanced with strips of the same colours.
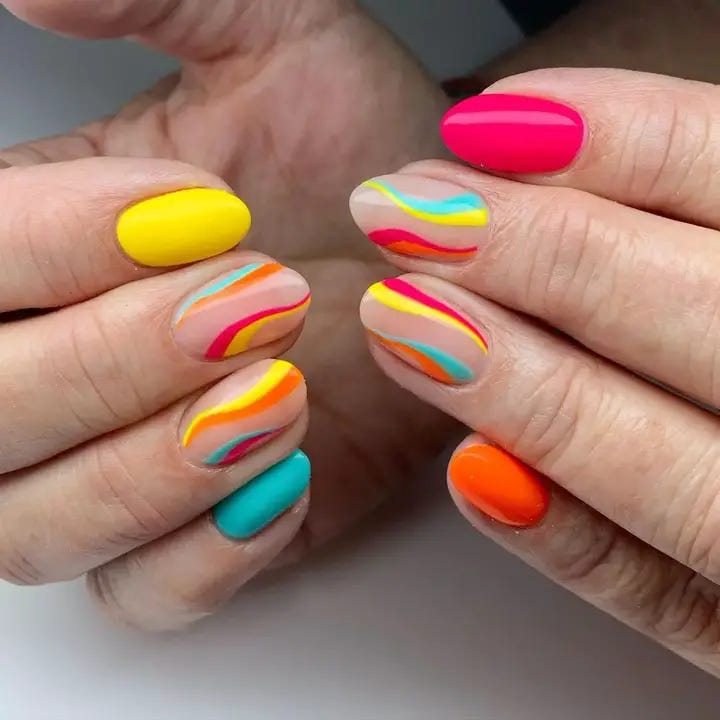
- Bright neon polishes in pink, orange, yellow, and blue
- Striping tapes or precise freehand application
- A thin detailing brush
Use a clear base coat as well as top coat for longer lasting wear.
When doing this at home, make use of the striping tape to plan where your lines will be for that clean appearance.
To protect your nails start with applying a base coat. Apply an undercoat if you want a neutral one. When dry, use either striping tape or your fine detail brush to achieve thin stripes in different neon shades. Get your finishing touch that gives off both sweet and strong appeal by sealing it with glossy topcoat.
Psychedelic Swirls
There is a whole range of bright nail polishes to be used as required. These bright designs and shades are so much fun and will get people talking at any summer event.
Advertisement
- Various gel polishes with vivid colors
- Fine detail brush
- Dotting tools
- Matte top coat for a contemporary look
Instruction:
- Apply one layer of different base colors on each nail then dry them.
- Use an ultrafine brush to draw freehand curves in contrasting colours.
- Add spots and other touches by using dotting tool.
- The finishing should be done off by applying a matte topcoat for something different, velvet-like texture.
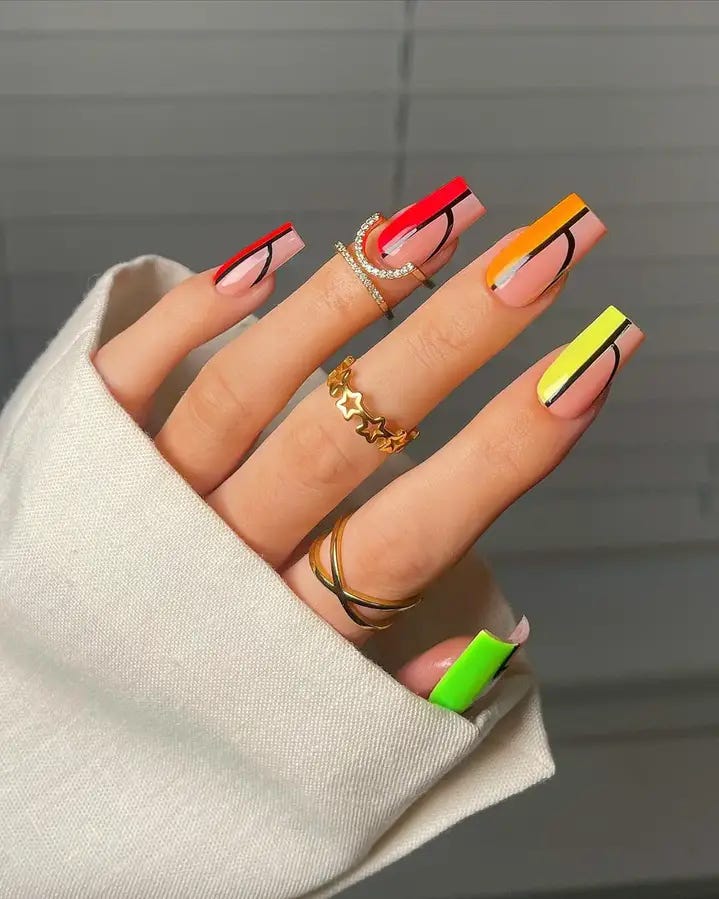
Sleek Neons And Subtle Accents
I am always mesmerized by the neatness of this artwork as a professional nail artist. A minimalistic, audacious expression is portrayed in its natural nail basis and neon boundaries contrasted with each other. The lines are put meticulously on it to give a sense of future that is classy but fun.

- Use neutral polish to make your nails healthier.
- Tape around the nails carefully to make straight edges where the neon borders shall be fixed.
- Pick bright edge neon polishes which are high pigmented.
If you want to do it yourself, take your time. Apply coat foundation, then wait until it dries completely. Next, use adhesive strips for accuracy and apply the polish in neon shades with a firm grip. For this style, less equals more so keep things simple.


0 Comments