Transform Your Nails into a Bold Summer Fashion Statement with 31 Red Shades & Designs! Discover the latest hues and patterns that will make your nails pop this season. Explore the hottest red summer nail trends and learn how to achieve salon-perfect nails at home. Get ready for a colorful journey through vibrant nail inspiration that will leave everyone talking!
Advertisement
Splash Of Passion
The ombre’s grace is timeless, but when it’s treated with the passion of red, it becomes a statement piece. The nails shown here are based on a clear foundation that goes from one end to anything red hot, marking the gentle change between a quiet day and an active summer evening. There are occasional splashes of red droplets which give chance for spontaneity making the manicure alive together with dynamic and polished look.
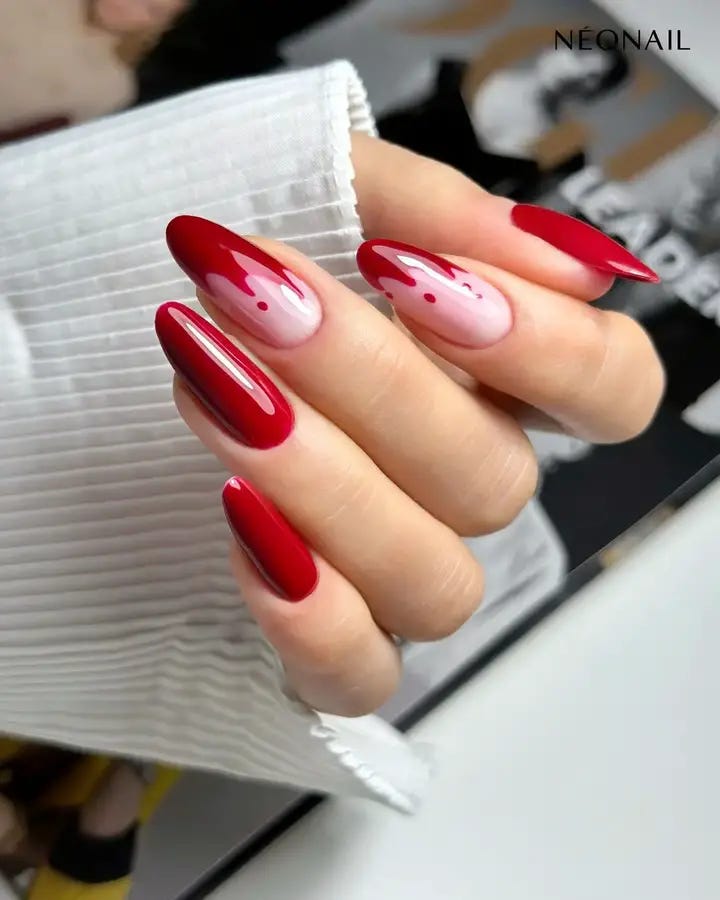
- Base Gel: Sally Hansen Miracle Gel
- Red Nail Polish: CND Shellac Luxe in “Hollywood”
- Dotting Tool for Splashes
- Top Coat: OPI GelColor Top Coat
Pro Tip: Using the dotting tool to place splashes can allow you random yet artistic placements.
Advertisement
DIY Guide:
- Apply clear base gel as per instructions and cure under lamp.
- Start near tips with red ombre effect going up.
- Use a dotting tool to create red droplets then cure again.
- Finish off your entire design with a coat of gel topcoat to make your nail art glossy forever.
Classic Red Meets Modern Design
Combining classic red with the sheer softness of pink, this design is perfect for people who like to mix old-fashioned and up-to-date styles. The shiny red is lively and strong, while the pale pink base provides a delicate stage for gentle summer love affairs or the sugary taste of summer fruit.
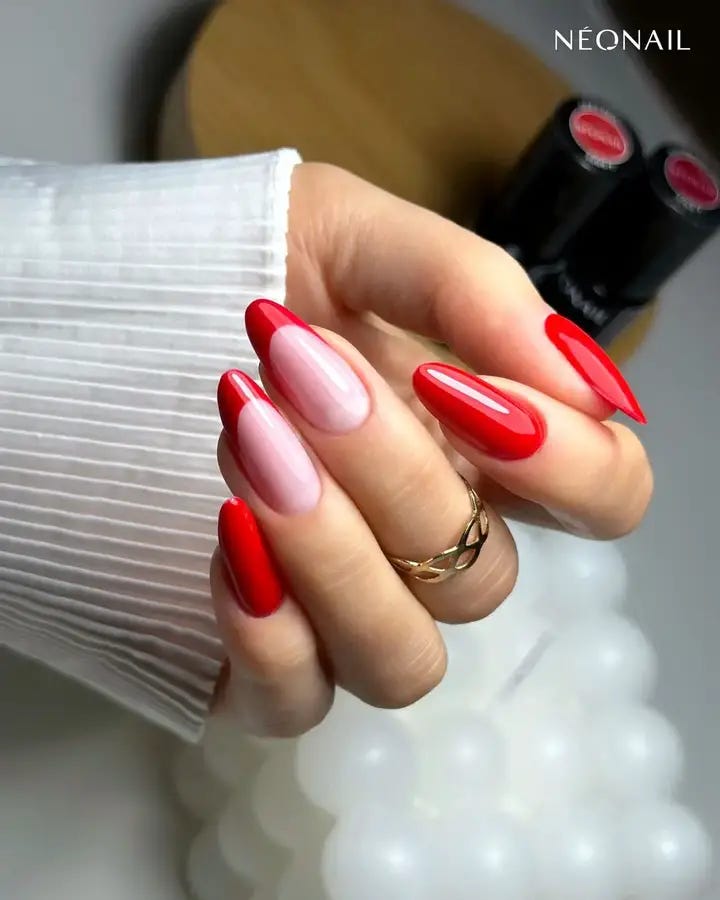
- Pink Base Polish: Essie “Muchi, Muchi”
- Classic Red Polish: OPI “Big Apple Red”
- Top Coat: Seche Vite Dry Fast Top Coat
Pro Tip: Blend your colors seamlessly by using a sponge to apply the red in small dabs at the tips and working it into the pink base.
Advertisement
DIY Tutorial:
- Paint your nails with “Muchi, Muchi” to achieve a subtle pink tint.
- Dab on “Big Apple Red” at the tips using a sponge and blend it softly into your base color.
- Apply “Seche Vite Dry Fast Top Coat” over your design to protect it and give it an intense shine.
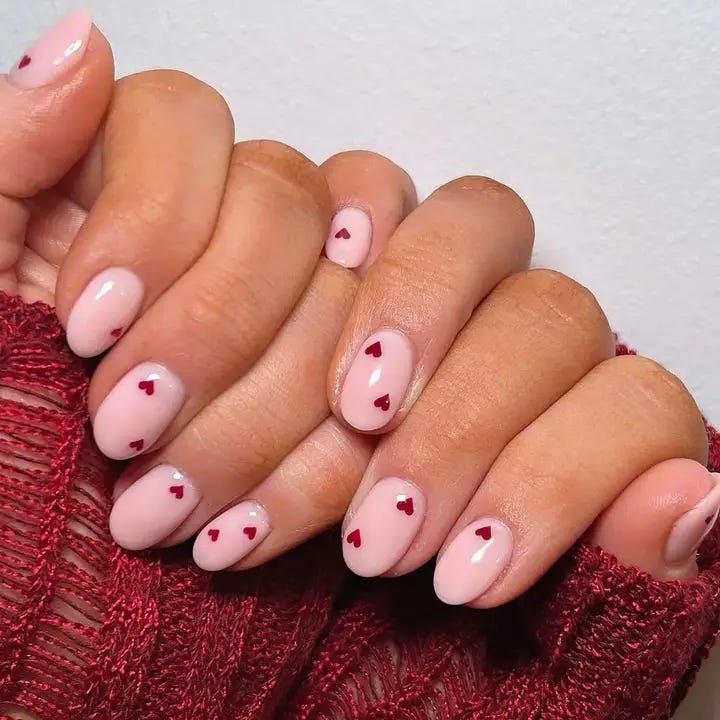
Heartfelt Detailing On Almond Claws
These oval-shaped fingernails can be seen as a blank space to show affection and love through tiny heart designs. Creating the impression of clear pink mixed with bold red hearts, this style creates an interesting opposition between fun and risk. It is a manicure that brings summer into your life with its bright energy and touches of caprice.
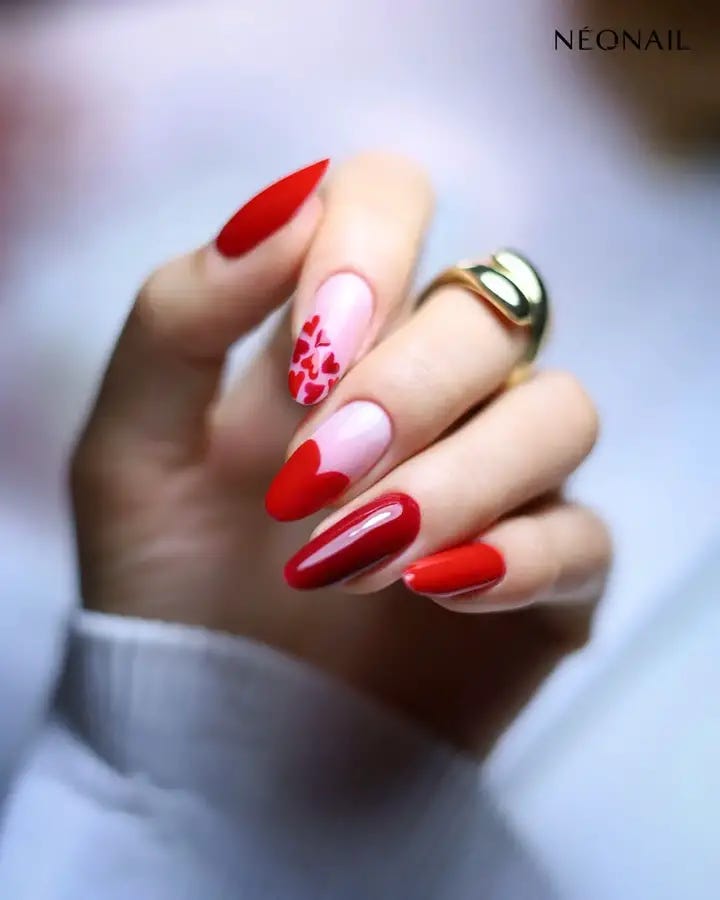
- Transparent Pink Nail Polish: OPI “Bubble Bath”
- Red Nail Art Paint: Orly Instant Artist Paint
- Brush for Hearts Detailing
- Top Coat: INM Out The Door Super Fast Drying Top Coat
Professional Tip: When painting hearts, make sure you keep your hand steady, and wait until each layer is completely dry before applying the following one so as not to smudge them.
Advertisement
Step-by-Step Instructions:
- Start with painting all nails in a base shade of “Bubble Bath” for sheer neatness.
- Use the art paint in red color along with detailing brush for creating small hearts.
- Finish off by applying quick-drying top coat over it that will give smoothness and durability.
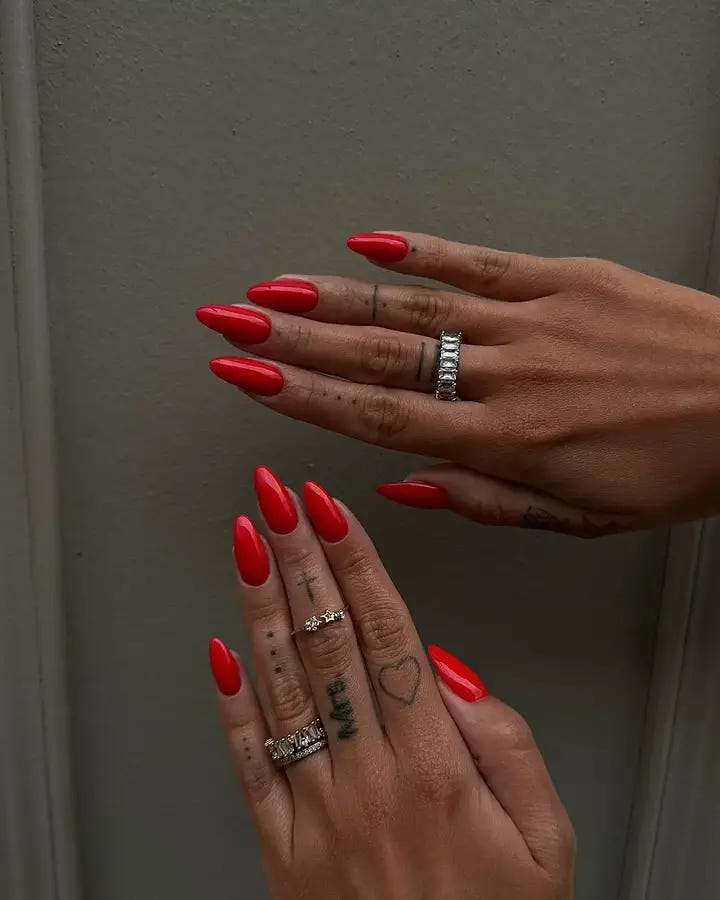
A Pop Of Cherry Red
What we have here is a fantastic fiery red color that can be worn by people with any type of skin. To make it look more modern, they used almond-shaped nails which give off a sleek feeling. The kind of red used in this design is fun and lively, perfect for sunny summer days or an amazing night out on the town. This shade will definitely catch people’s attention and get them talking.
The Deep Wine Adventure
These nails remind me of a deep burgundy, a dark red that is all about secrets and knowledge. The stiletto shape takes risks and gives some attitude to the traditional red, making it look sexy and self-assured. This darker hue works perfectly for someone who wants their summer nail design to say something loud.
Red Stiletto Drama
The stiletto nails are bold and beautiful with their strong shape and bright red shade, made even more luxurious by adding precious stones as accents. This design is created for those who want their nail art to reflect confidence and passion without any fear.
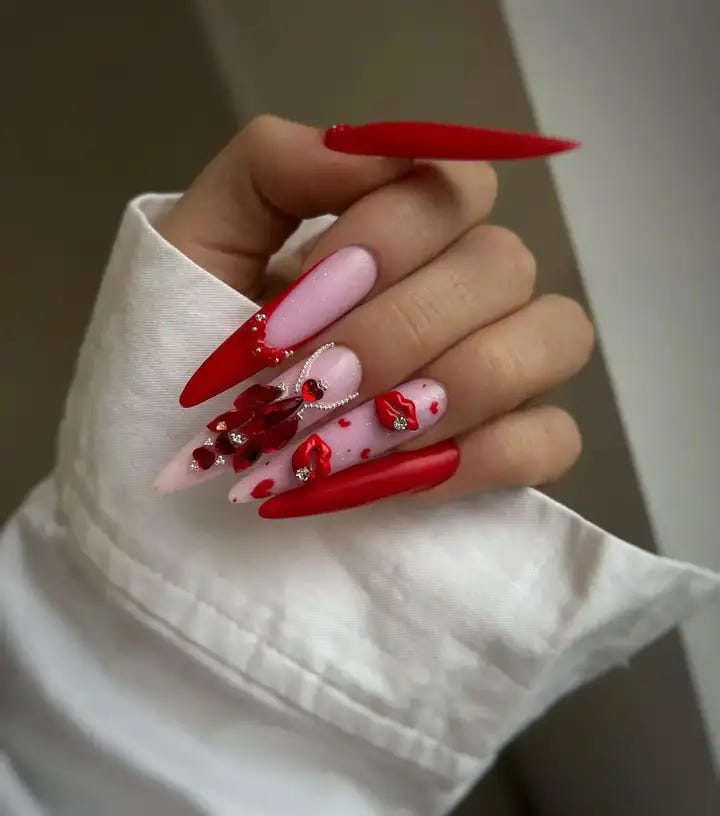
- Red Gel Polish: Gelish “Red Roses”
- Pink Gel Polish: Gelish “Light Elegant”
- Rhinestones and Charms
- Gel Top Coat: Gelish “Top It Off”
Pro Tip: Place a dot of gel top coat where you want the rhinestones to be, then cure them under UV light to make sure they stay in place.
Step By Step Tutorial:
- Paint alternating nails with “Red Roses” and “Light Elegant,” curing after each coat.
- Use a gel top coat to attach rhinestones all over the nails.
- Finish off with another layer of top coat for added shine and durability.
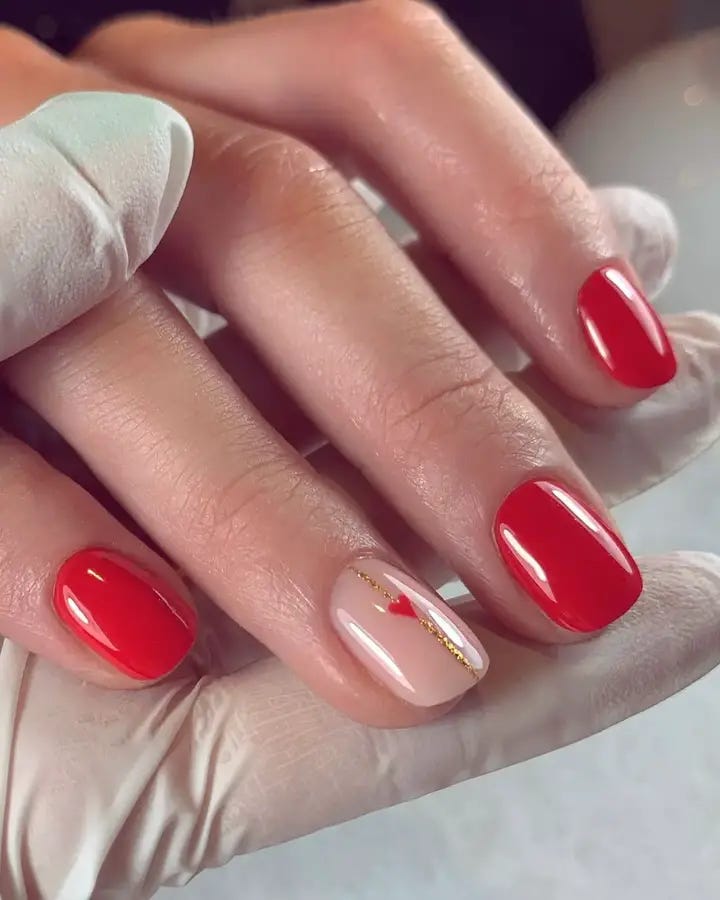
Dark Elegance With A Glimmer Of Light
This design has a curious, dark-coloured red that merges into an alluring ombre effect with a touch of white outline. These nails are a modern twist on the French manicure, which can be appreciated by people who like combining both traditional and modern styles.
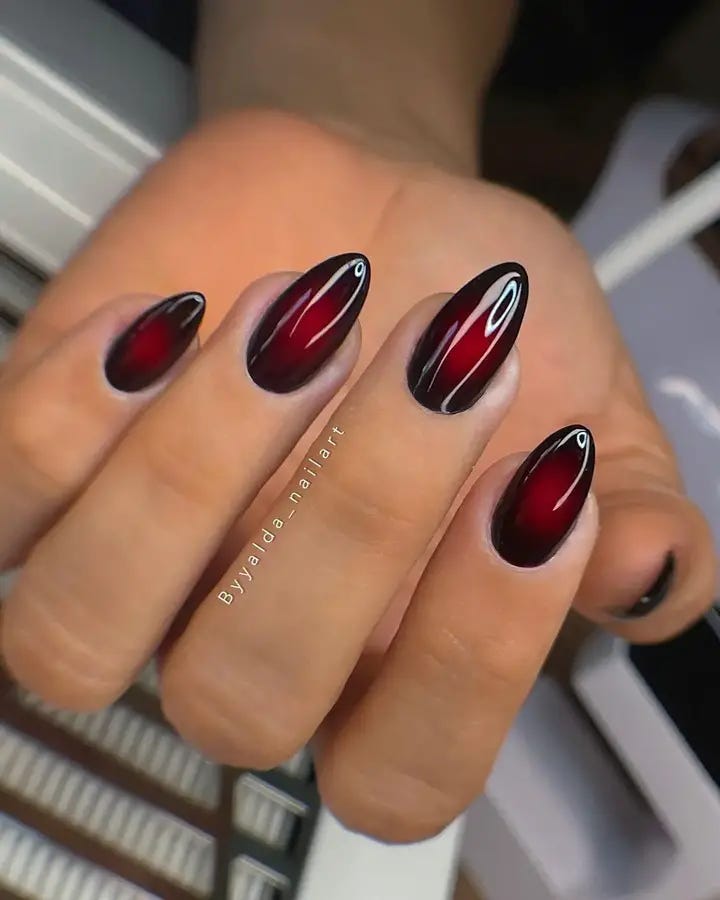
- Dark Red Polish: OPI “Malaga Wine”
- White Nail Art Pen: Sally Hansen Nail Art Pen in “White”
- Top Coat: OPI Top Coat
Pro Tip: Apply the white outline after completely dry red paint to create clean, sharp lines.
DIY guide:
- Apply two coats of malaga wine; allow them to fully dry.
- Draw Carefully The White Outline On Each Of The Tips Of The Fingers.
- Seal in the Design With A Top Coat For protection And Shine.
Radiant Ruby: A Lustrous Take On Classic Red
Nothing beats the appeal of a ruby red manicure which is vibrant and attractive. On these nails, there is a sleek, shiny texture that seems luxurious; then it ends with squared-off edges that appear modern also classic because they seem both daring and stylish. It’s like you can smell cherries that have been ripened in the sun when you look at this shade, making it perfect for day events or a hot night out.
- Base Coat: Essie “First Base”
- Ruby Red Nail Polish: Zoya “Carmen”
- Top Coat: Glisten & Glow Top Coat
Pro Tip: Smooth even application is crucial to achieving this look. For most people, two coats are enough; however, if it isn’t bright enough after two layers, applying a third thin coat will make all the difference.
DIY Guide:
- To avoid staining and improve polish adhesion start with a base coat.
- For full opacity apply two to three thin layers of Zoya “Carmen.”
- Finally finish off with high-shine top coat for durability as well as wet-look finish.
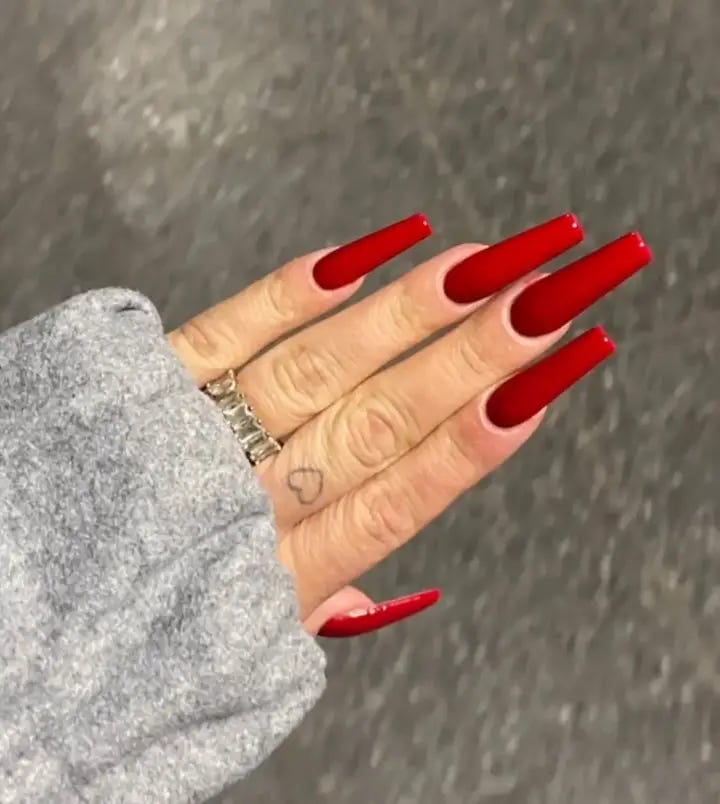
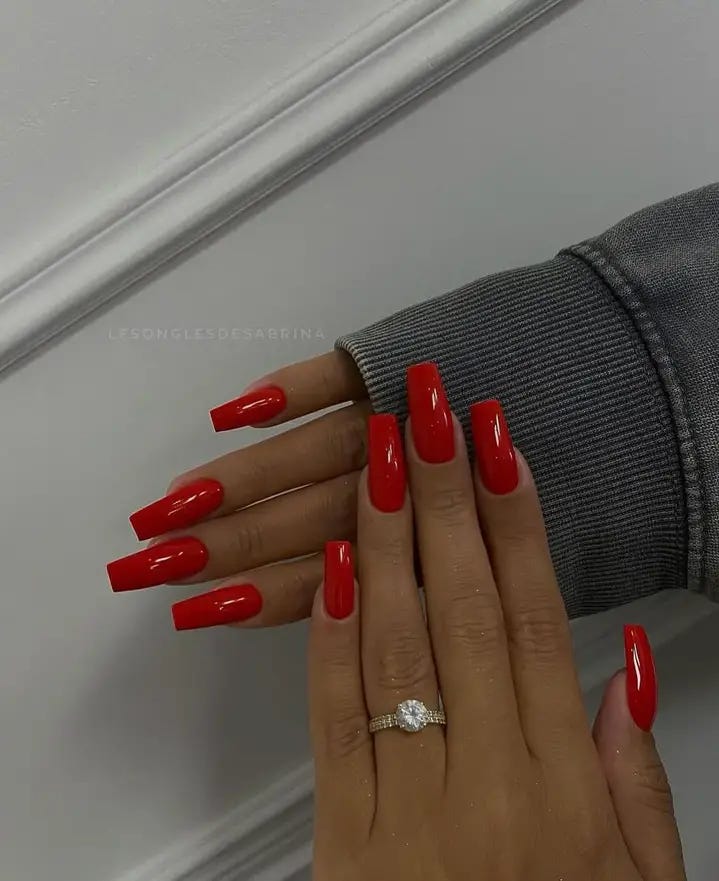
The Matte Red Revolution
Here is a picture of matte red nails that are bold and undeniably modern. Such a finish shows how powerful texture can be. With no shine, the attention is focused more on the shade itself which is a flaming true red color. Additionally, the elongated coffin shape gives it an avant-garde feel and makes a statement as bold as it is fashionable.
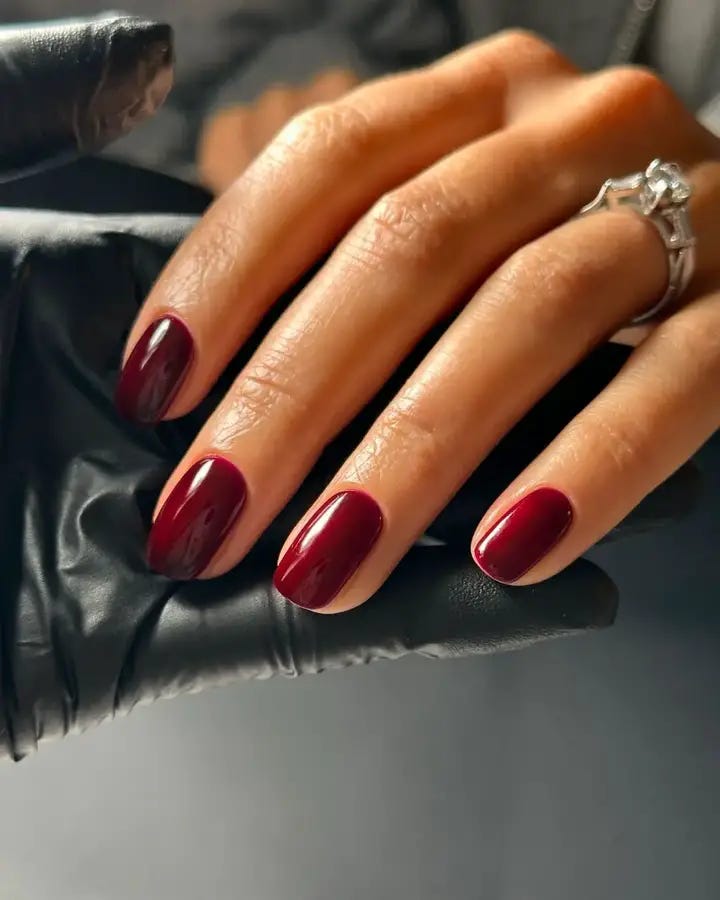
The Enigmatic Burgundy: Deep Red With A Twist
Sophistication and obscurity are what the burgundy nails represent. The dark, wine-like hues of this polish give it an opulence of color that is hard to match with any other shade in summer reds. It has an egg shape which is more feminine and classic looking than square or round ones, making them suitable for all events.
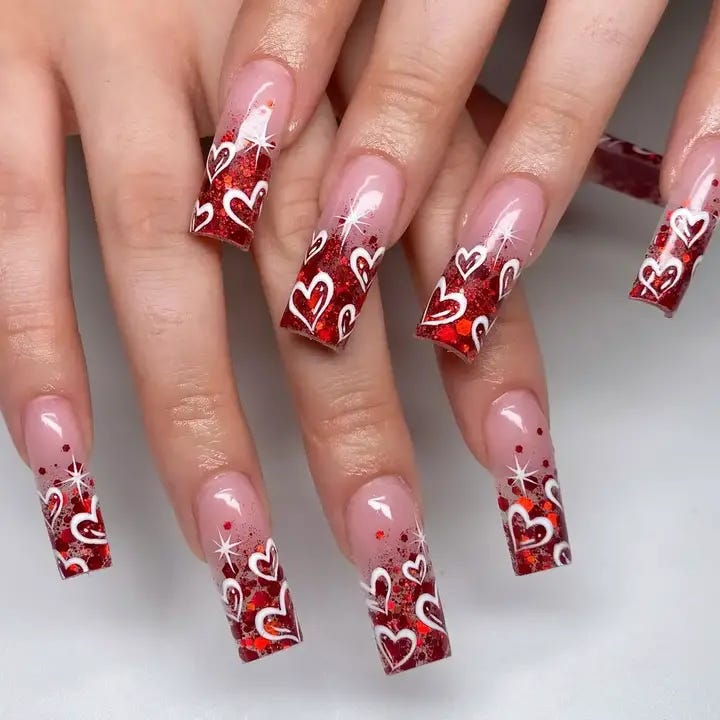
Sparkling Red Artistry
This guide will show you how to get your nails looking as amazing as they ever can. The red artistry on display is incredible, there’s a combination of sparkling glitter and white artistic strokes that lead to cute little heart shapes. It has a clear, natural nail base going up towards the shiny red tip that defines summer fun in an elegant way. It’s a perfectly designed work that conveys the happiness of summer festivals.
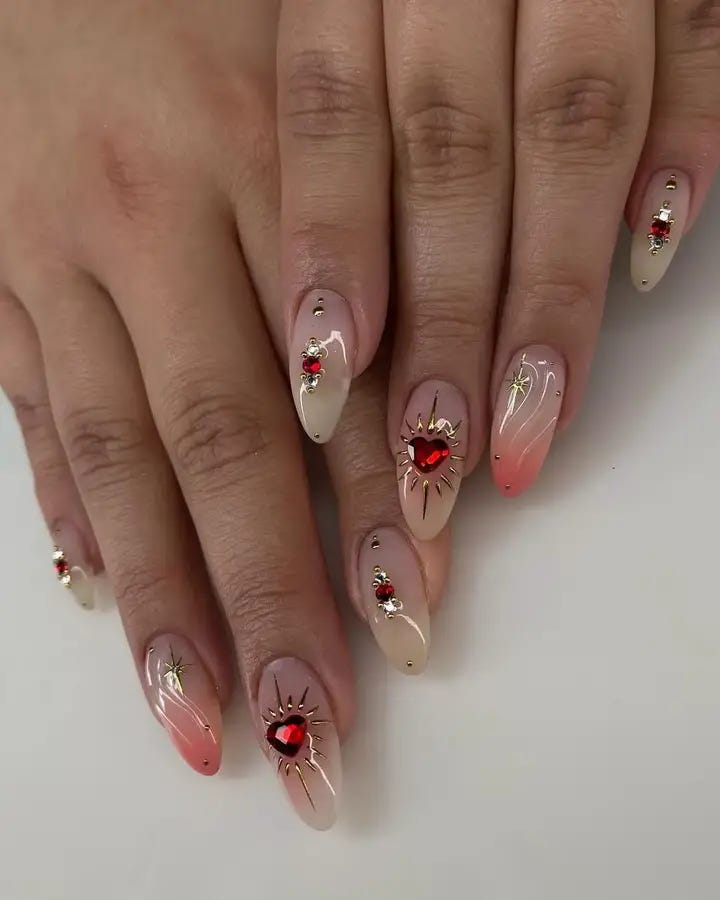
Jewel-Toned Elegance
These nails have jewel-like decorations on them that go from skin-colored to pale pink. The luxuriousness of the design is improved by adding small gold elements. This style is ideal for those who want a mix of elegance and intricate beauty, and can be worn during summer day or evening events.
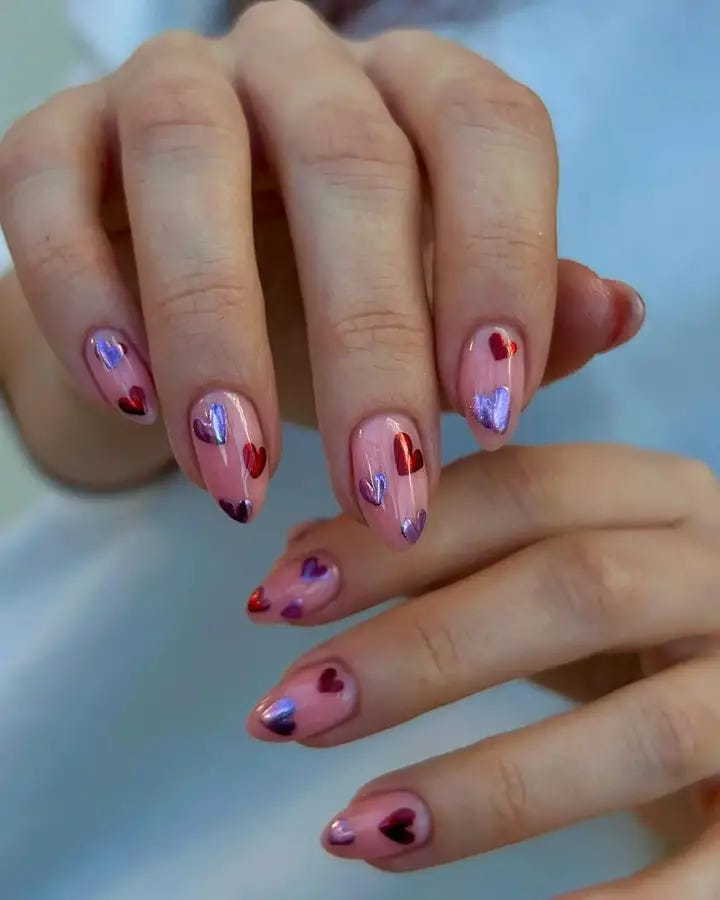
Hearts Aflame
For a presentation of love, these nails are decorated with shiny heart shapes colored in red and lavender against a see-through pink foundation. It is a simple design but the hearts make it full of affection so that it becomes an ideal match for any summer love affair or conveying one’s jolly mood.
The Chic Simplicity Of Gradient Red
Gradient nails are beautiful in which the natural pink color on them flows seamlessly towards a rich burgundy tip. It is an understatement of style that is sophisticated yet versatile for any summer event, from the gentle blush of a summer morning to the intense warmth of a sunset.
- DND “Pink & White” Sheer Pink Gel
- Gelish “Plum and Done” Burgundy Gel Polish
- Gelish “Top It Off” Gel Top Coat
- Sponge for Gradient Effect
Pro Tip: The sponge should be lightly dabbed to create smoother gradient transitions; you should also cure between layers so as to avoid colors bleeding into each other.
DIY Guide:
- Apply “Pink & White” as your base and cure it.
- Start by sponging “Plum and Done” at the tips, then blend up towards the middle followed by curing it.
- Finish off with a top coat for glossy finish and cure again.
Modern Art On Nails
Gradient nails are beautiful in which the natural pink color on them flows seamlessly towards a rich burgundy tip. It is an understatement of style that is sophisticated yet versatile for any summer event, from the gentle blush of a summer morning to the intense warmth of a sunset.
- DND “Pink & White” Sheer Pink Gel
- Gelish “Plum and Done” Burgundy Gel Polish
- Gelish “Top It Off” Gel Top Coat
- Sponge for Gradient Effect
Pro Tip: The sponge should be lightly dabbed to create smoother gradient transitions; you should also cure between layers so as to avoid colors bleeding into each other.
DIY Guide:
- Apply “Pink & White” as your base and cure it.
- Start by sponging “Plum and Done” at the tips, then blend up towards the middle followed by curing it.
- Finish off with a top coat for glossy finish and cure again.
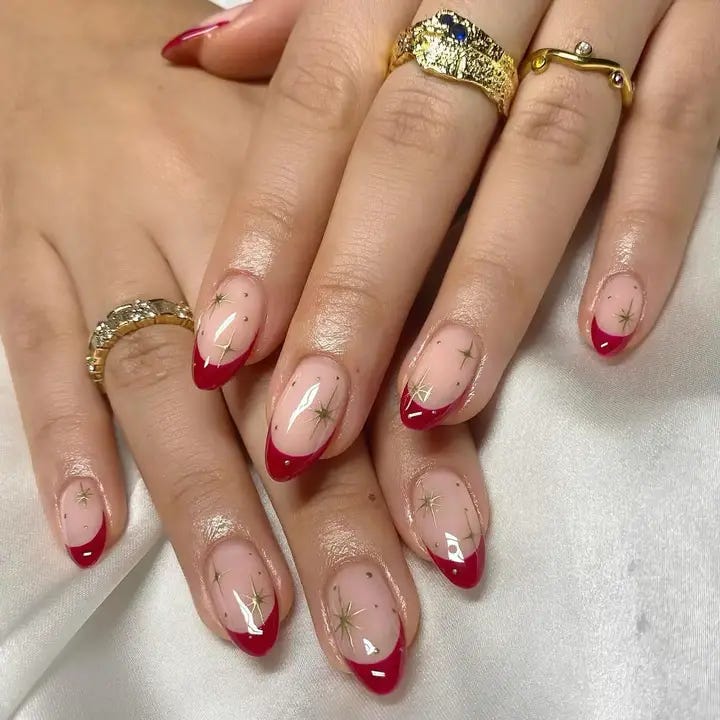
Starlight Red
This plan shows off about summer evenings under the stars, characterized by faint gold dots and stars on a see-through pink surface which fade away into deep red tips. It’s a look that is both fun and sophisticated, making it perfect for hot nights out or fancy summer parties.
- Essie “Ballet Slippers” — Sheer Pink Polish
- OPI “Red Hot Rio” — Red Polish for Tips
- Nail Art Star Decals — Gold Star Stickers
- Artistic Nail Design “Gold Digger” — Gold Nail Art Paint
- INM Northern Lights Holographic Top Coat — Top Coat
Pro Tip: Apply star stickers with tweezers for precision placement; seal with top coat to ensure they stay put.
Step-by-Step Instructions:
- Begin with a base of classic sheer pink “Ballet Slippers.”
- Create contrast by painting bold red tips using “Red Hot Rio.”
- Apply gold star decals and dot accents using “Gold Digger.”
- Finish with holographic top coat for extra sparkle.
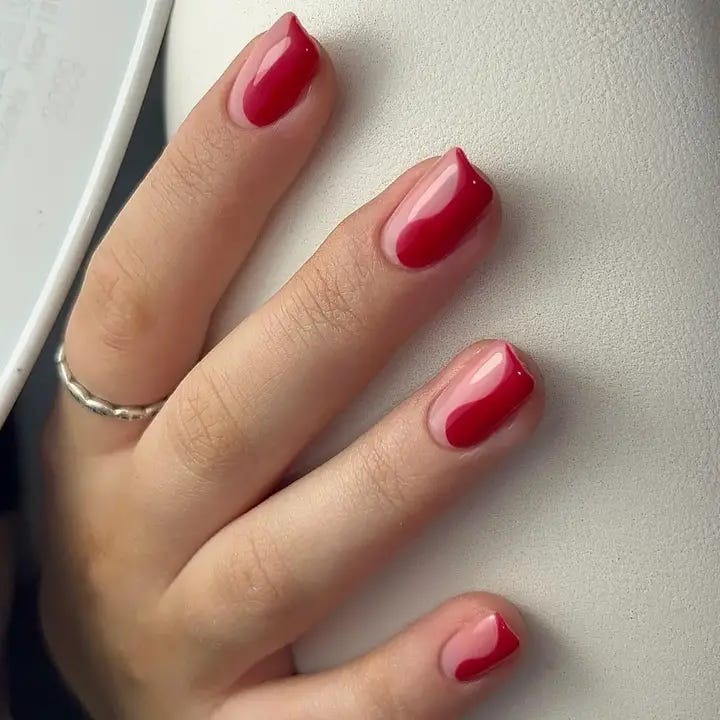
Swirling Seduction In Red
Swirls of deep and bright red shades make an alluring dance, the art where the colors seduce each other. This shiny finish captures light and reflects the vibrant energy of a summer fiesta. It is bold, unforgivingly glamorous, and will simply stop people in their tracks.
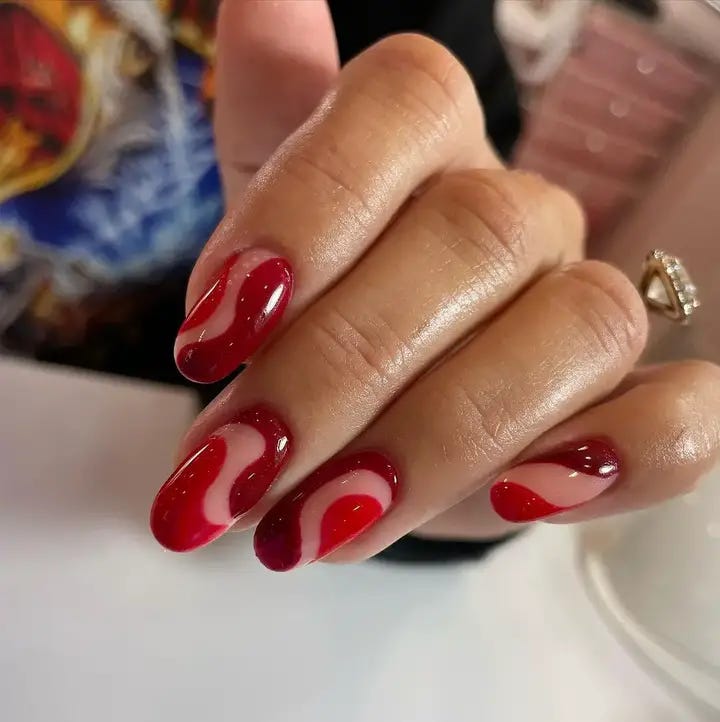
- Base Coat: Sally Hansen Miracle Gel Base Coat
- Red Nail Polishes: Various shades from Essie and OPI for the swirls
- Detailing Brush for Swirls
- Top Coat: Sally Hansen Miracle Gel Top Coat
Pro Tip: Apply the swirls while the base color is still a bit tacky to blend the colors effortlessly.
DIY Guide:
- Apply a base coat until it is just sticky.
- Paint your nails with deep red as your base colour.
- While wetting use detail brush to make a whirlpool with lighter red polish.
- When satisfied with design let it dry then finish with top coat glossiness.
Linear Red Over Nude
Here, we observe the minimalist elegance of clean lines on a naked base. These red bold stripes against a soft background remind us of current art and give your summer looks an interesting but refined edge.
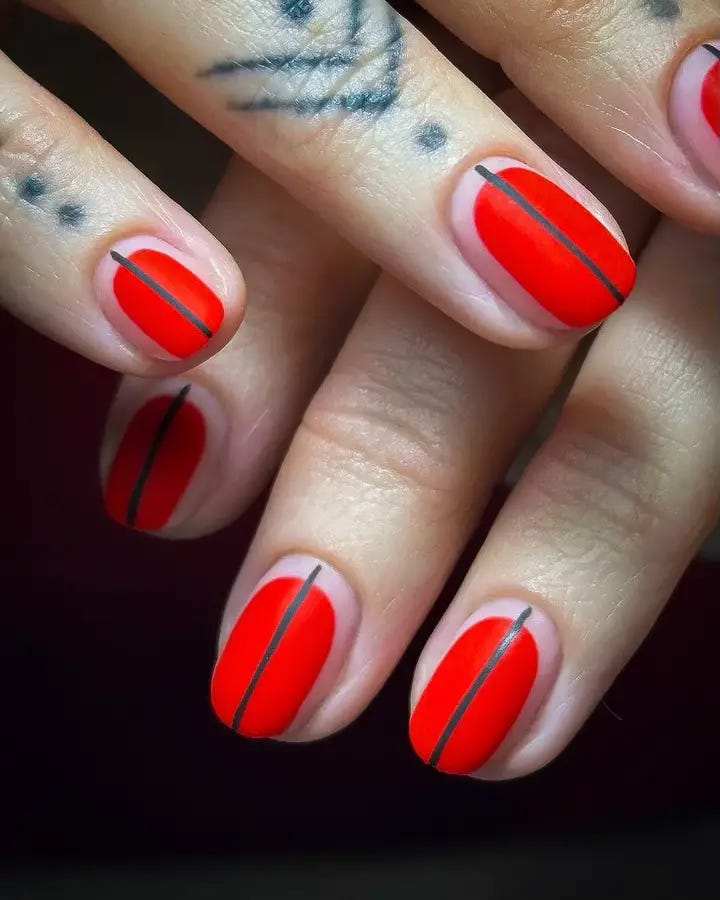
- Nude Nail Polish: Zoya “Rue”
- Red Stripe Polish or Tape
- Top Coat: Seche Vite Dry Fast Top Coat
Pro Tip: If you’re using polish for the lines, keep your hand steady and use a fine brush. If you prefer tape, make sure the base is completely dry before applying it.
DIY Instructions:
- Paint all of your nails with the nude polish as a base coat.
- On each nail, create thin red lines using striping tape or a fine brush.
- Add top coat to finish off the look and lock in the design.
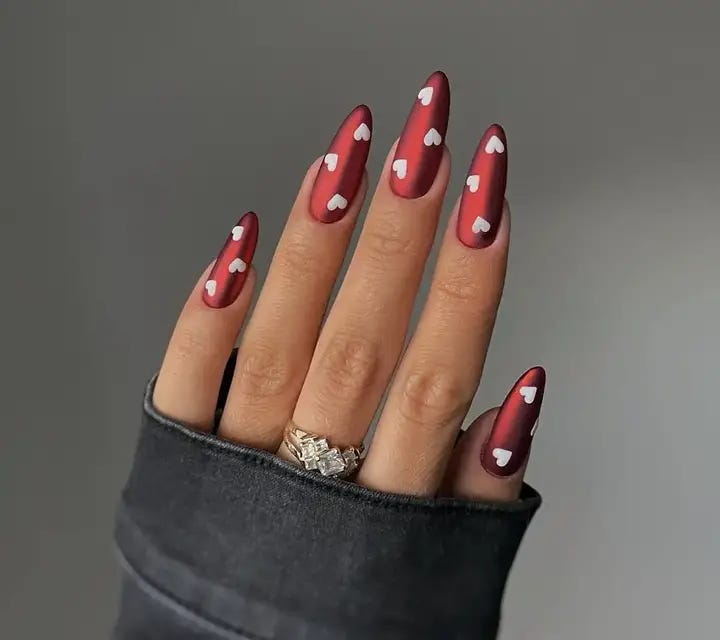
Romantic Red Metallics And Hearts
This marriage of love and wealth pairs shiny metallic red with soft pink and is covered in tiny hearts. The design is elegant in a whimsical way; therefore, it would be great for starlit date nights or stylish summer weddings.
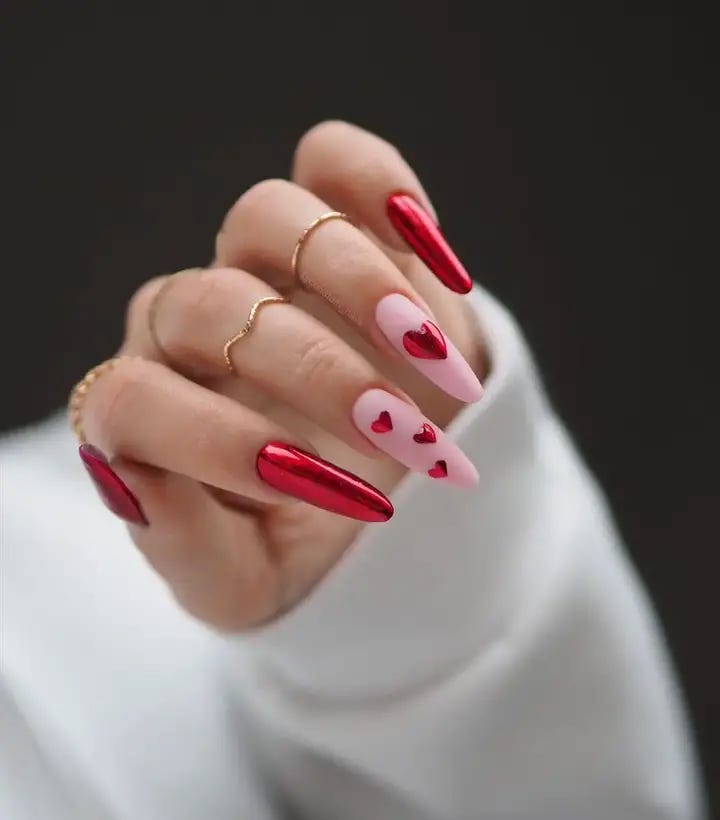
- OPI “Put it in Neutral” — Soft Pink Polish
- Essie “Penny Talk” — Metallic Red Polish
- Heart Stencils or Stickers
- Essie “Good To Go” — Top Coat
Pro Tip: If you want to achieve an exact shape, use a stencil or sticker as a guide to place the hearts; then fill them in with the metallic polish.
Guide:
- Base coat with “Put it in Neutral.”
- Stick on heart stencils onto your nails then paint over them with Penny Talk for shiny hearts.
- Remove stencils cautiously and seal the look using top coat which will make it last longer and add some shine.
Lustrous Red Almonds
These almond-shaped nails have glamour for centre stage, finished with a shiny high polish in an intriguing ruby red. The deep richness of the colour is great for making that bold statement, while the pointed shape adds a touch of drama and sophistication.
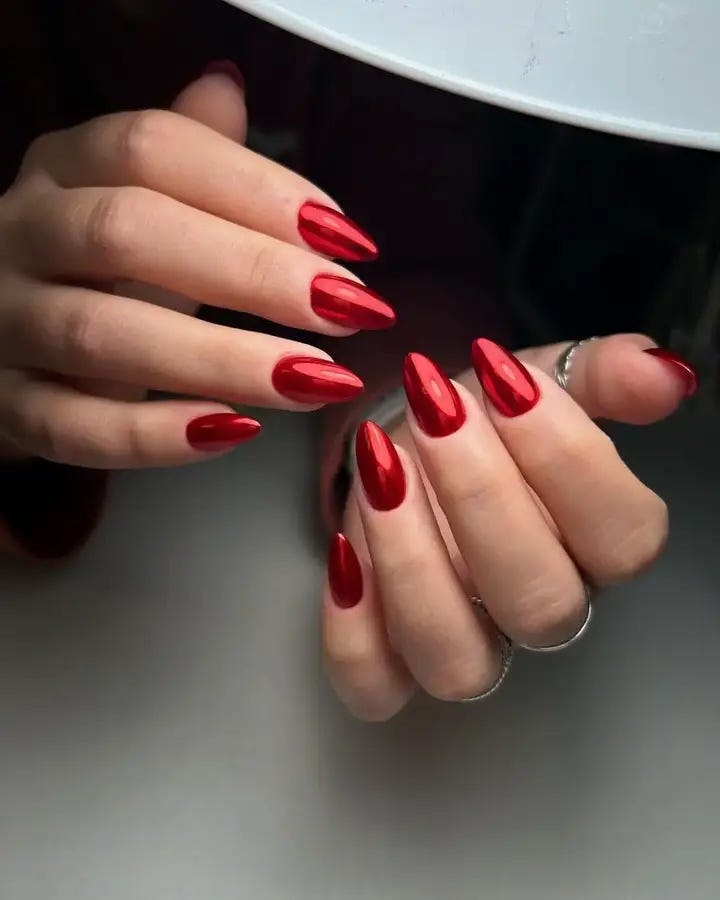
- Base Coat: OPI Natural Nail Base Coat
- Red Nail Polish: China Glaze “Ruby Pumps”
- Top Coat: Essie Gel Setter Top Coat
Pro Tip: For almond nails, file the sides to a taper and round out the tip, creating that classic silhouette that’s both daring and elegant.
DIY Guide:
- To protect your nails and ensure a smooth application apply base coat.
- Paint using “Ruby Pumps,” which is packed with depth and shimmer.
- Use the Gel Setter Top Coat to seal it for a long-lasting, chip-resistant shine.
Love-Struck Pink
The nail design has beautifully captured the true meaning of love. The light pink base is like a blank sheet that receives little red hearts which in turn brings forth affectionate emotions. If you want a more subtle yet significant statement of fashion, then this is perfect for you.
- Essie “Ballet Slippers” — sheer pink polish
- Sally Hansen “Rapid Red” — red nail art polish
- Seche Vite Dry Fast Top Coat — top coat
Pro Tip: When working with small designs such as hearts, it’s best to use a thin brush for accuracy. You can always add more shape but correcting too much width is difficult.
DIY Steps:
- Start by applying “Ballet Slippers” for an even, transparent foundation.
- With your fine-tipped brush dipped into “Rapid Red,” gently draw on hearts.
- Finish off with Seche Vite Top Coat to seal in shine.
The Classic Red With A Twist
The first nail design idea is a coral shade that is very sophisticated and has a summertime flair. This particular hue bridges the gap between orange and pink, giving off a soft yet vibrant beach vibe. When it comes to the almond shape of nails, it adds a contemporary and delicate aspect to the hands of the wearer, making this look suitable for both summer gala or even a trip on the beach.
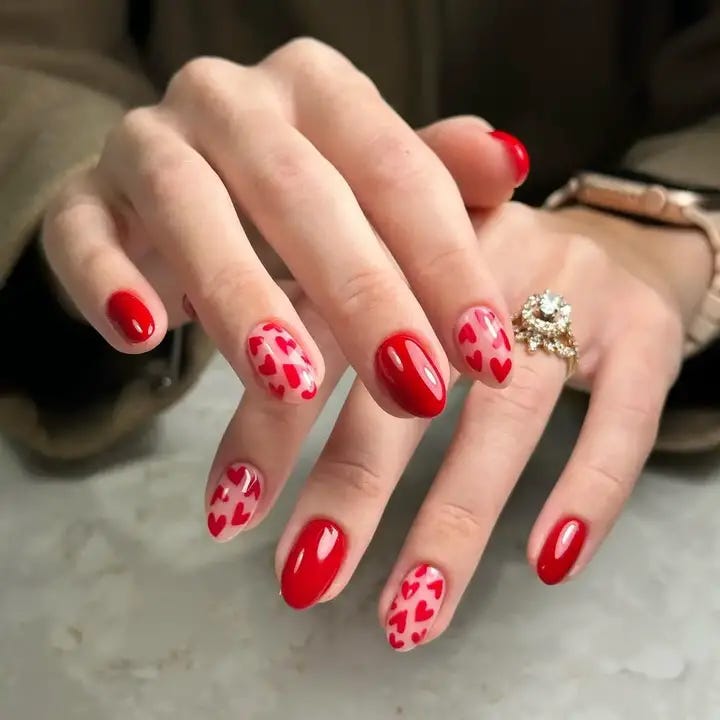
Bold And Beautiful
This nail art idea combines the pure innocence of white with the fun nature of pink in a romantic way. When two classic colors are mixed together like this, it creates an everlasting stylishness which is ideal for bright summer days. The hearts included here aren’t just cute — they also represent love during summer and imaginative dreams.
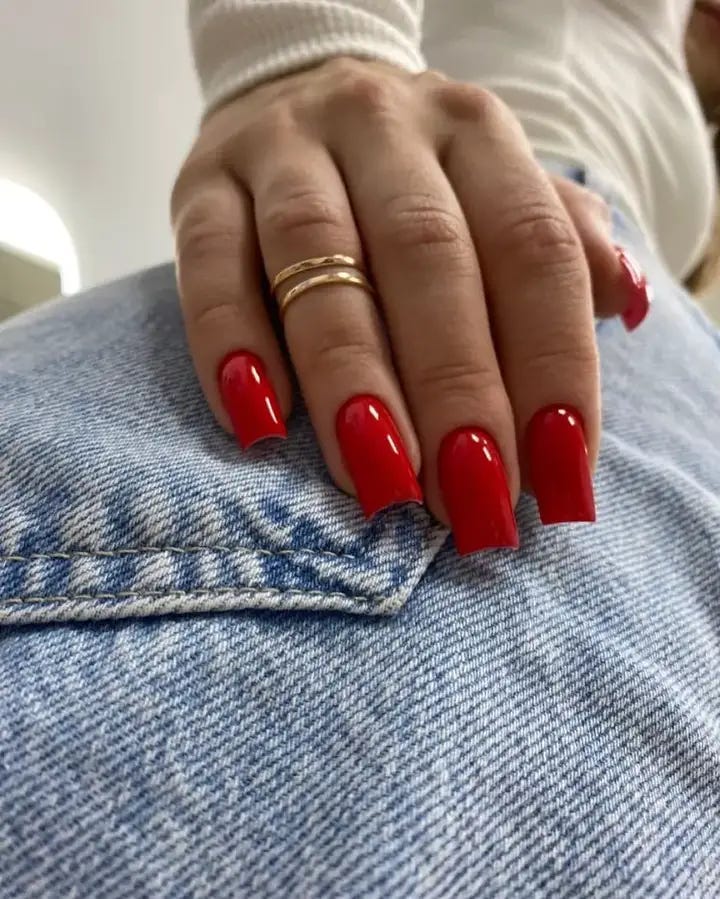
Nautical Chic For Summer
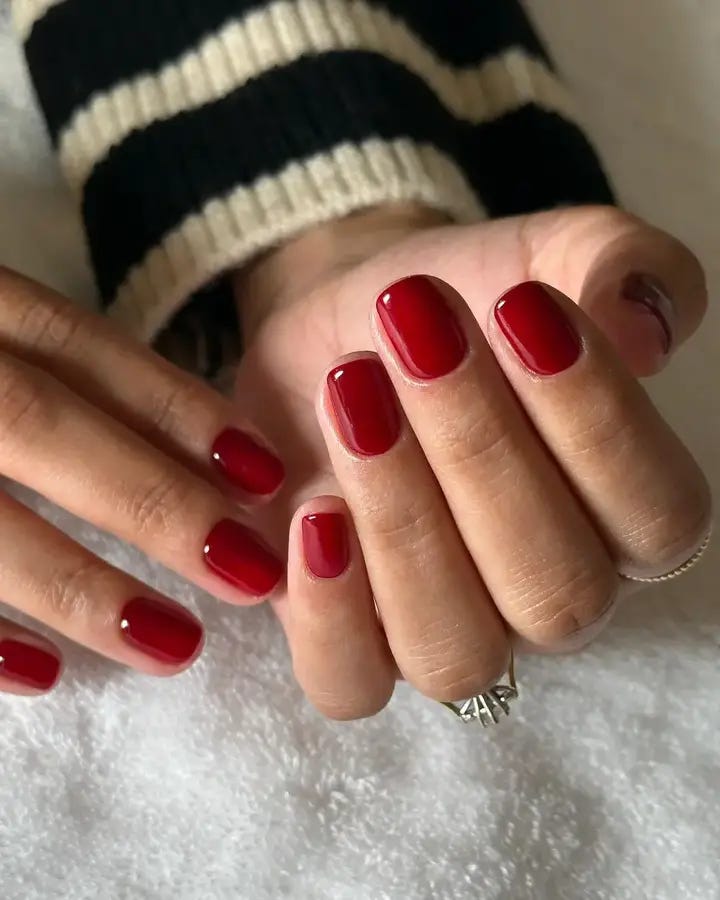
Short nails have never been classier than with this glossy, bright and chic red polish. This design is beautiful because of how simple it is — the deep color speaks for itself. It just goes to show that sometimes you don’t need much to make a statement.
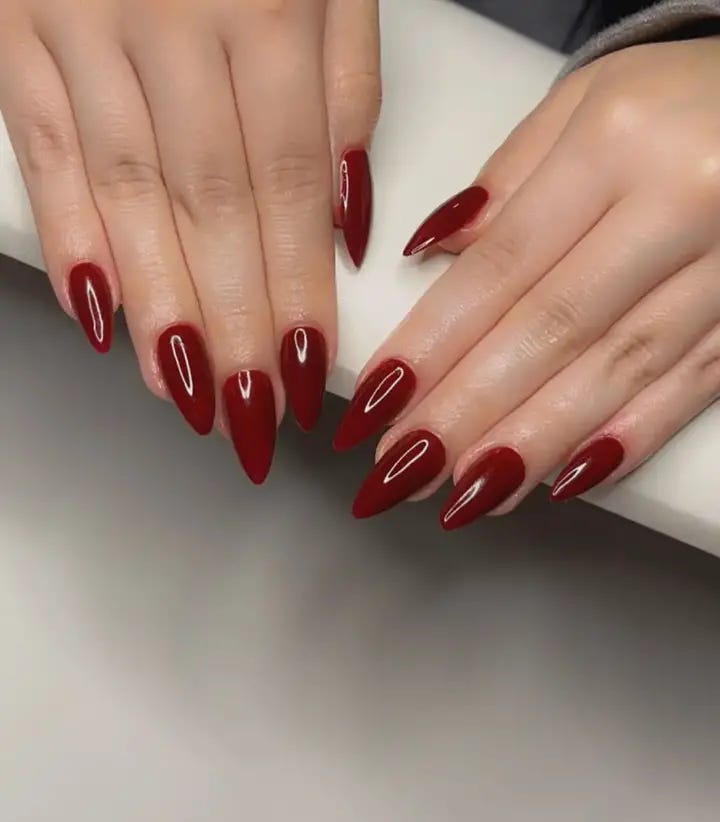
The Elegance Of Classic Red
There’s nothing like a red manicure to make you look beautiful all the time. These nails have a dark, rich shade of red that is both daring and elegant. They are slightly rounded at the top which gives them an updated look, while still being inspired by old fashioned style icons in history. For any summer gathering, whether it be casual picnics or evening galas, these nails shout loud about how much I love my passion for red.
Regal Red Accents
This plan is a wonderful match of class and invention. The deep red polish worked with naked accents gives it a glamorous touch, whereas the cautious incorporation of golden decorations and white elements gives it an imperial look. These nails are more than just regal; they are ideal for grand events or fancy nights out.

- Nude Nail Polish: Essie “Lady Like”
- Deep Red Nail Polish: OPI “Got the Blues for Red”
- Gold Nail Foil
- White Nail Art Paint: Sally Hansen Nail Art Pen in “White”
- Nail Adhesive for Embellishments
- Top Coat: Seche Vite Dry Fast Top Coat
Pro Tip: Use tweezers while applying the nail foil and embellishments to enhance accuracy. Secure larger items such as pearls or charms with a nail adhesive instead of using a top coat.
DIY Steps:
- For the naked base, paint your nails with “Lady Like” and use “Got the Blues for Red” on sections that should be red.
- Use nail foil along with white nail art pen to add details.
- Apply any embellishments using nail adhesive and allow them to dry.
- Finish up by applying Seche Vite Top Coat which will make them shine longer and smoother.
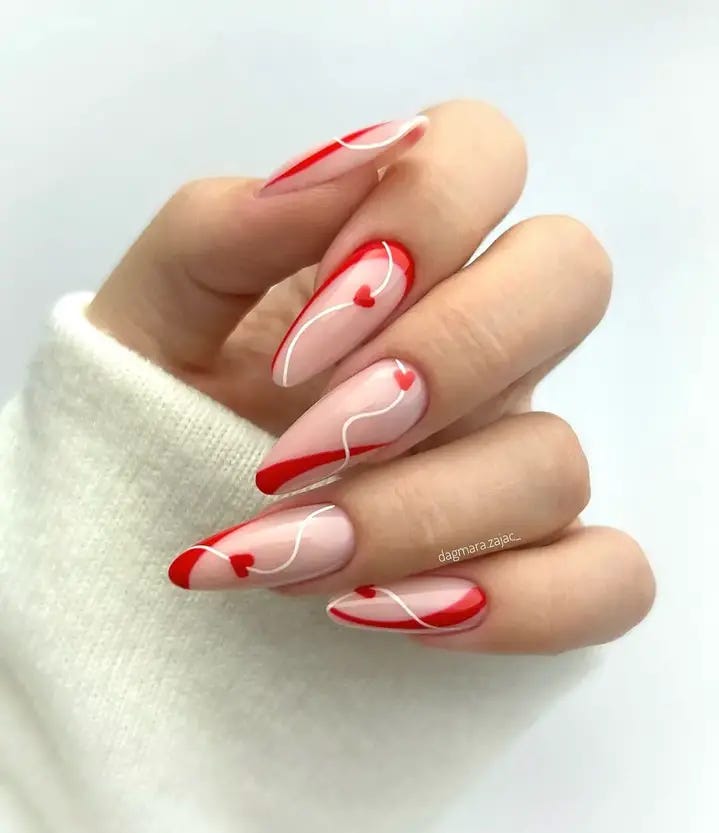
Bow Elegance
Entertain this stunning design to make it more dynamic. The flowers are white and with red tips which creates a contrast between them and the boldness of their colors as well as making them look delicate on top of having a nude base that is see-through.
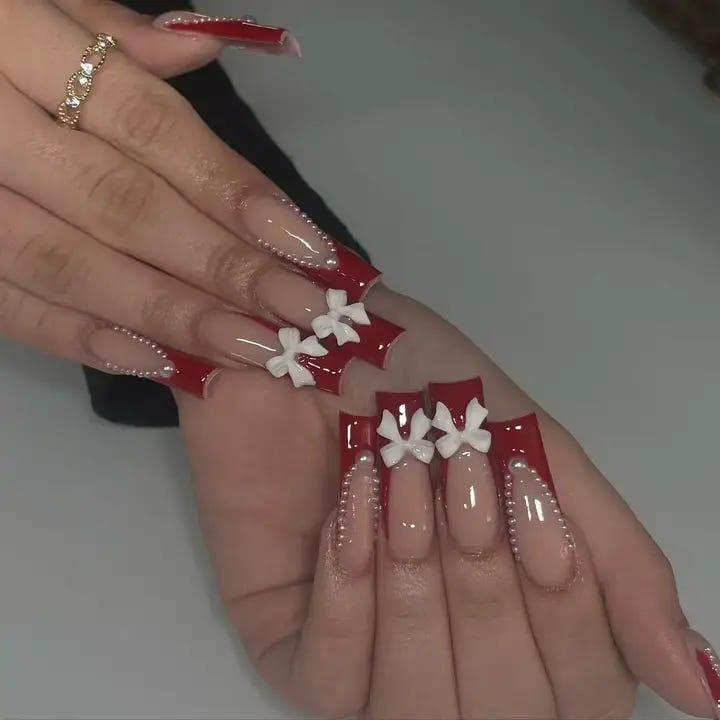
- Transparent Nail Varnish: OPI “Bubble Bath”
- Acrylic paint (red) for french tips
- Acrylic paint (white) for flowers
- Top Coat: INM Out The Door Top Coat
A professional suggestion would be to draw dots and drag outwards using a fine brush so as to form petals when drawing flowers.
Abstract Elegance
A contemporary masterpiece is what this design represents; the combination of matte and glossy giving it an abstract appearance. The rich, flat red base is divided by lustrous metallic silver lines that create an arresting contrast. This is a visually impactful and tactilely diverse design that is ideal for the trendy person.
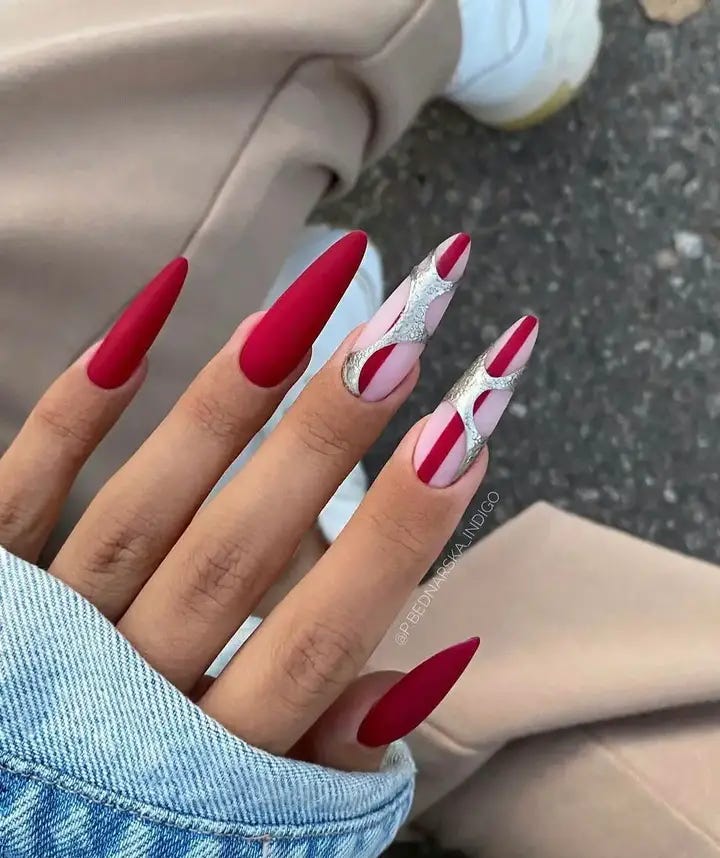
- Matte Red Polish: OPI “Matte Top Coat” over a red base
- Metallic Silver Polish: Essie “No Place Like Chrome”
- High-Gloss Top Coat for Accents
Pro Tip: Apply the metallic accents after the matte coat has fully dried to avoid smudging and to enhance the textural contrast.
Whimsical Hearts
This plan is a wonderful match of class and invention. The deep red polish worked with naked accents gives it a glamorous touch, whereas the cautious incorporation of golden decorations and white elements gives it an imperial look. These nails are more than just regal; they are ideal for grand events or fancy nights out.
- Nude Nail Polish: Essie “Lady Like”
- Deep Red Nail Polish: OPI “Got the Blues for Red”
- Gold Nail Foil
- White Nail Art Paint: Sally Hansen Nail Art Pen in “White”
- Nail Adhesive for Embellishments
- Top Coat: Seche Vite Dry Fast Top Coat
Pro Tip: Use tweezers while applying the nail foil and embellishments to enhance accuracy. Secure larger items such as pearls or charms with a nail adhesive instead of using a top coat.


0 Comments