Nautical Luxe: Navy Blue and Silver for a Sophisticated Look. Embrace a nautical theme with a luxurious twist by pairing navy blue with silver accents. This classic combination offers an elegant yet bold aesthetic, suitable for both casual and formal wear. Add a touch of silver striping or anchor designs for a thematic yet refined appearance.
Swirling Blue And Silver Marble Art
Professional Insight and Description: The swirling blue and silver marble design encapsulates a dramatic and elegant visual feast. The technique involves layering different shades of dark blue and royal blue, interspersed with icy white and silver veins that mimic natural marble. The perimeter of each nail is embellished with sparkly silver glitter, enhancing the luxurious feel and adding a touch of bling. This design is ideal for those seeking a bold statement with their nail art.
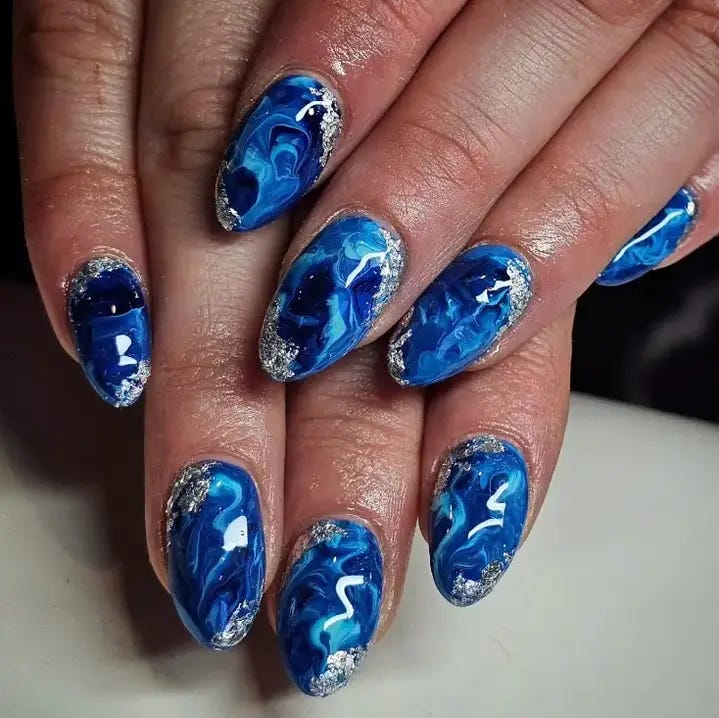
- Base colors: Essie “Butler Please” and “Blanc”
- Marbling tool: Fine-tip dotting tool or toothpick
- Silver glitter: Ultra-fine silver craft glitter
- Top coat: OPI Top Coat for a high-gloss finish
Creating this marbled effect requires a steady hand and patience. Drip the polish into a water container and swirl gently before dipping the nail to achieve the marbled effect.
DIY Instructions:
- Apply a clear base coat to protect your nails.
- Apply a base layer of “Blanc.”
- Drop “Butler Please” and additional “Blanc” into water, swirling with a toothpick.
- Dip each nail into the swirl to transfer the design.
- While the design is tacky, carefully add the silver glitter along the edges.
- Seal the design with a glossy top coat for protection and shine.
Pale Blue Elegance With Metallic Accents
Professional Insight and Description: This nail design features pale blue as its base, offering a soft and trendy backdrop for the intricate metallic accents that take center stage. Each nail showcases a unique touch, from silver linings to delicate studs, creating a cute and aesthetic finish. The addition of a large, metallic coated gem on one nail is particularly eye-catching, reflecting a sophisticated and elegant choice for special occasions or everyday glamour.
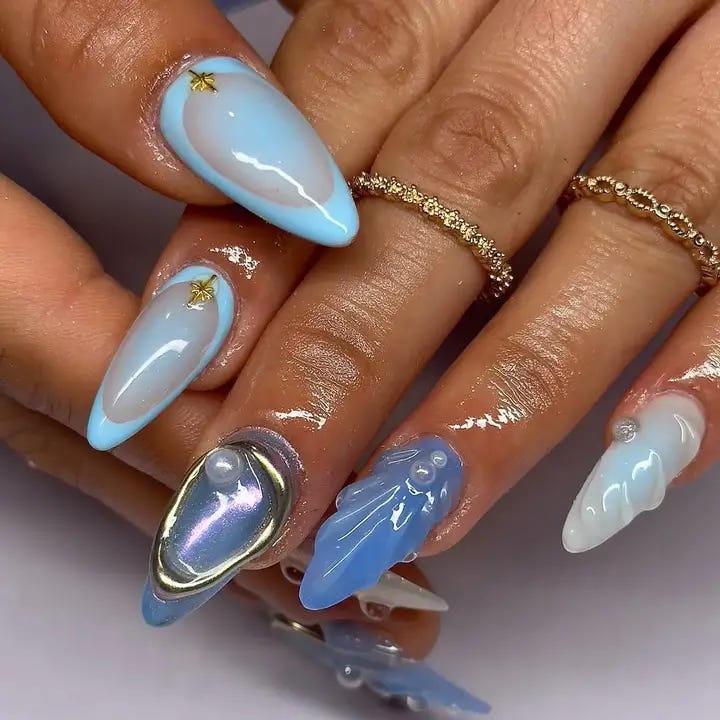
- Base color: OPI “It’s a Boy!”
- Metallic accents: Silver nail foil, rhinestones, and metallic polish
- Top coat: Sally Hansen Miracle Gel Top Coat
The use of nail foil and rhinestones adds depth and interest to the design, making each nail a work of art.
DIY Instructions:
- Start with a protective base coat.
- Apply two coats of “It’s a Boy!” for a smooth, even base.
- Carefully place silver foil and rhinestones on the nails using tweezers for precision.
- Add a drop of metallic polish on selected nails for extra shine.
- Finish with a layer of top coat to secure the embellishments and enhance durability.
Chic Grey And White Gradient With Silver Crackle
Professional Insight and Description: This design embraces a minimalist yet trendy approach with its smooth grey and white gradient, which serves as a perfect canvas for the silver crackle overlay. The sparkly effect of the crackle polish adds a fun and unique texture, contrasting sharply with the smooth gradient beneath. This nail art is simple, elegant, and wonderfully versatile, fitting seamlessly into both casual and more formal settings.
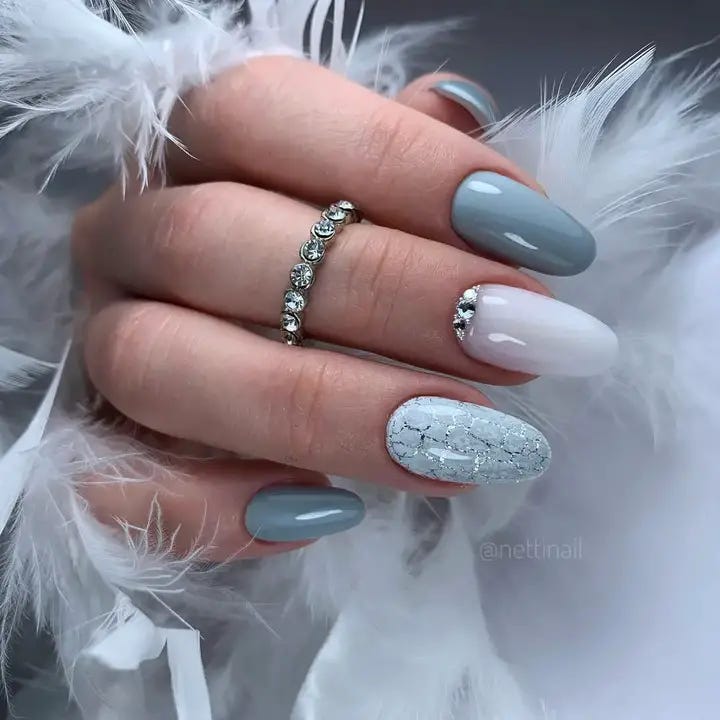
- Base colors: China Glaze “Recycle” and Essie “Private Weekend”
- Crackle polish: Silver crackle polish
- Top coat: CND Vinylux Weekly Top Coat
For the best gradient effect, use a sponge to softly dab and blend the base colors before applying the crackle polish.
DIY Instructions:
- Apply a base coat to protect your nails.
- Create a gradient by first applying “Recycle,” then “Private Weekend” at the tips, blending with a sponge.
- Once dry, apply a thin layer of silver crackle polish and watch it separate into unique patterns.
- Finish with a high-gloss top coat to seal in the design and add a luxurious shine.
Sparkling Botanicals On Shimmering Nude
Professional Insight and Description: The enchanting nude nails embellished with sparkling botanical accents offer a sophisticated and natural elegance. This design features delicate blue flowers painted with a fine brush over a shimmering nude base, intertwined with subtle greenery. It’s an exemplary fusion of art and nature, perfect for any season or occasion, offering a refreshing twist on classic floral nails.
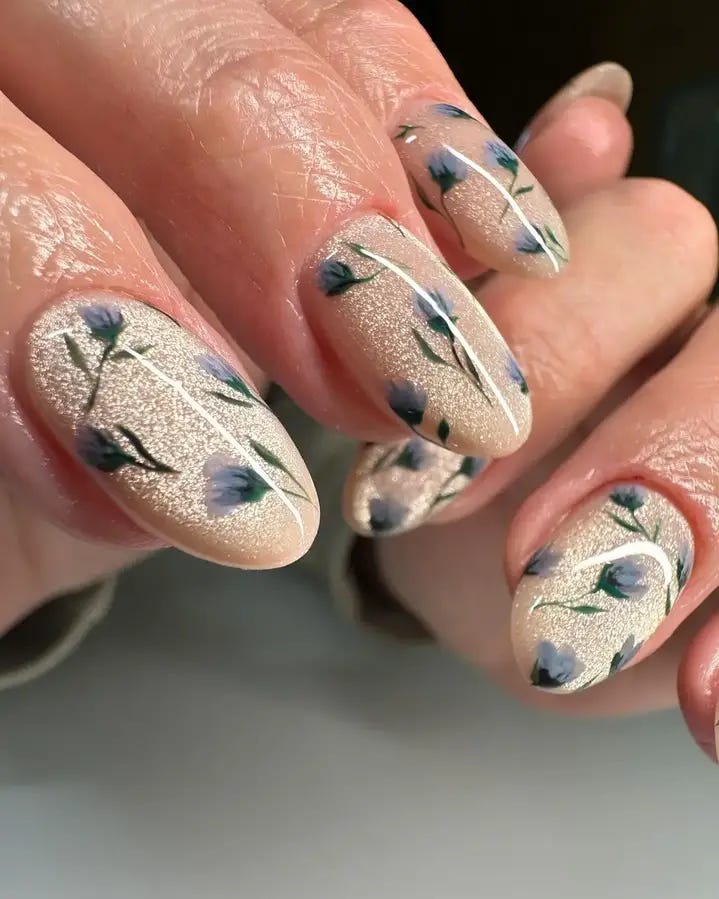
- Base color: OPI “Bubble Bath” with a shimmer topcoat
- Detailing paints: Acrylic colors in shades of blue and green
- Top coat: Essie “Good to Go” Top Coat
For this intricate work, thin brushes are essential for precision, and sealing the design with a durable top coat ensures longevity.
DIY Instructions:
- Apply a clear base coat to protect your nails.
- Apply two coats of “Bubble Bath,” then a shimmering topcoat for a radiant finish.
- Use a fine brush to hand-paint the floral designs using blue and green acrylic paints.
- Seal the design with a fast-drying top coat to maintain the nail art’s beauty and durability.
Royal Blue Waves With Golden Hearts
Professional Insight and Description: This captivating design boasts royal blue waves on a clear base, intertwined with golden heart accents and silver detailing, creating a luxurious and romantic aesthetic. The intricate swirls and curls paired with sparkling embellishments reflect an artistic mastery, making this nail art a statement piece perfect for special occasions or as a bold everyday look.
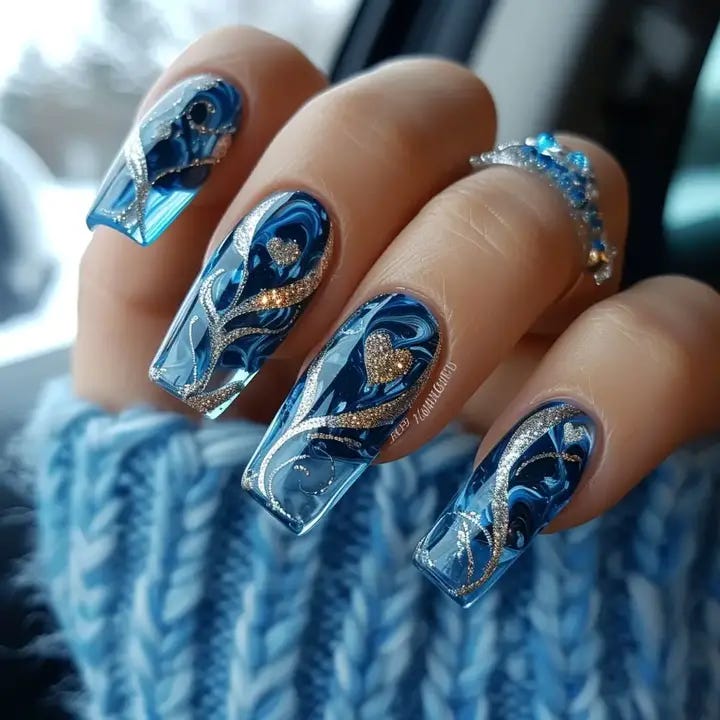
- Base color: Clear gel polish
- Wave details: Royal blue and metallic gold nail paints
- Embellishments: Tiny silver beads and golden heart stickers
- Top coat: UV top coat for a glossy and protective finish
Utilizing a mix of brushes for the wave patterns and tweezers for placing the embellishments precisely helps achieve the design’s intricate detailing.
DIY Instructions:
- Begin with a base coat of clear gel polish and cure under a UV lamp.
- Paint swirling waves using royal blue polish; add accents with metallic gold.
- While wet, place golden heart stickers and silver beads strategically.
- Seal the entire design with a UV-cured top coat for a lasting glossy finish.
Sophisticated Navy And Silver Art Designs
Professional Insight and Description: This design features a bold navy and silver theme, with intricate art designs that include geometric patterns and specks of sparkly elements. The combination of matte and glossy finishes adds a unique texture contrast that is both aesthetic and eye-catching. It’s a sophisticated choice that speaks of confidence and creativity.
- Base color: China Glaze in “Up All Night”
- Silver accents: Mirror powder and silver nail art stickers
- Matte top coat: Matte Finisher by NYC
- Glossy top coat: Revlon Extra Life No Chip Top Coat
For those wanting to replicate this look, the mirror powder can be used to achieve a foil effect on the nails. It’s best applied with a sponge applicator to ensure a smooth, even layer.
DIY Instructions:
- Begin with a clear base coat to protect your nails.
- Apply two coats of “Up All Night” as the base color.
- Use a small sponge to dab on the mirror powder onto the tips or as accents.
- Place silver stickers according to the pattern you desire.
- Finish with a layer of matte top coat over the navy areas and glossy top coat over the silver to emphasize the contrast.
Icy Waves And Swirls In Electric Blue
Professional Insight and Description: This nail design is a dynamic blend of electric and icy blue tones, crafted into wave-like swirls that mimic ocean currents. The use of white and blue in alternating swirls adds a mesmerizing depth to the design, while strategically placed sparkly accents enhance the nails’ visual impact. The extended length and creative sculpting of the nails showcase a bold choice for those who appreciate art designs that are both elegant and fun.
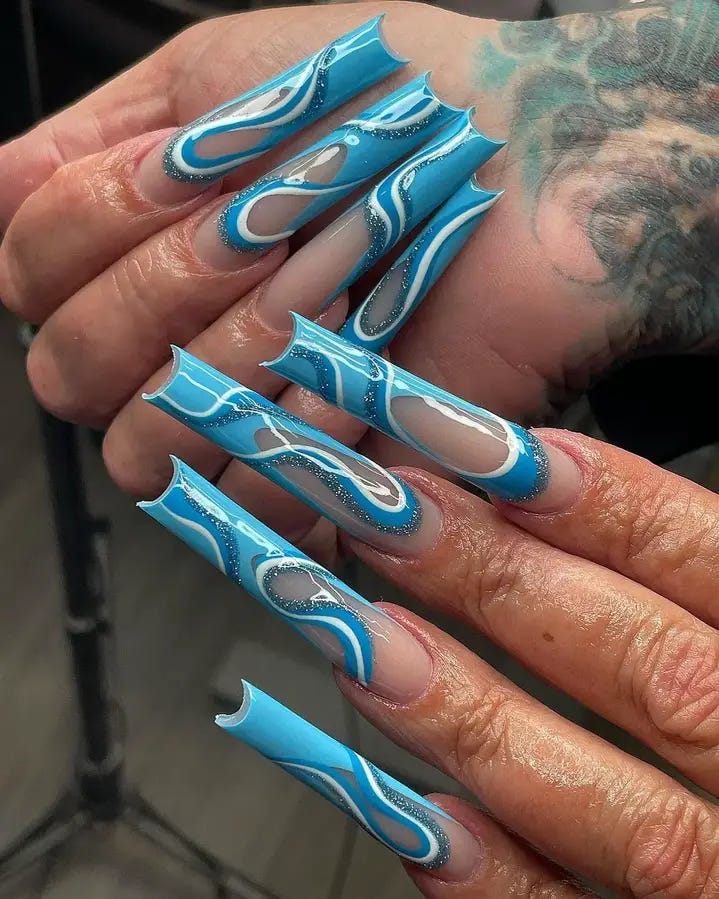
- Base colors: OPI “Can’t Find My Czechbook” and Essie “Private Weekend”
- Accent details: Silver microbeads and fine glitter
- Top coat: Sally Hansen Miracle Gel Top Coat
- Tools: Detailing brush, dotting tool
For achieving the swirls with precision, I recommend using a fine detailing brush. The microbeads can be applied with a dotting tool to ensure even spacing and adherence.
DIY Instructions:
- Apply a protective base coat.
- Paint the base layer with alternating colors using “Can’t Find My Czechbook” and “Private Weekend.”
- Once dry, use a detailing brush to create swirl patterns with the contrasting color.
- Add microbeads and glitter along the swirls while the paint is still tacky.
- Seal your design with a glossy top coat for a durable, shiny finish.
Pastel Blue With Sophisticated Silver Studs
Professional Insight and Description: These pastel blue nails are adorned with silver studs, creating a look that’s both trendy and sophisticated. The matte finish on the pale blue background gives a modern touch, contrasting beautifully with the metallic sheen of the studs. This design is perfect for anyone looking for a simple yet striking nail art that combines minimalism with a touch of luxury.
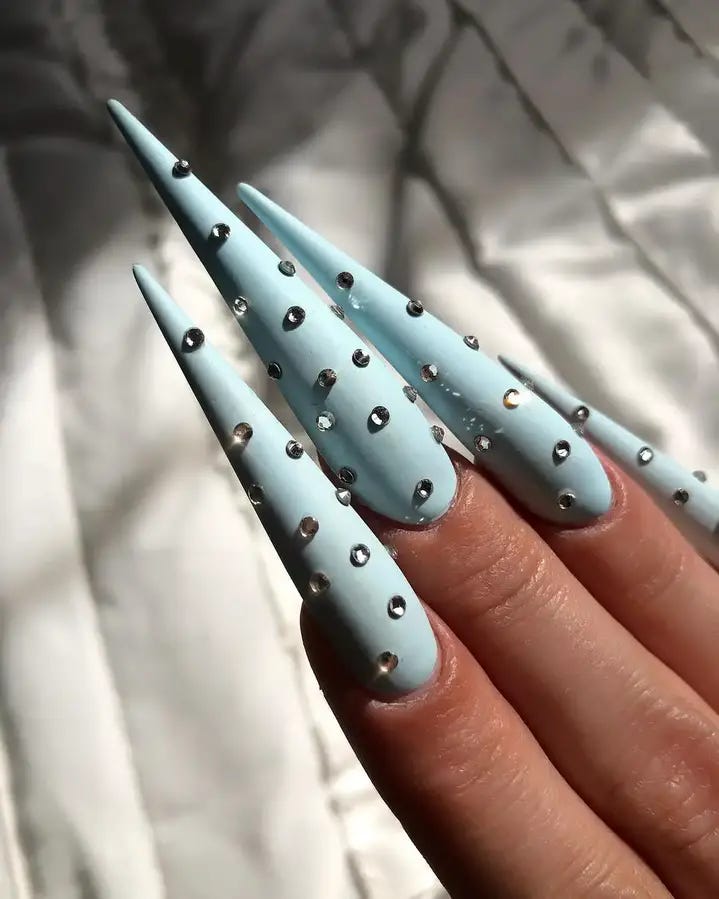
- Base color: Essie “Saltwater Happy”
- Studs: Silver nail studs
- Matte top coat: Matte About You by Essie
Using a matte top coat not only emphasizes the softness of the pastel but also provides an excellent backdrop for the glossy silver studs, making them stand out more prominently.
DIY Instructions:
- Start with a base coat to protect your nails.
- Apply two coats of “Saltwater Happy,” letting each coat dry completely.
- Place silver studs in a symmetrical pattern using tweezers for precision.
- Apply a matte top coat to seal in the design and studs.
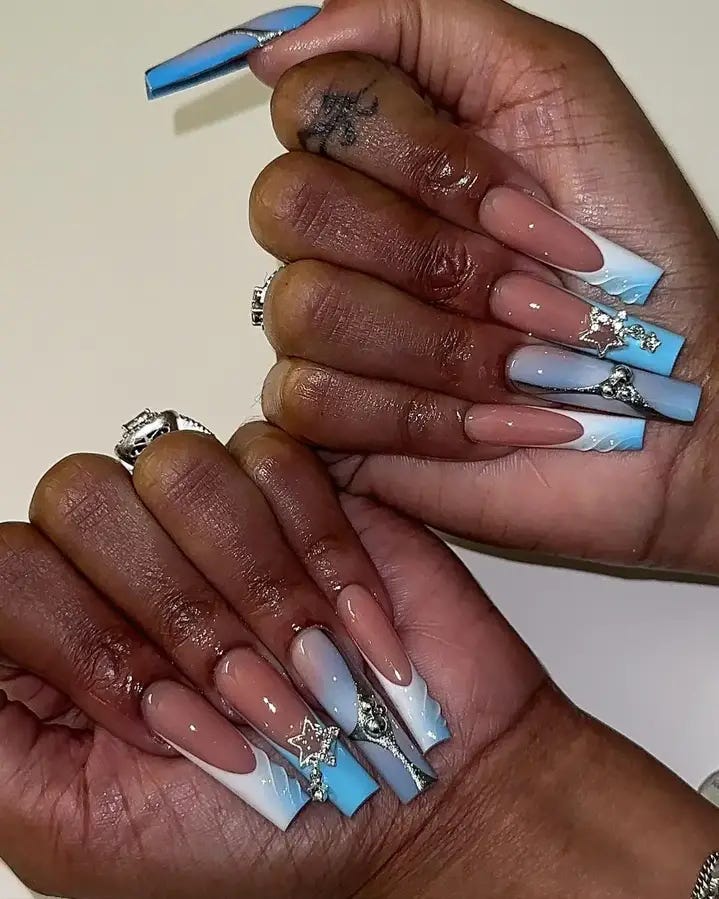
Elegantly Simple Blue And Silver French Tips
Professional Insight and Description: This nail design reimagines the classic French tip with a fresh twist, featuring light blue tips paired with delicate silver line accents. The subtlety of the blue gradient adds a cute and aesthetic touch to the nails, ideal for those seeking a simple yet refined look. The addition of a sparkly silver strip enhances the separation, making this design trendy yet suitable for both casual and formal settings.

- Base color: Sally Hansen “Barracuda”
- Accent line: Silver striping tape or polish
- Top coat: Revlon Quick Dry Top Coat
For clean and precise lines, I suggest using striping tape. It provides a sharp contrast without the hassle of freehand painting, which can be tricky with lighter colors.
DIY Instructions:
- Apply a base coat to protect your nails.
- Paint your nails with “Barracuda” as the base color.
- Once dry, apply striping tape at the tip, then paint over with silver polish or place pre-cut silver tape.
- Finish with a quick-dry top coat to enhance the longevity and shine of your manicure.


0 Comments