Transform your nails into a summer masterpiece with our sunset nail art guide! Discover expert tips on creating stunning gradient designs that capture the beauty of a summer sunset. Learn how to seamlessly blend vibrant hues for that perfect ombré effect and add playful charms to elevate your look. Whether you’re a beginner or a nail art enthusiast, this guide provides step-by-step instructions to help you achieve salon-quality results at home. Perfect for adding a touch of summer magic to your nails!
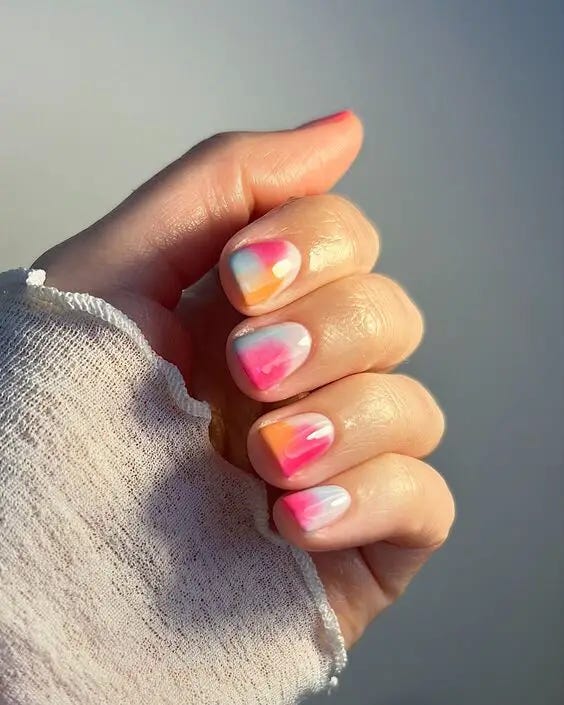
Floral Summer Sunset Nails
This unique design captures the softness of a sunset with a floral twist. Using a technique that mimics watercolor art, these nails blend pinks, yellows, and whites with floral patterns, making them look like a blooming garden under a sunset sky.

Materials List:
- Polishes: “Pastel Pink,” “Sunset Yellow,” “Cloud White”
- Decorations: Tiny floral decals or hand-painted flowers
- Top Coat: Matte finish for a delicate, artistic feel
- Tools: Fine brush for details, sponge for the watercolor effect
DIY Instructions: Begin with a pale pink base. Use a sponge to dab on “Sunset Yellow” and “Cloud White” to create a watercolor effect. Carefully place floral decals or paint small flowers using a fine detail brush. Opt for a matte top coat to enhance the soft, artistic look of the watercolor flowers.
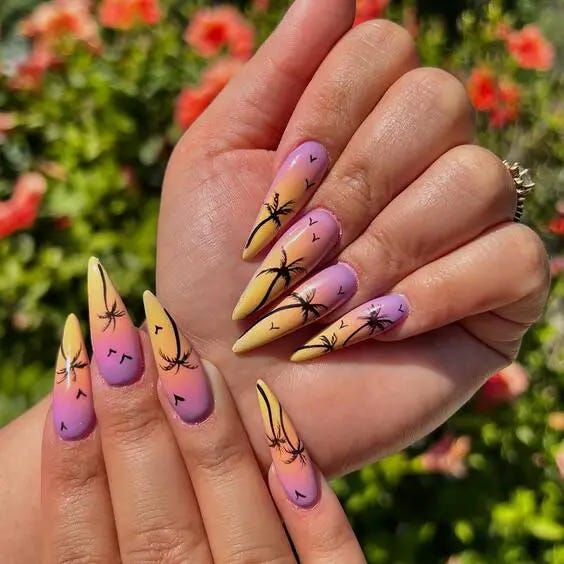
Pastel Sunset Palm Nails
This design captures the tranquility of a pastel sunset sky. The soft lavender and gentle yellow gradient provide a perfect backdrop for the silhouetted palm trees, offering a serene yet vibrant look that’s ideal for any summer occasion.
Materials List:
- Polishes: “Lavender Whisper” and “Mellow Yellow”
- Top Coat: Glossy top coat for a sleek finish
- Tools: Detail brush for palm tree design, sponge for gradient effect
DIY Instructions: Start with a clean, prepped nail. Apply a light coat of “Lavender Whisper” and while still wet, blend in “Mellow Yellow” from the nail base using a sponge to create a smooth gradient. Use a detail brush to paint the palm tree silhouettes in black. Finish with a glossy top coat to enhance the colors and ensure durability.
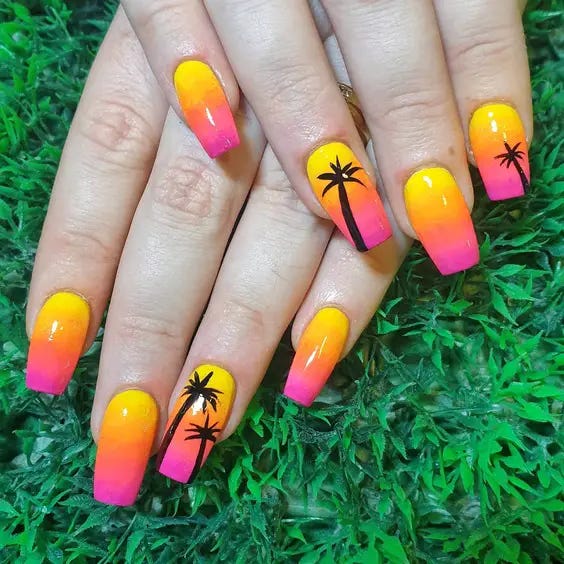
Vibrant Sunset Palm Nails
These nails boast a more vivid interpretation of the sunset theme with a fiery gradient of yellow, orange, and pink. The black palm trees add a striking contrast, making this design not only colorful but also expressive of the dynamic summer sunset.
Materials List:
- Polishes: “Solar Flare,” “Tropical Pink,” and “Sunset Orange”
- Top Coat: High-gloss top coat to make the colors pop
- Tools: Sponge for blending the gradient, thin brush for palm details
DIY Instructions: Paint your nails with “Solar Flare” as the base color. Apply “Sunset Orange” and then “Tropical Pink” towards the tips using a sponge to achieve a vibrant gradient. Once dry, use a thin brush to add palm tree designs in black for a bold, graphic look. Seal with a high-gloss top coat for vibrancy and protection.
Soft Ombre Sunset Nails
This design offers a subtle and romantic take on the sunset theme, featuring a soft ombre transition from pink to white. The simplicity of the colors mimics the soft fading light of a sunset, making it a perfect choice for those preferring understated elegance.
Materials List:
- Polishes: “Blush Pink” and “Pure White”
- Top Coat: Matte top coat for a modern, soft touch
- Tools: Sponge for creating the ombre effect
DIY Instructions: Apply a base coat to protect your nails. Start with “Blush Pink” at the base and gently sponge up towards the middle using “Pure White” to create a seamless ombre effect. Allow it to dry completely before applying a matte top coat to finish the look with a contemporary feel.
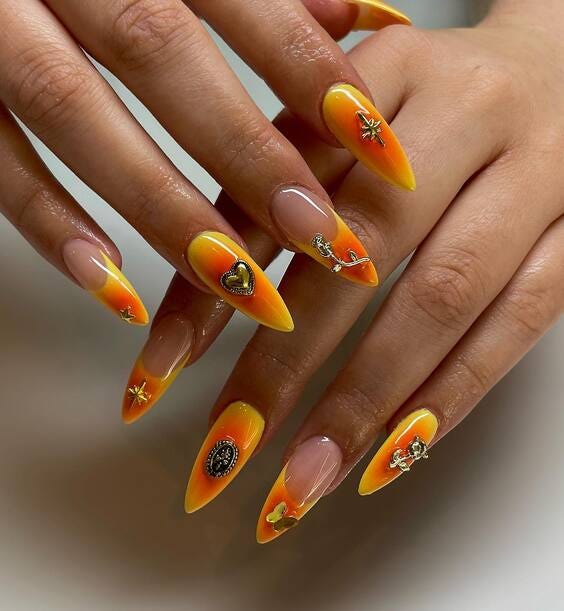
Sunset Charm Nails
These nails combine a sunset-inspired gradient with exquisite charm embellishments for a touch of luxury. The transition from a sunny yellow to a deep sunset orange creates a vibrant backdrop, while the carefully placed charms — ranging from hearts to stars — add a unique and glamorous twist.
Materials List:
- Polishes: “Sunny Delight” and “Evening Glow”
- Decorations: Gold charms (hearts, stars, and moons)
- Top Coat: High-gloss gel top coat for a long-lasting shiny finish
- Tools: Tweezers for charm placement, sponge for gradient application
DIY Instructions: Apply a base coat to protect your nails. Start with “Sunny Delight” at the base and use a sponge to blend into “Evening Glow” towards the tips. Once the gradient is dry, strategically place various gold charms on the nails using tweezers. Seal everything with a high-gloss gel top coat to enhance the gradient and secure the charms in place.
Polka Dot Sunset Nails
This playful design uses a polka dot pattern to mimic the bubbly texture of a vibrant sunset. The nail base transitions from a soft pink to a bold orange, overlaid with varying sizes of hot pink dots, creating a fun, textured look that’s perfect for summer parties or casual outings.

Materials List:
- Polishes: “Peach Sunset,” “Tropical Orange,” and “Hot Pink”
- Top Coat: Clear glossy top coat for smoothness and shine
- Tools: Dotting tool in different sizes for the polka dots
DIY Instructions: Begin by applying “Peach Sunset” at the base of your nails. Gradually blend into “Tropical Orange” using a sponge to create a seamless gradient effect. Once this base is dry, use a dotting tool to add “Hot Pink” dots, varying the size for a dynamic look. Finish with a clear glossy top coat to protect the design and add a vibrant shine.
Intricate Summer Sunset Nail Art
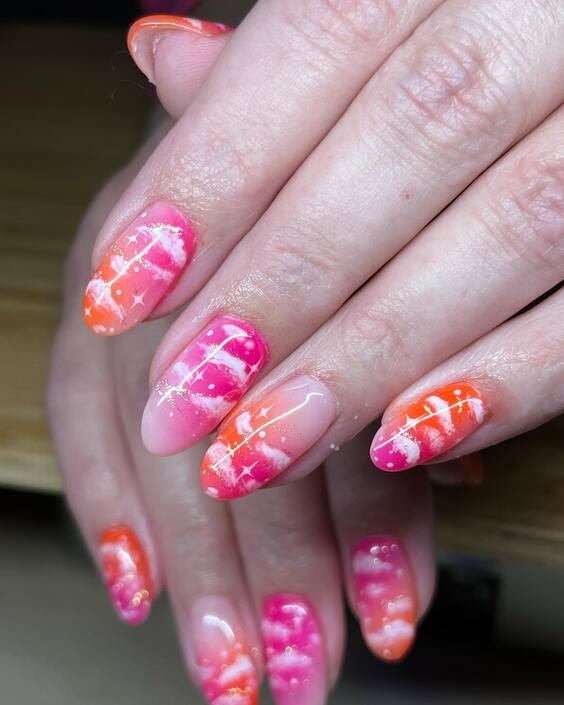
This nail design showcases a sophisticated mix of pink and orange hues, artistically blended to resemble the breathtaking colors of a summer sunset. The white cross-hatch pattern adds a unique touch, reminiscent of the fleeting clouds in a sunset sky, making each nail a miniature piece of art.
Materials List:
- Polishes: CND Shellac in “Tropix” and “Cake Pop”
- Decorations: White nail art pen for the cross-hatch design
- Top Coat: High-gloss finish for a seamless look
- Tools: Detailing brush for precision in pattern creation
DIY Instructions: Apply a base coat, followed by a layer of “Cake Pop.” Once dry, add “Tropix” in a gradient style using a sponge. Use the white nail art pen to carefully draw the cross-hatch pattern. Seal with a high-gloss top coat for a vibrant, long-lasting finish.
Flowing Marble Summer Sunset Nail Art
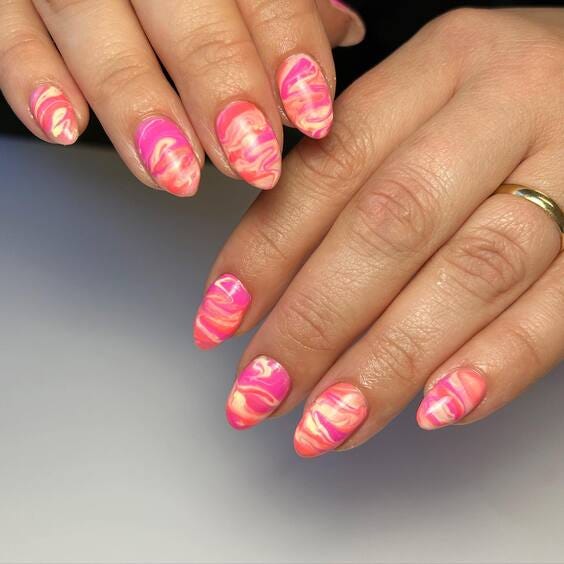
Embodying the fluidity of waves under a sunset sky, this design uses a marble technique with swirls of pink and orange to create a dynamic, flowing effect. The seamless blend of colors offers a soft, romantic aesthetic perfect for summer nights out or a day at the beach.
Materials List:
- Polishes: OPI “Hotter Than You Pink” and “Orange You Fantastic”
- Top Coat: Matte finish to enhance the marble effect
- Tools: Marbling tool or a fine-tip brush to swirl the colors
DIY Instructions: Start with a clear base coat. Drop alternating colors of pink and orange onto the nail while wet, then use a marbling tool to gently swirl the colors together. Allow the design to set slightly before applying a matte top coat for a stunning, soft-focus finish.
Glamorous Glittered Summer Sunset Nails
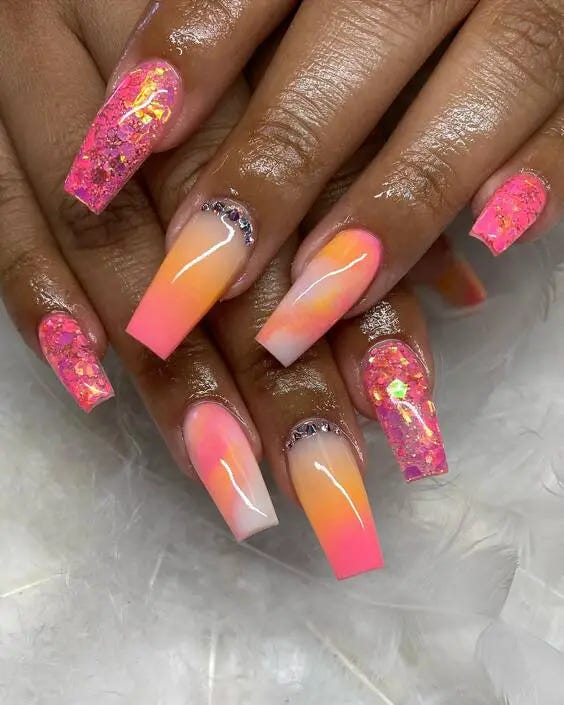
This glamorous design combines the soft gradients of sunset with the sparkle of glitter and rhinestone embellishments, mimicking the sparkling stars that appear as the sun sets. The pink to orange gradient is bold and beautiful, enhanced by glitter overlays and rhinestone accents along the cuticle line for an added touch of luxury.
Materials List:
- Polishes: Deborah Lippmann “Break 4 Love” and “Meet Me In Sunset”
- Decorations: Pink glitter, small rhinestones
- Top Coat: Gel top coat for a durable, glossy finish
- Tools: Tweezers and a dotting tool for precise placement of decorations
DIY Instructions: Apply a base coat followed by “Break 4 Love.” Once dry, apply “Meet Me In Sunset” in a gradient fashion. While the second color is still tacky, sprinkle pink glitter towards the tip and add rhinestones near the cuticle with tweezers. Finish with a gel top coat to seal in the design and ensure longevity.
Elegant Gradient Summer Sunset Nails
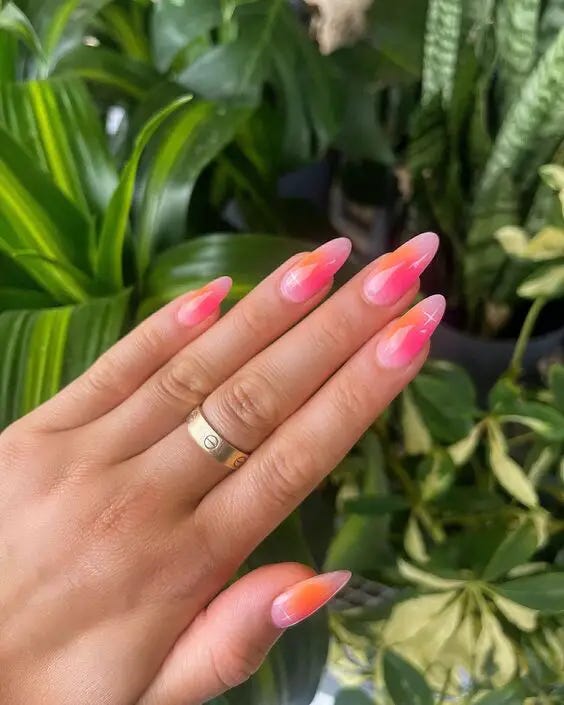
This design offers a chic and elegant take on summer sunset nails, featuring a soft gradient transition from a bright pink to a peachy orange. The effect is smooth and subtle, reminiscent of the sky as it changes colors during a sunset. This look is perfect for those who prefer a more understated yet sophisticated style.
Materials List:
- Polishes: Essie “Fiji” and “Tart Deco”
- Top Coat: Glossy finish for a sleek and vibrant appearance
- Tools: Sponge for a smooth gradient effect
DIY Instructions: Begin with a clean, buffed nail surface and apply a base coat. Use “Fiji” as the base color, then sponge on “Tart Deco” starting from the tip and blending towards the middle. Repeat the sponging for a more intense gradient. Finish with a glossy top coat to enhance the colors and provide lasting wear.
Abstract Sunset Nails With A Pop Of Blue
This nail design captures the essence of a playful sunset with abstract shapes and a pop of cool blue, symbolizing the sudden appearance of the night sky as the sun sets. The whimsical use of shapes and colors creates a dynamic and youthful look that is perfect for summer festivities.

Materials List:
- Polishes: Sally Hansen “Sunset Orange,” “Mellow Yellow,” and “Breeze Blue”
- Top Coat: Matte finish for a contemporary edge
- Tools: Detail brush for precision in abstract design
DIY Instructions: Apply a base coat to protect your nails. Paint the entire nail with “Sunset Orange.” Once dry, use a detail brush to add abstract shapes with “Mellow Yellow” and a dot of “Breeze Blue” for contrast. Allow each layer to dry before applying the next color. Seal with a matte top coat for a modern look.
Neon Tip French Manicure Inspired By Summer Sunsets
A modern twist on the classic French manicure, this design features neon tips in pink and orange that resemble the striking colors of a summer sunset. This nail style is both bold and playful, making it a perfect choice for those looking to add a splash of color to their summer wardrobe.

Materials List:
- Polishes: Neon pink and orange nail polish
- Base Coat: Clear base for a natural nail look
- Top Coat: High-gloss top coat to enhance the neon colors and ensure durability
- Tools: Striping tape for precise tip painting
DIY Instructions: Start with a clear base coat to protect your nails. Place striping tape at the tips of your nails to define the area for the neon colors. Apply neon pink on some tips and orange on others. Carefully remove the tape while the polish is still slightly wet. Finish with a high-gloss top coat to make the colors pop and to extend the wear of your manicure.
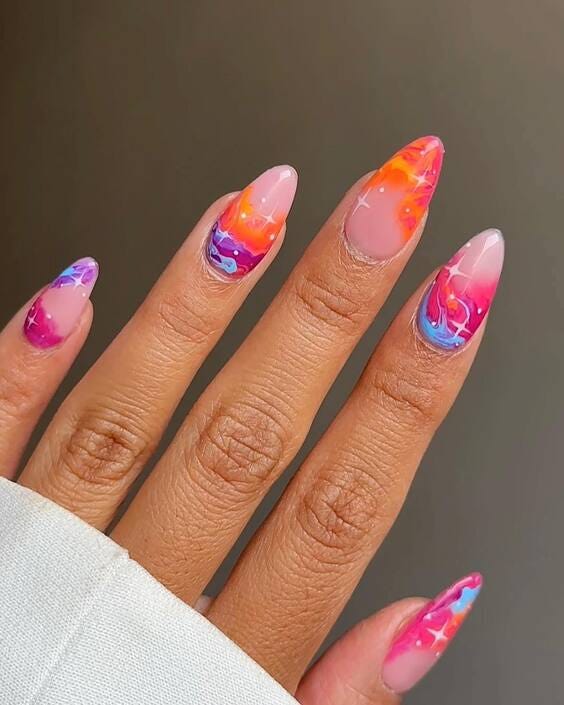
Vivid Swirl Summer Sunset Nails
This nail art represents a bold, colorful canvas of swirling sunset colors. The use of vibrant pink, purple, and orange encapsulates the dramatic and intense colors of a late summer sunset, perfect for making a statement at any summer event.
Materials List:
- Polishes: Gel polishes in “Vibrant Pink,” “Sunset Orange,” and “Deep Purple”
- Top Coat: High-gloss gel top coat for a glass-like finish
- Tools: Thin brush for swirling the colors
DIY Instructions: Start by applying a light pink base coat and cure it under a UV lamp. Once set, use a thin brush to apply swirls of orange and purple. Blend the colors slightly where they meet to create a seamless transition. Cure again, and then apply a high-gloss top coat for a durable, shiny finish.
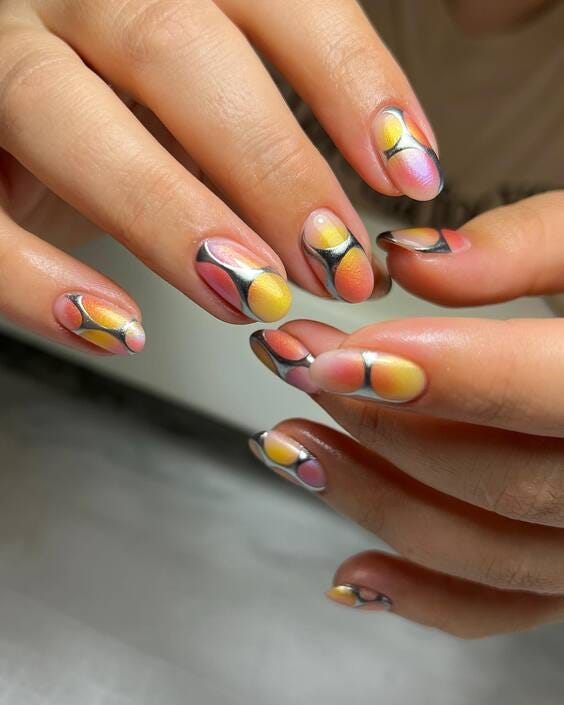
Modern Artistic Summer Sunset Nails
This design merges the beauty of sunset colors with modern artistic flair. It features a sophisticated palette of soft yellow, vibrant orange, and delicate pink, framed by bold black lines that add a dramatic contrast. The result is a fresh, contemporary look that is perfect for those who appreciate a nail design that doubles as a piece of art.
Materials List:
- Polishes: “Sunrise Yellow,” “Tropical Sunset,” and “Soft Pink”
- Top Coat: High-gloss finish to enhance the colors
- Tools: Fine detail brush for precision in line work
DIY Instructions: Start with a base coat to protect your nails. Apply “Soft Pink” as the base color, followed by patches of “Sunrise Yellow” and “Tropical Sunset” using a sponge for a blended effect. Once dry, use a fine brush to create sharp black lines that segment the colors artfully. Finish with a glossy top coat for a sleek and vibrant appearance.


0 Comments