Experience a Tropical Escape: Vibrant Orange and Coral Nail Art. Embrace the essence of summer with a lively orange nail design, complemented by bursts of coral artwork. Choose a vivid orange hue as your canvas and embellish it with intricate coral patterns or whimsical tropical fruit motifs for an added dash of fun. Whether your nails are short or long, this enchanting look is versatile. Utilize gel polish for enduring wear, ensuring your summery design endures through sunny beach days and balmy summer evenings.
Swirls And Stripes: Orange Creamsicle Dream
The design has a creamy base with orange swirls that resemble the famous summer treat creamsicle. Its playful yet sophisticated look makes use of simple lines with a twist. This design brings together old and new styles, thus making it an absolute nail sizzler for summer.
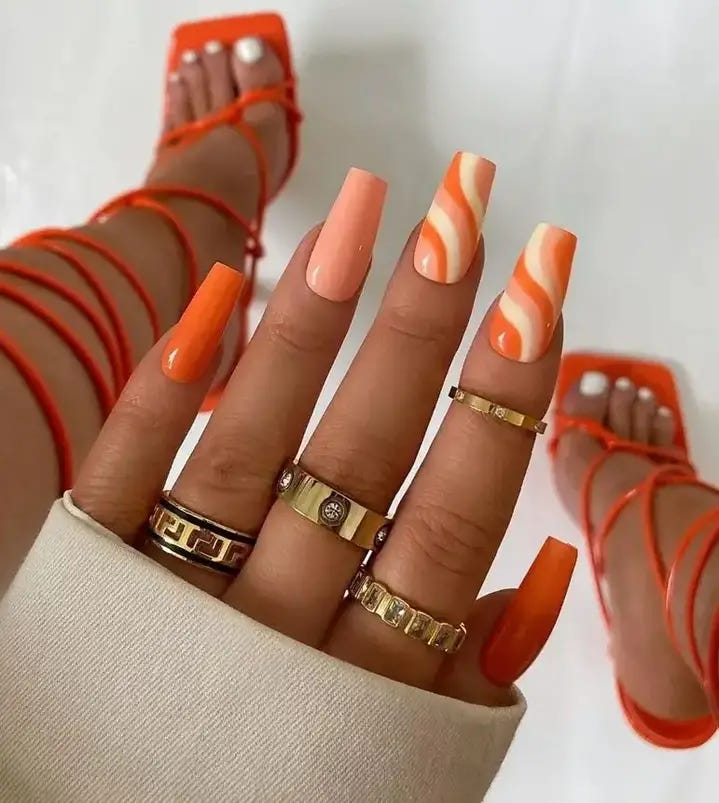
- Base — light orange gel polish
- Swirls — darker orange
- Line tool/ fine brush- striping pen
- Top coat- to make sure your nails remain elegant all through till you change them again in the next summer.
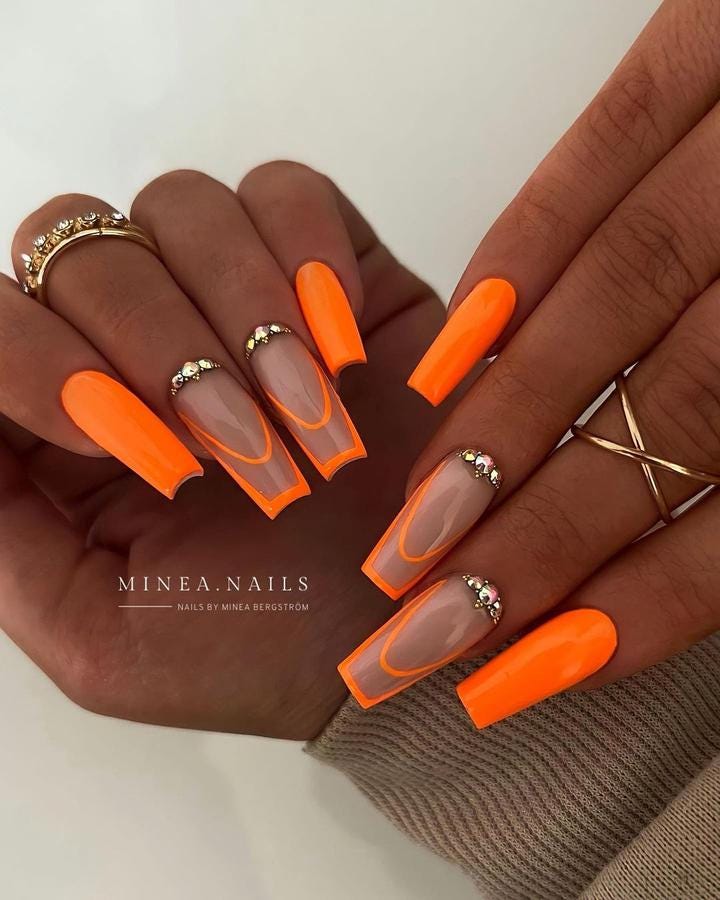
Burst Of Summer: Vibrant Florals And Butterfly Kisses
The designer celebrates the season by incorporating light-hearted art with summer orange colors. Over it, overlays of thin flowers, orange swirls and fanciful butterflies on a clear foundation tells the story of a garden in full bloom during summertime. The cute flower and butterfly accents represent not only growth but also change and positivity for those who may want to show such feelings through their fashion choices.
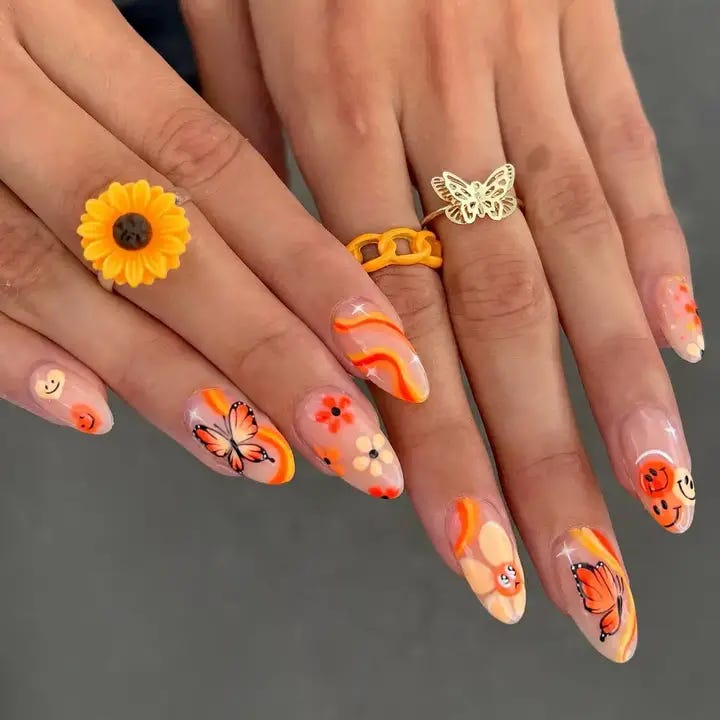
- Translucent Pink Gel Polish (Base)
- Art Stuff needed: orange, black, white acrylic paints
- Small paint brushes for detailed work
- Top coat to protect design
DIY Instructions:
- Put down some layers of the translucent pink polish as a base
- Swirls and fauna motifs can be painted using acrylics with thin brushes being used for detail.
- To preserve it like new until fall seals this small canvas with top-coat.
Heartfelt Neon: Love In Bright Pink
A pink heart design on a summer’s day can only mean bright and neon. It is more than just a nail design — it is a statement piece that exudes love and gaiety and it is perfect for those hot days as well as long warm nights.
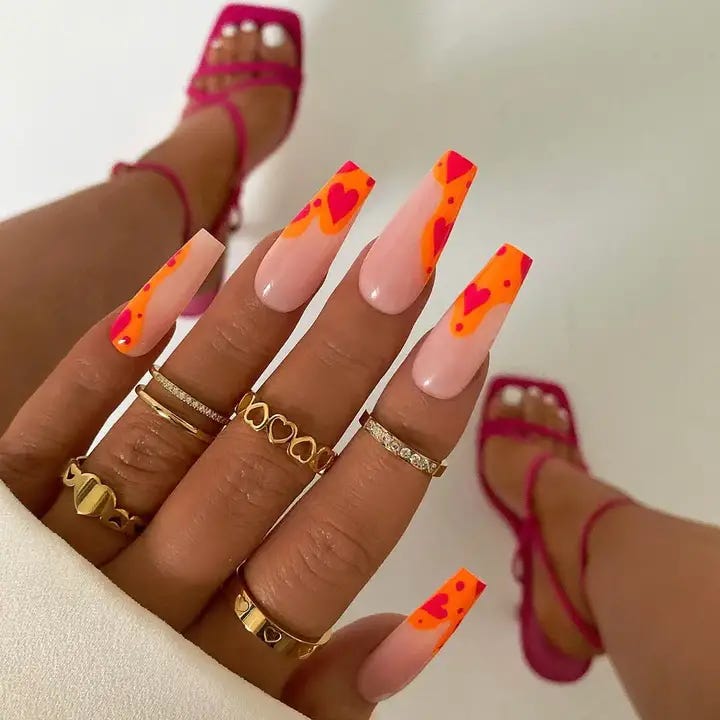
- Gel polish in neon pink
- Pastel pink gel polish for the gradient effect
- Nail decals or stencils shaped like hearts
- A sponge for ombre
- Glossy top coat
DIY Tips:
- Using a sponge, combine neon and pastel polishes together to create an ethereal gradient.
- Put on heart decals or hand-draw hearts in strategic places.
- Finally, add glossy top coat which will make the hearts stand out.
Golden Hour: Sunset Glow On Your Fingertips
The design is an orange gradient with gold accents that represents the beauty of a sunset on one’s finger nails. The star shaped appliques make it glamorous and creates a celestial theme. It is perfect for anyone who wants to add some bling to their nail game and keep it classy.
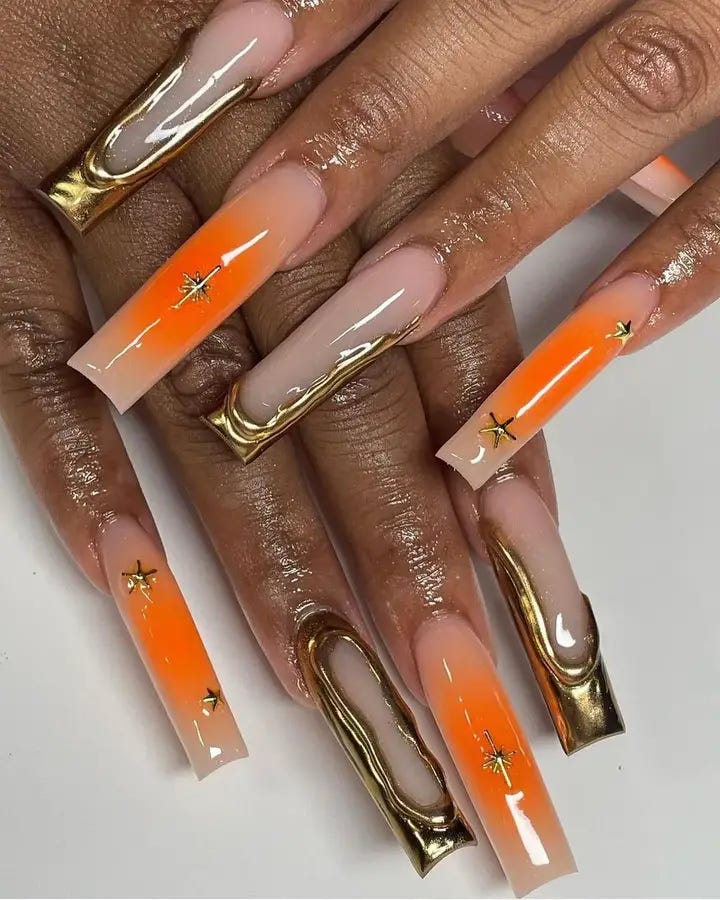
- An even light orange gel polish for the gentle sunset base
- For the gradient, bright orange gel polish is required
- To achieve metallic accents, use gold foil
- Starry effect can be achieved through star appliques
- A top coat will help in securing everything in place.
DIY Tips:
- Start with a light orange base, fading into a bright orange tip.
- Press gold foil into uncured polish randomly for flashes of random metallic.
- Finish with a top coat and place star appliques for infinite design like the night sky.
Trendy Graffiti: Urban Art Meets Manicure
Graffiti art is not limited to walls; it can also be done on nails. The mischievous loops and squiggles in pastel and neon orange are for those who have the sun in their heart and the city at their fingertips. It represents uniqueness and delight from being conventional breakers.
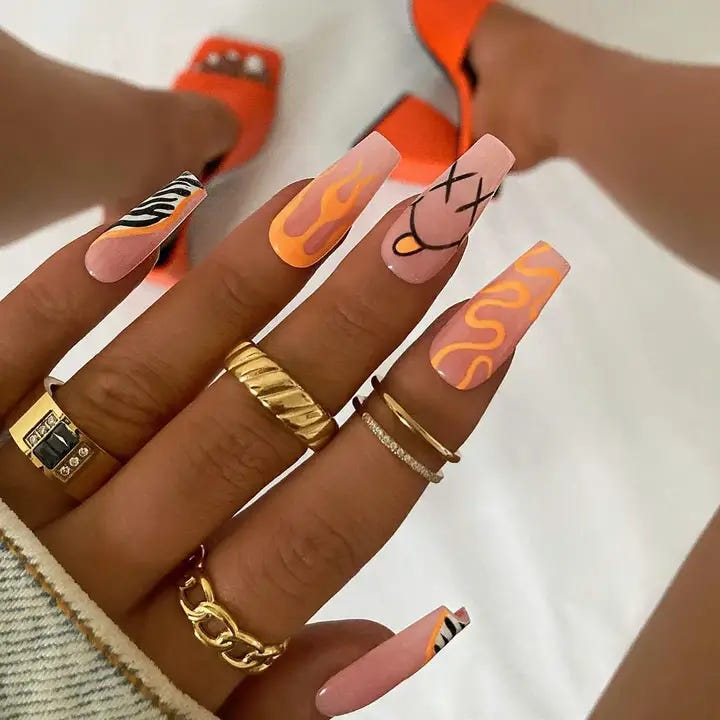
- Bottom coat of light pink hard gel
- Top coat for finishing touches
- Nail art pens in neon orange and black for accurate lines
Directions:
- Apply a base layer of pastel pink.
- Allow it to dry before using bright orange or dark-colored artistic pens to create curvy lines or weird shapes.
- Finish off with a top coat that will bring out your personal graffiti.
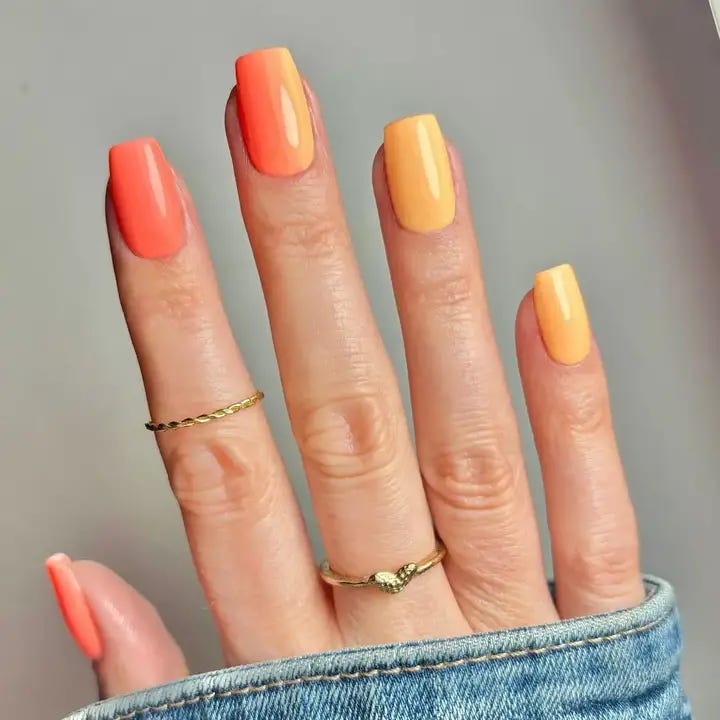
Short And Chic: Coral Art For Every Occasion
Embrace the ever-changing short nail trend with a pop of vibrant orange. Not only are short nails fashionable, but they are also handy for people who live a fast-paced life. A cream base is used to alternate between bright orange nails in order to strike the right balance between being playful and formal.
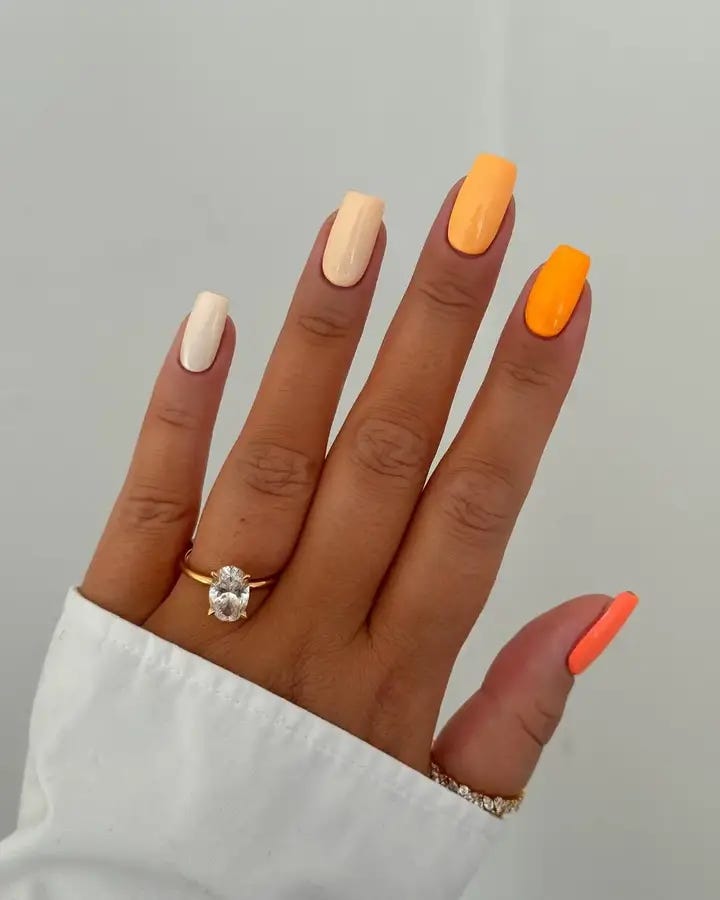
- A light cream gel polish as underlay
- Bright orange gel polish that provides contrasting, fun effect
- Matte top coat which adds a modern flair to it
- Glossy top coat which makes the colors stand out more
Short nails can be as enjoyable and easy to decorate:
- After applying a base coat, I applied alternating coats of cream gel polishes.
- Then using bright orange on all others for dramatic looks.
- Finish by painting matt onto cream and glossy onto orange finishes.
Elegant Almond Nails With A Pop Of Summer
Timeless, almond-shaped nails that talk summer when you dress them up with an orange tip. This is a classy design with a touch of modernity to it that creates fun and fashionable nail art at the same time.
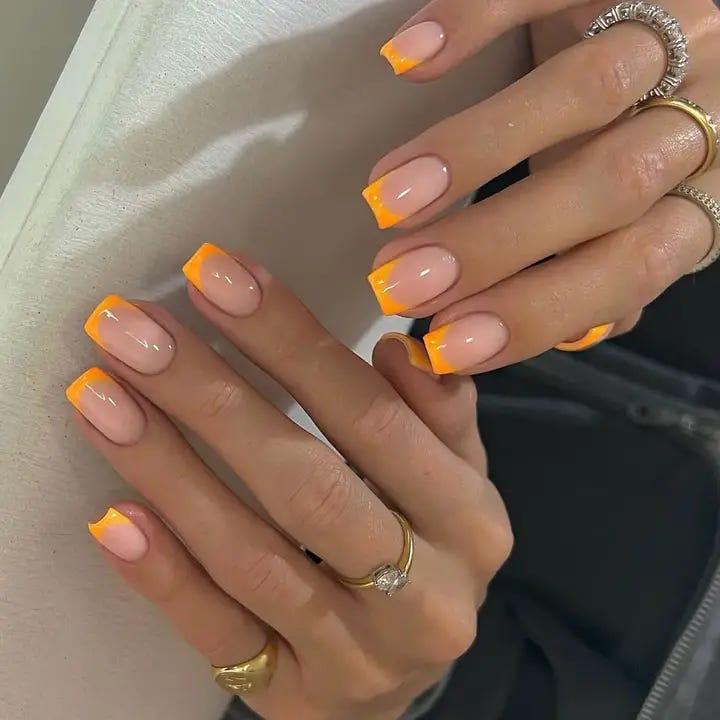
- Clear, nude fingernail polish for a fresh and nice appearance
- Vibrant orange gel nail paint to make a strong statement
- Slender brush for meticulous application on the edges
- Smooth top coat which will fix the pattern
DIY Tips:
- Start by applying nude base and have it well cured.
- Brush it carefully on the tips using thin brush like after French manicure playful look.
- Finish with shiny top coat that blends colours seamlessly and provides protection.
Fiery Ombre: The Sunset Blend
Nail design reflecting the summer sunset, whose sun colors of fiery red and bright orange create a warm embrace for any summer evening. The change from vivid to gentle fades is seamless, thus becoming an amazing visual representation of the sky’s twilight palette. It is meant for daydreamers, romantics and those who notice charms in every single breath.
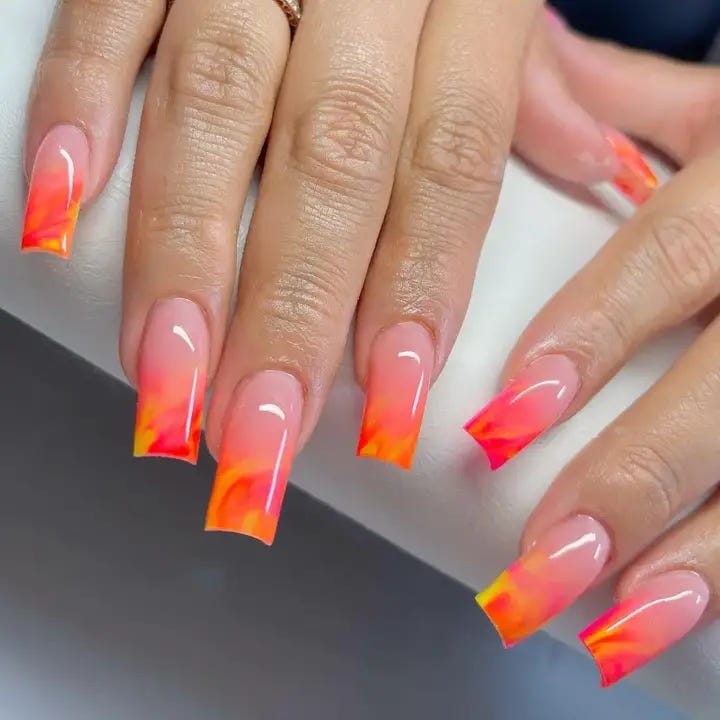
- Fiery red and bright orange gel polishes
- Sponge — ombre blending
- Top Coat — smooth glossy finish
To achieve this sunset-inspired ombre:
- Apply a base coat using a bright orange gel.
- Use sponge to dab on some fiery red while gently merging its hues.
- In order to get a feel of what your nails are all about; you can use top coat..
Neon Dreams: Electric Summer
Not just following trends, these nails set them. That is why it bears strong resemblance to bright pink summer vibes and inspiration behind the vibrant summer days in stark neon orange. Including a sweet clear nail shape and bling near the cuticles, this design represents what summer fun and nail art is all about.
Citrus And Cream: A Smooth Summer Duo
A simple design for nails that is pretty at the same time is created by a gradient from vivid orange to smooth creamy hue. This means you can have summer’s freshest, most cooling treats on your fingertips. The trendy nail design hints at the season subtly and it is perfect for people who want color to whisper but not shout.
- Splash of summer — zesty orange gel polish
- Soft transition — creamy gel polish
- Long-lasting shine — high-quality top coat
DIY Steps:
- Apply creamy gel polish as base.
- Blend in orange polish from tips while still tacky, ensuring evenness of gradients along the way.
- Seal with a top coat to finish off this citrus inspired look.
Blue Wave: Cool Tides On Hot Days
There is nothing like a wave of cool to break the heat and this nail art captures that. With blue and orange providing a fresh, trendy contrast this look is for those who love summer trends with just a touch of refreshment. The gel waves bring a dynamic motion to the design, making it an addition to any summer wardrobe that’s full of life.

- Orange and blue gel polishes for contrast
- White gel polish to highlight the wave crests
- A fine brush for detailed wave designs
- A top coat for a smooth, finished look
DIY Tips:
- Start with a neutral base coat.
- Paint on the waves with blue and orange using a fine brush for precision.
- Accent the waves with white highlights as if they are being reflected by sun lights.
- Apply a top coat so you can protect your mini oceanic artwork.


0 Comments