Find your muse in European summer nail art. Embrace vibrant hues and detailed designs reminiscent of the diverse cultures and picturesque vistas of Europe. Whether you’re drawn to the quaint allure of Italy or the cosmopolitan ambiance of Paris, infusing these aesthetics into your nail art can elevate your summer style with a hint of global sophistication.
Celestial Seas: Mystical Depths And Golden Shores
Taking inspiration from the secret sea and the golden beaches that shine, this nail art design is perfect for a mermaid look. Deep blue and shimmering iridescent greens paired with gold accents serve as an apt representation of the mystical and luxury aspect in trendy summer nights.
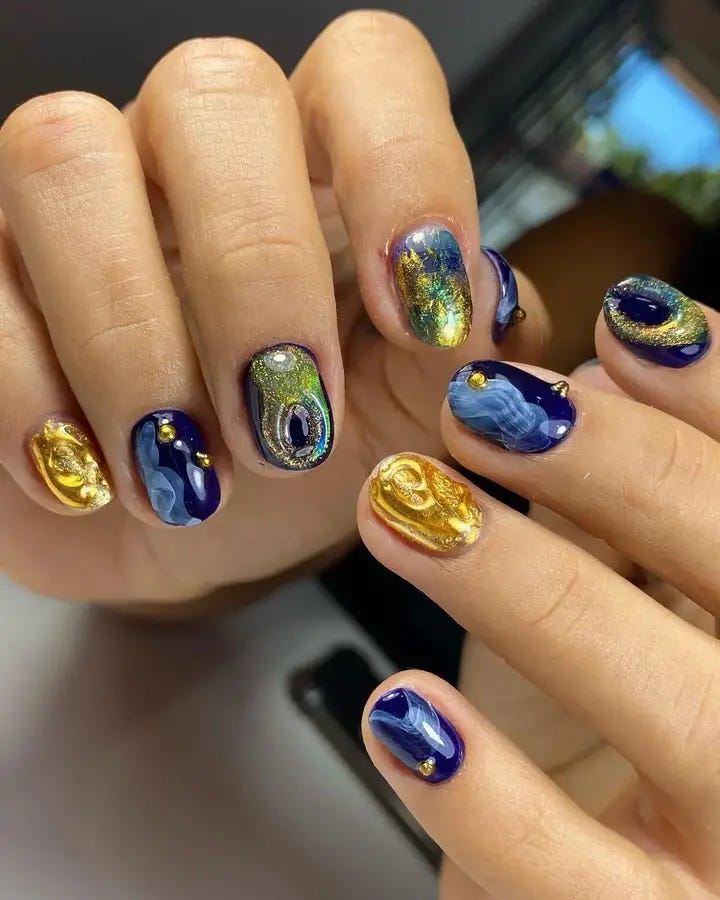
- Deep Blue Polish, Iridescent Green, Gold Foil, Glossy Top Coat are required to produce a shiny effect.
- Professional advice: If you want foil nails that stay for long and have vibrant colors, use gel polishes.
Start by applying deep blue polish. While the polish is still wet but sticky to touch, add small pieces of gold foil quickly. To make it look like a moonlit ocean; use an iridescent polish.
Pink Serenity: Minimalism Meets Sparkle
A soft touch of pink combined with subtle embellishments, gives a simple and charming appearance. This design demonstrates that less can be more when it comes to minimalist tendencies, with diminutive gems just brightening up.
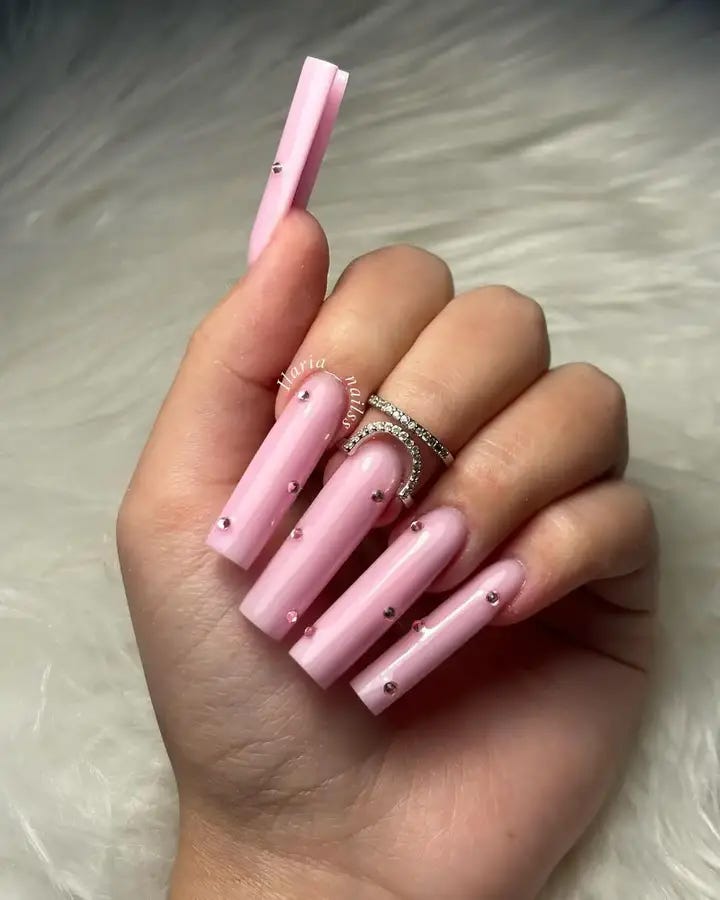
- Necessities: Baby pink gel polish, tiny rhinestones or crystals and an adhesive that adheres well.
- Expert Advice: A soft pink Essie Gel Couture gel polish will serve as chip-free undercoat for long-lasting effect while the Swarovski crystals give the most luxurious brilliance.
Paint on your base pink, cure it and then put every small piece in place using tweezers and some glue. Top off with clear nail polish to ensure it holds firmly as well as giving it a perfect look.
Crimson Edge: Boldness With A Touch Of Sparkle
A flaming crimson that screams out for your attention. This look will give off the impact it intends to with its mixture of fiery colors and vibrant sparkles. It’s meant for those who aren’t afraid to make a statement.
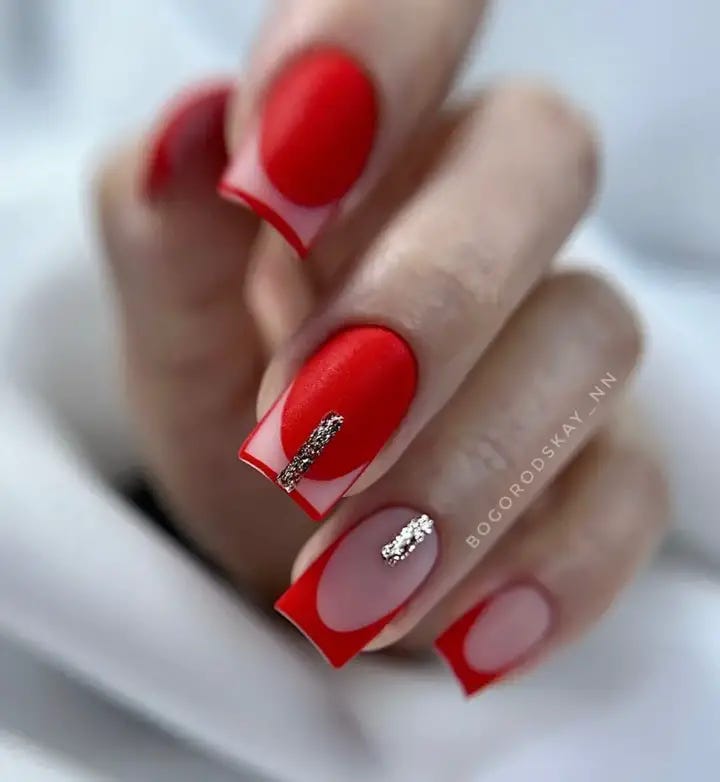
- Supplies: One bottle of matte red nail polish, some silver glitter, and some detail brushes or striping tape
- Recommendations given by professionals: OPI’s Matte Top Coat can transform any glossy polish into something more velvet-like
First paint your nails with the matte red polish. Once that’s dry, take some striping tape and section off where you want the glitter to go. Apply some adhesive in that area and then sprinkle on the silver glitter for a precise, striking line.
Wild Accents: Unleash Your Inner Predator
To channel the wild, this is a sophisticated version of a trendy animal print. It’s a timeless example of wearable art where classic leopard spots against nude bases bring an exotic tinge to any look.
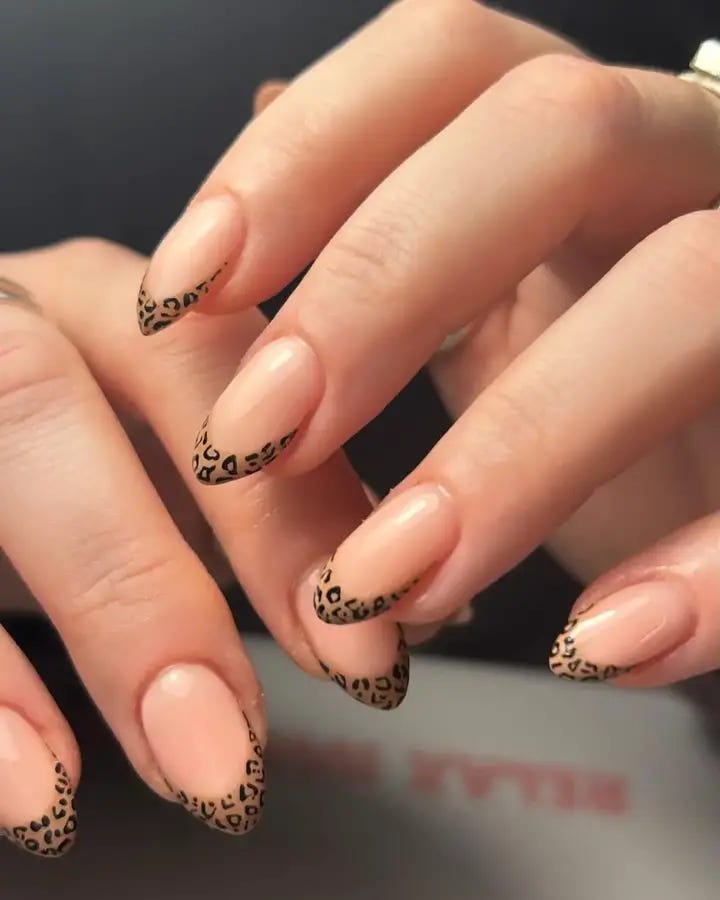
- Nude polish, black and brown polishes for the spots and a fine tip brush are some of the consumables that are used while doing this.
- Professional Recommendations: For the base, choose a polish like OPI’s Bubble Bath for a natural appearance, and use a fine-tip brush for the intricate spots.
Start with nude base. Once dry, use your finetip brush to make uneven brown spots and “C” shapes; then around them add black accents. Seal it all off with top coat to preserve one’s inner beast beauty or something like that.
Lustrous Frost: Sleek And Chic
Epitomizing sleek elegance these nails have a white French tip with a unique frosted finish. This design is both classic yet modern, and offers something new to an age old style.
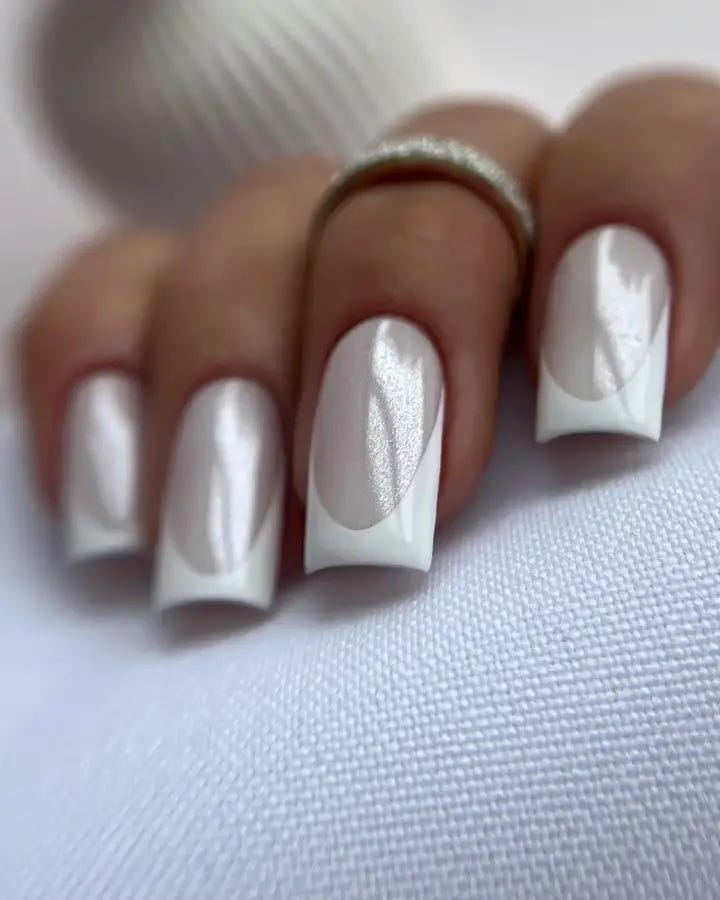
- Frosted white polish, glossy nude base, and fine striping tape are some of the consumables required.
- Essie’s matte top coat over a glossy nude polish will help to achieve that frosted look thus maintaining sophistication as well as permanence according to professional suggestions.
First apply the glossy nude base, let it dry then use the striping tape for creating your perfect French tip. Then smear on the frosted white polish, remove the tape and voila — a stunning look ready for any occasion.
Oceanic Dreams: Under The Sea Adventure
Dive into the depths with these blue nails. This design captures the essence of underwater moments with its varying shades and aquatic plant life accents, in a mesmerizing look that mirrors the movement of the sea.
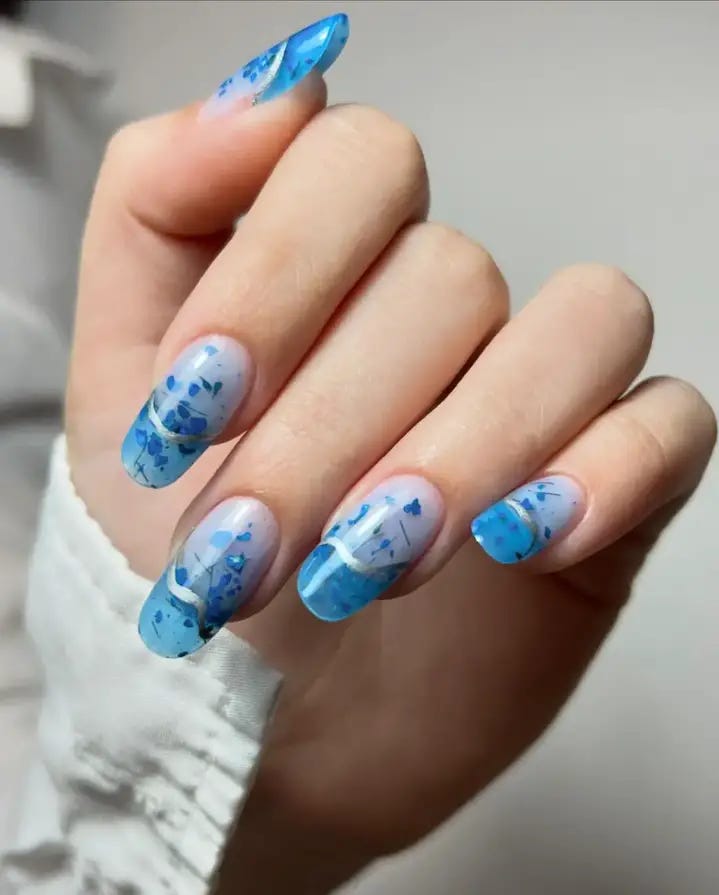
- Consumables: A range of blue polishes, sheer polish for overlay, nail art brushes, and white polish for details.
- Professional Recommendations: Pick up a palette of blues from OPI’s collection to get the depth needed, while their sheer top coat gives an underwater effect!
Layer different shades of blue to mimic gradients in water. Add plant designs with a fine brush, overlay them with sheer polish, and finish things off with a glossy top coat!
Flaming Passion: Ignite Your Look
These nails are burning with a design as hot as the summer sun. The lively stream of red, orange and yellow colors are reminiscent of flickering flames; making it an outrageous statement.
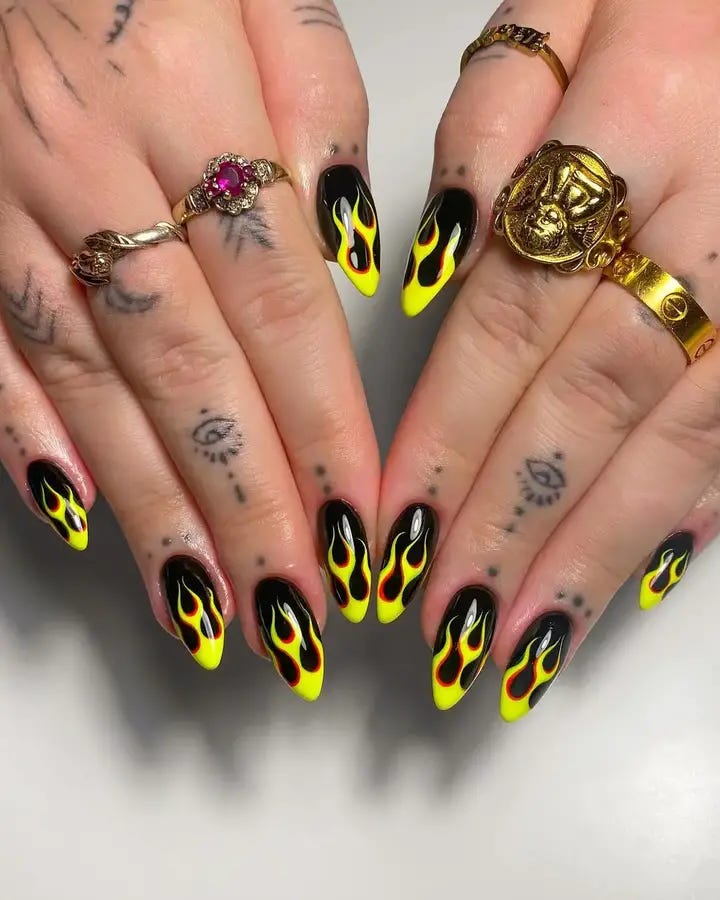
- Items: Red, orange and yellow gel polishes, black polish for accenting & detail brush for the flame design.
- Expert Advice: High pigment gel polishes will give you that intense, fiery look; I prefer brands such as Gelish or CND for their wide range of colours and long-lasting formulas.
First paint the base black to create contrast then lose hand-paint the flames using color in layers to build up a gradient effect. Finally, add glossy top coat to give off sizzling shine.
Tortoiseshell Elegance: A Walk On The Wild Side
These tortoiseshell patterned nails are elegantly timeless but with a modern twist. They have the traditional charm of a tortoise shell combined with golden trinkets to make luxurious accentuating your style.
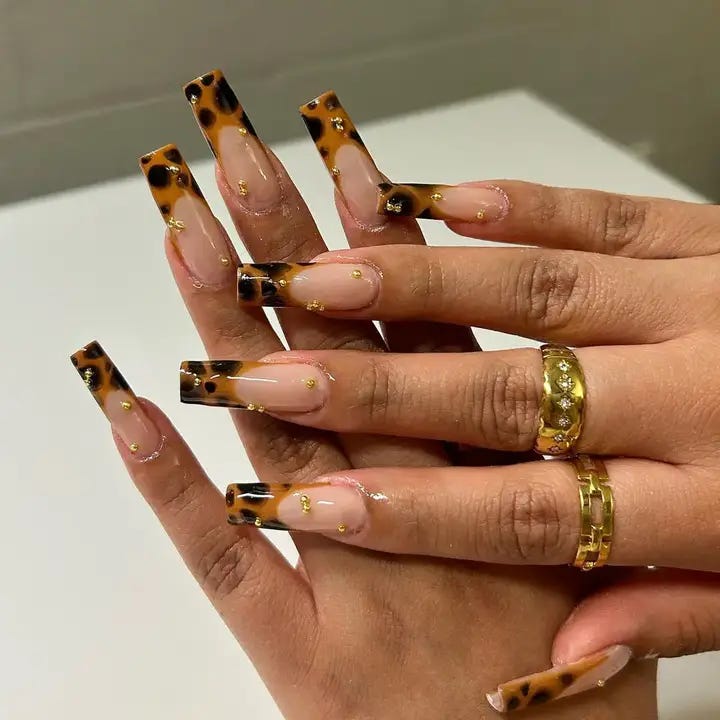
- Consumables: The tortoiseshell designs can be achieved using brown and black polishes, gold foils for the embellishments and a high-gloss finish.
- Professional Recommendations: Gold leaf accents should be added into semi-transparent polishes while trying to achieve the tortoiseshell look.
Layer it up by applying both your brown and black polishes using a sponge for an effect that resembles mottling. Apply gold foil randomly on top of these for that luxurious touch then clear top coat to give you that glossy lasting manicure.
0 Comments