Embrace the Vibrant Vacation Vibes with Bold Summer Nail Trends! Prepare to immerse yourself in summer with nails adorned in tropical blues, vivid oranges, and hot pinks. Whether you opt for short gel or long acrylic styles, these trendy summer hues are ideal for your upcoming beach escapade, infusing a playful yet stylish flair into your seaside ensemble.
Floral Fantasy: A Blossom Of Blues
Into a fantastic floral dream, we have discovered an astonishing drawing that combines the conventional elegance of nail art and the modern freshness of summer. A natural nail bed is adorned with cobalt and azure petals, representing a vibrant youthful feel like a day by the seaside.
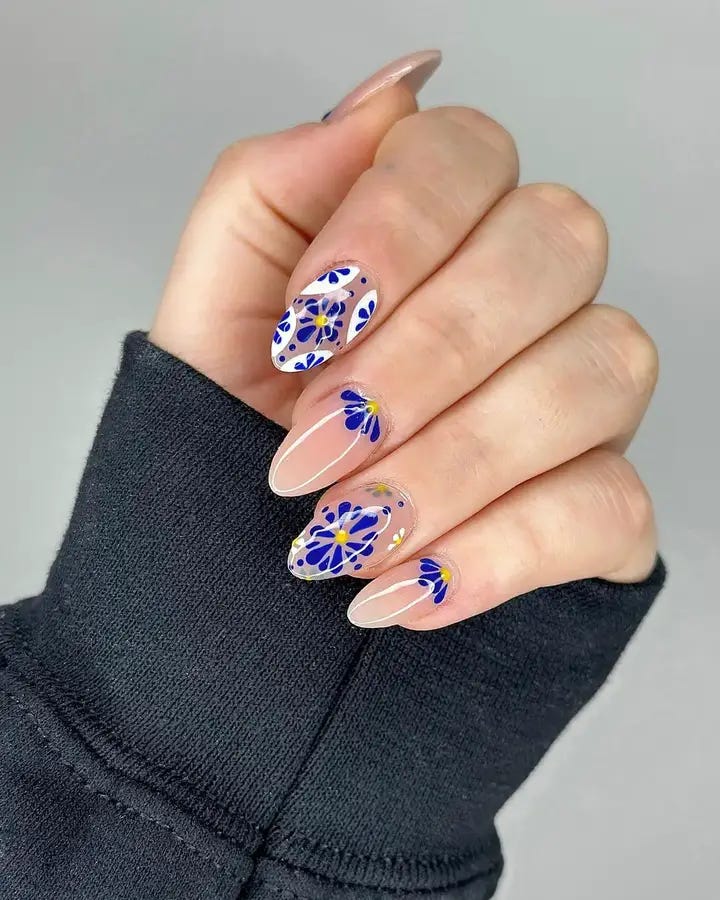
- Materials: sheer nude polish as base coat, cobalt blue and white colors for flowers, doting tool and small brush for fine details.
- Professional Recommendations: Opt for long-lasting products such as OPI Infinite Shine to keep your flowering nails fresh throughout.
In case you would like to perform it yourself start with a base coat of sheer nude. As soon as it is dry make petal outlines using a thin brush then fill them in with blue while adding some subtle highlights using white color. To complete apply glossy top coat which will protect your pattern from damage and add shine of summer.
Turquoise Tranquility: Calm Waters And Leopard Spots
Just imagine the calmness of cerulean waters and the rowdiness of cheetah’s hide. What about a pop of tropical, cool colors summer trend meets animal print in this design? Just for that Hawaiian vacation or any other day out there.
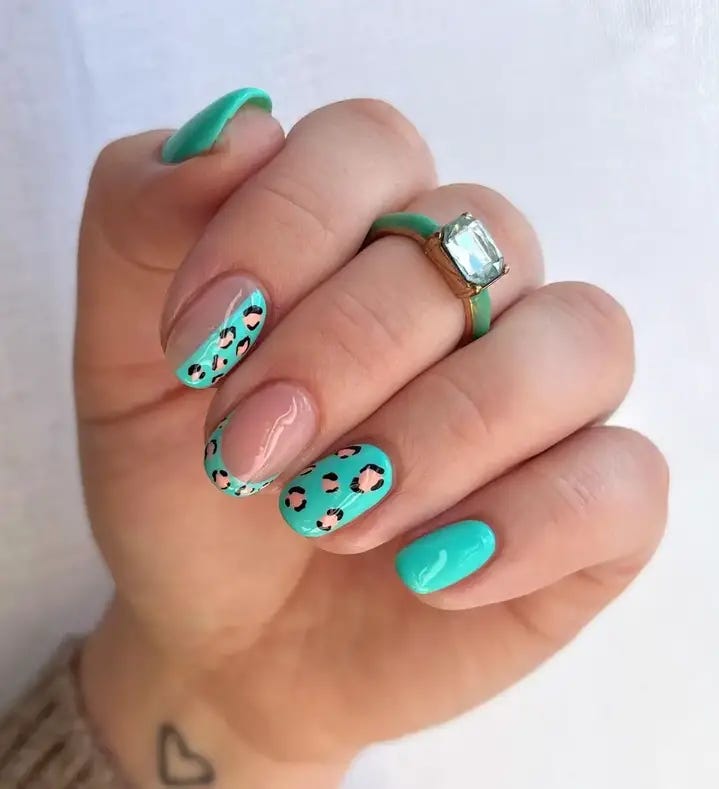
- Eatables: A gel polish in Blue green for the base and Peach and Black ones to make spots with top coat to give it a wet appearance.
- Professional Recommendations: For their vibrancy and longevity, Gelish polishes are preferable.
To get this effect; start by covering your nails with turquoise paint then let it dry or cure. Then create irregular, small dots in peach (partially outlining them in black) using a dotting tool, before sealing with a topcoat for added luster.
Zebra Chic: Monochrome Elegance
No more black and white traditional. This design is a reinterpretation of the monotonic trend, with brave zebra prints that shout I am confident. Ideal for those who want to be bold with their nail designs.
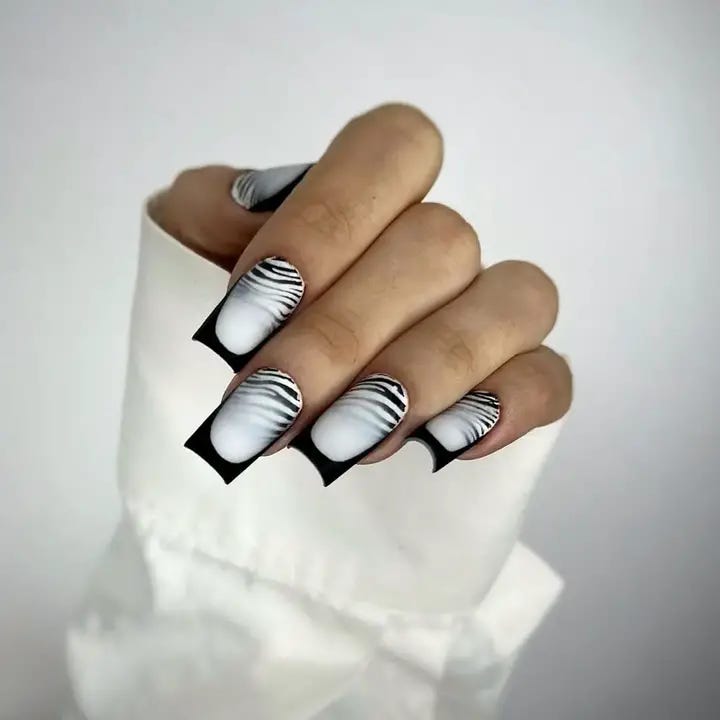
- Materials: White gel polish, black gel polish, striping brush for precise lines and strong glossy topcoat
- Recommendations from Professionals: I find that using a gel system like Bio Seaweed Gel ensures crisp lines that don’t bleed.
Start by applying white gel polish on your nails at home followed by curing it before drawing zebra stripes using a striping brush. Never forget to enjoy yourself; plus jagged edges make this look even more admirable!
Starry Sophistication: Purple Glitter Tips
Sophisticated and playful. The clear base reveals the natural beauty of the nail beneath with the purple glitter tips being a fun splash of color, perfect for daydreaming and beach nights.
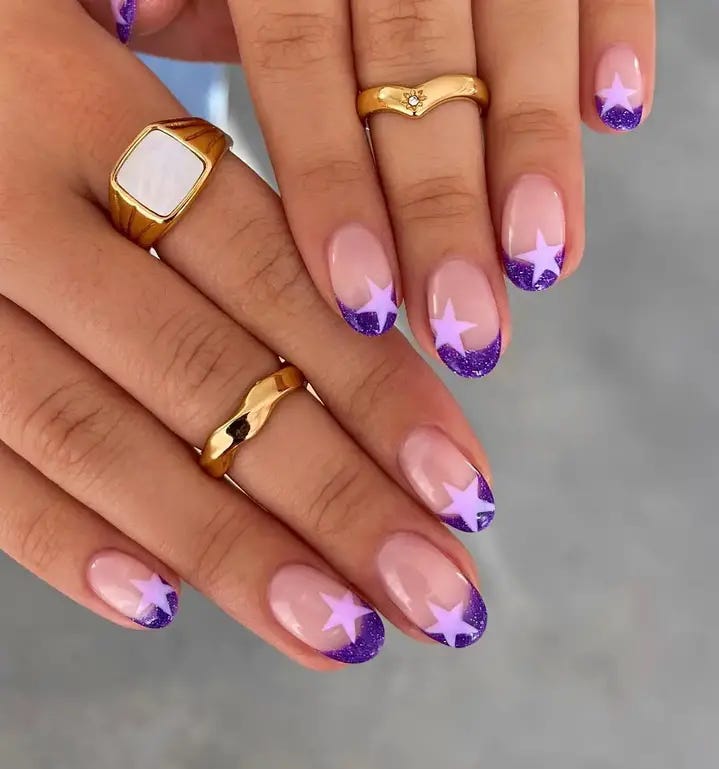
- Used: Clear base coat, Purple Glitter, Star shaped Decals, Durable top coat
- Pro Recommendation: Essie’s gel couture clear base with a no-chip top will keep your nails going even during sandy vacations.
For DIY, start with clear base then dip just the edge in purple glitter. Wait for it to set before adding the star decals. Seal it all together with a top coat and your look is ready for any summer party.
Candy Clouds: Pastel Pops And Gemstone Clusters
In this playful design, what the inner child needs is nothing short of pastel clouds and gemstone clusters. It’s a distinctive whimsical approach to nail art that combines trendy and conventional aspects in order to achieve an unusual result.
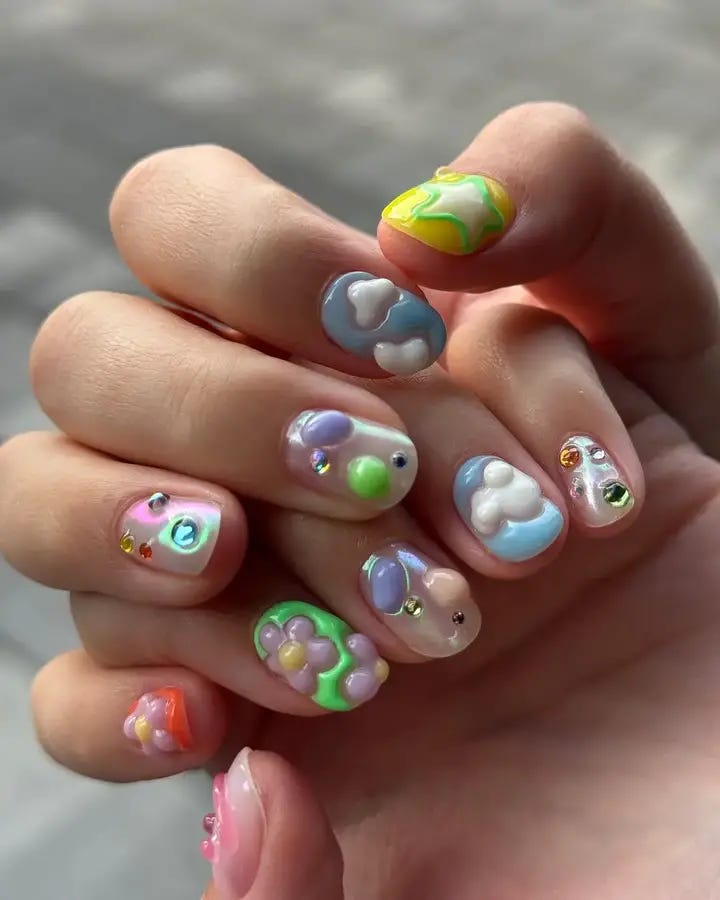
- Consumables: Pastel polishes, different gemstones, and shiny top coat for sealing it in.
- Professional Recommendations: Quick drying times and vibrant color choices are provided by Sally Hansen’s Insta-Dri line for pastel polishes. The gemstones used should have flat backs which make the application process easier and give a smoother finish.
Do your pastel base, then when it is dry but still sticky use tweezers to arrange jewels in cloud-like shape. To preserve your design and add more summer magic on that, apply a glossy top coat at the end.
Ocean’s Whisper: Sea-Inspired Elegance
This set is an amalgamation of nail artistry and the grandeur of the ocean, with its trendy long stiletto nails screaming style and excellent workmanship. There are different designs on it ranging from oceans prints to chrome that reflects like materials which can be found deep in the sea and are ideal for those who love bold statement accessories.
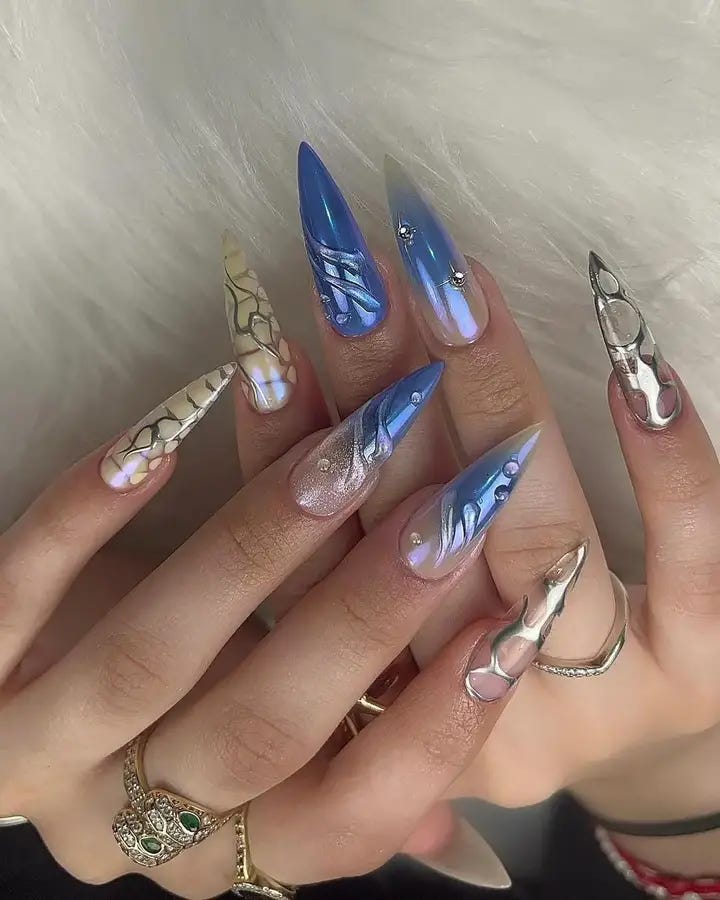
- Consumables: Assortment of blue polishes, chrome powder, glue on tabs for nail tips and patterns for accurate designs.
- Professional Recommendations: Specially designed chrome powders and marine stencils will make all details more intricate
Switch between your blue polishes while applying the base coat to each nail. Make use of stencils when you want detailed patterns and add a metallic shine by rubbing chrome powder with a sponge applicator
Soft Geometry: Pastel Tones And Gold Flakes
Indulge in the gentle side of summer styles with this geometric design: combining dull pastels and the luxuriousness of gold leaf. It’s a simple yet sophisticated look that can be perfect for casual days or beach vacations.
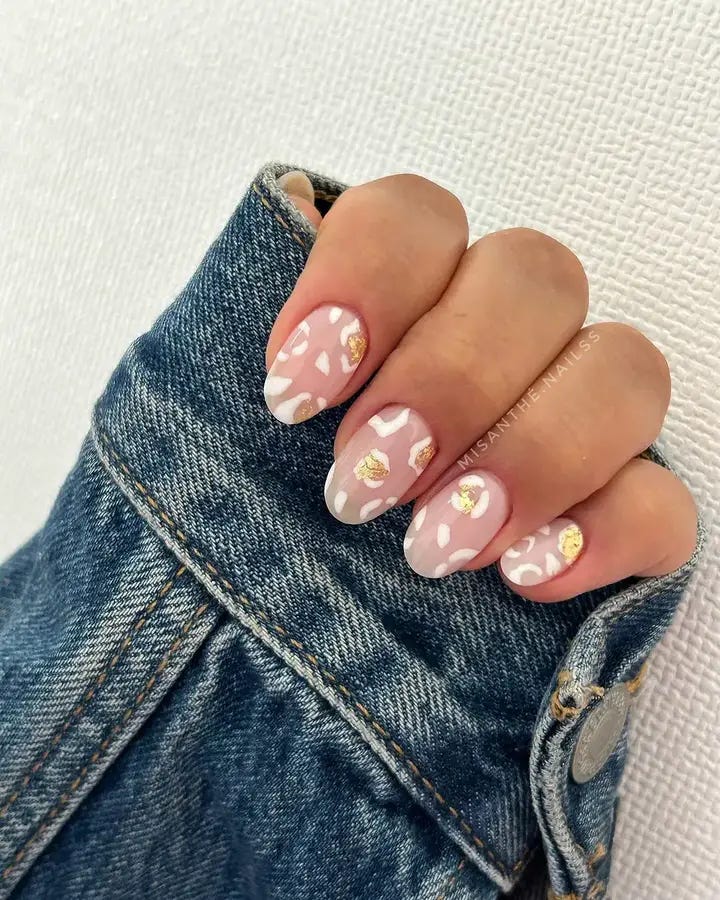
- Materials: Dull pink polish, white polish to make geometric shapes, and gold leaf flakes.
- Experts say: Choose a pastel with good opacity so it doesn’t streak, and thin gold leaves that can adhere flatly to the nail surface.
Start off with a light pink base, then use white polish to paint on geometric patterns. Next you’ll want to add in random or structured patterns of the gold leaf flakes and seal it all together by using a top coat.
Tortoiseshell Tips: Modern Take On A Classic
There is a modern twist to the classic tortoiseshell pattern introduced in the nail art scene. This design is made up of blazing orange and black colors that are finished with a glossy shine, making it quite lively and cool for any summer affair.
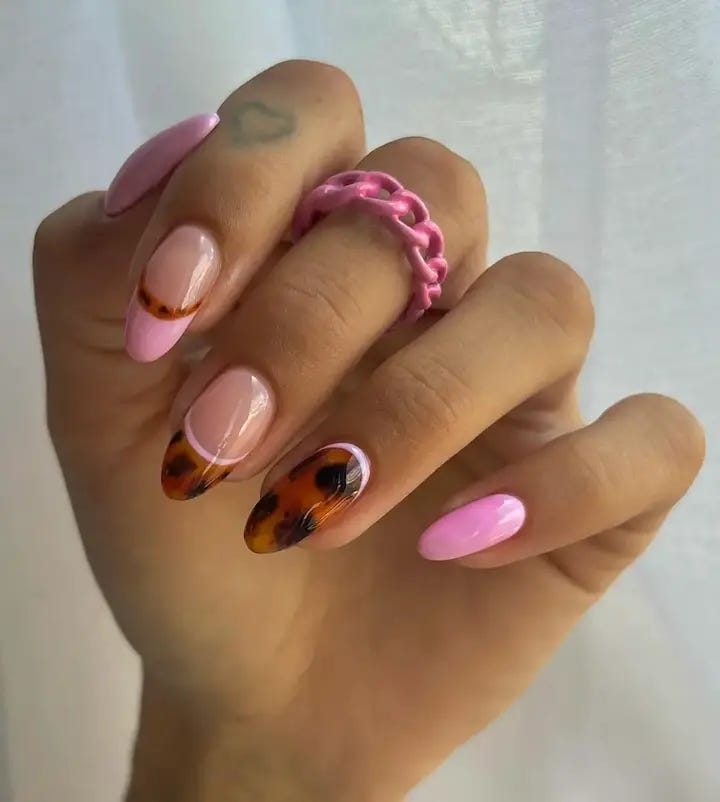
- Materials: Amber and black polishes, a clear polish for blending, and a glossy top coat.
- Experts’ advice: For an authentic effect of tortoise shell use semi-transparent amber polish or apply black using sponge for blurry look.
Begin by applying amber polish as a base on your nails. Then use a wet sponge to add the black polish that will give you the tortoise shell effect. Finally put some high-gloss top coat over it so as to make them stand out in their color.
Summer Sorbet: Fruity Flair And Floral Whimsy
This design is a delightful mixture of the best things summer has to offer. The nails are decorated with flowers and fruits, which indicate that the artists were inspired by fun compositions for the current period of time. These ideas are cool because they are both flashy and amusing.
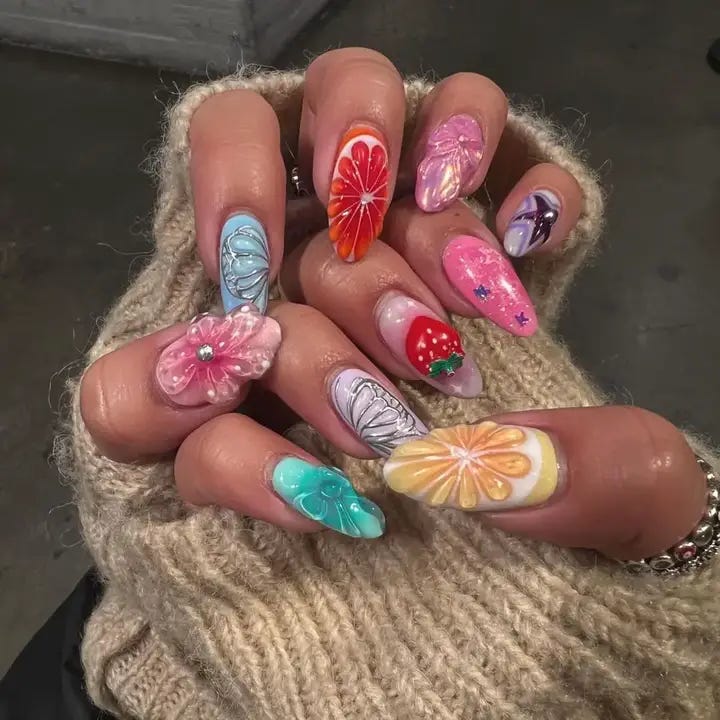
- Materials: Diverse pastel lacquers, nail art brushes with fine tips and decoration stones or rhinestones.
- Professional Recommendations: For pastels from Essie and crystals from Swarovski to add glamour.
If you prefer to make your own at home, apply a coat of pastel shade as a base and let it dry. Next, draw on designs yourself or simply stick on decals. Lastly add any 3-D effects and seal with top coat for long lasting vibrant look.
Olive And Botanics: Earthy Elegance
Embrace the revolution of earthly tones, and let its olive-inspired palette transport you. As muted greens shimmer across your nails, hints of botanicals may guide your way. This look pairs both together, making it perfect for any nature-loving fashionista.
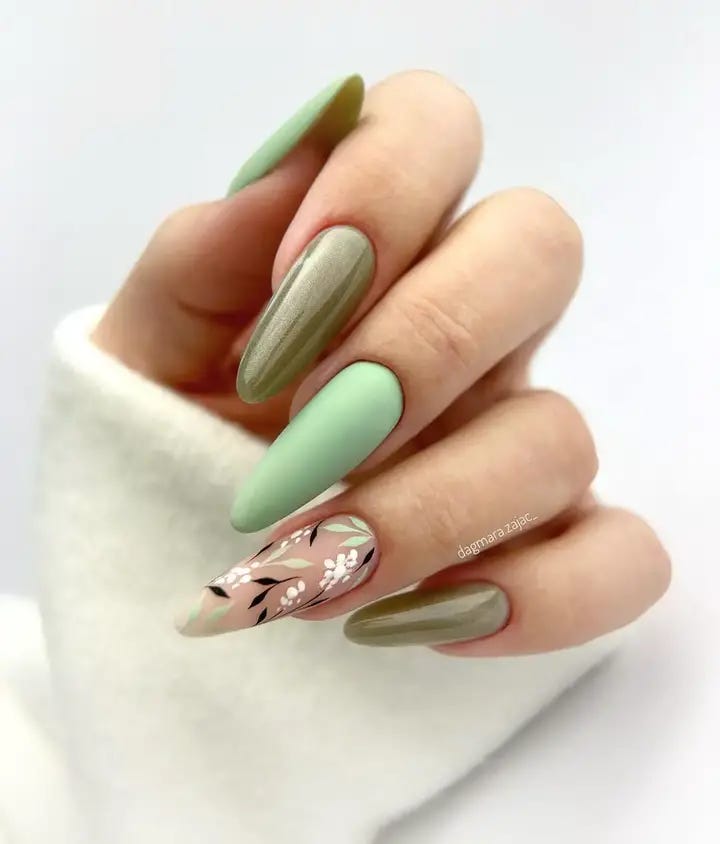
- Materials: Olive green polish, nude polish, fine-detail brushes, matte top coat
- Professional Recommendations: Choose high-pigment shades like OPI for the paint and a steady hand to bring the intricate designs to life.
To recreate this look: Alternating between shades of olive and nude, build up a base layer on each nail. With your fine brush in hand, gently apply the botanical designs and then finish everything off with a matte top coat to preserve this beautifully understated result.
Celestial Seas: Mystical Depths And Golden Shores
Taking inspiration from the secret sea and the golden beaches that shine, this nail art design is perfect for a mermaid look. Deep blue and shimmering iridescent greens paired with gold accents serve as an apt representation of the mystical and luxury aspect in trendy summer nights.
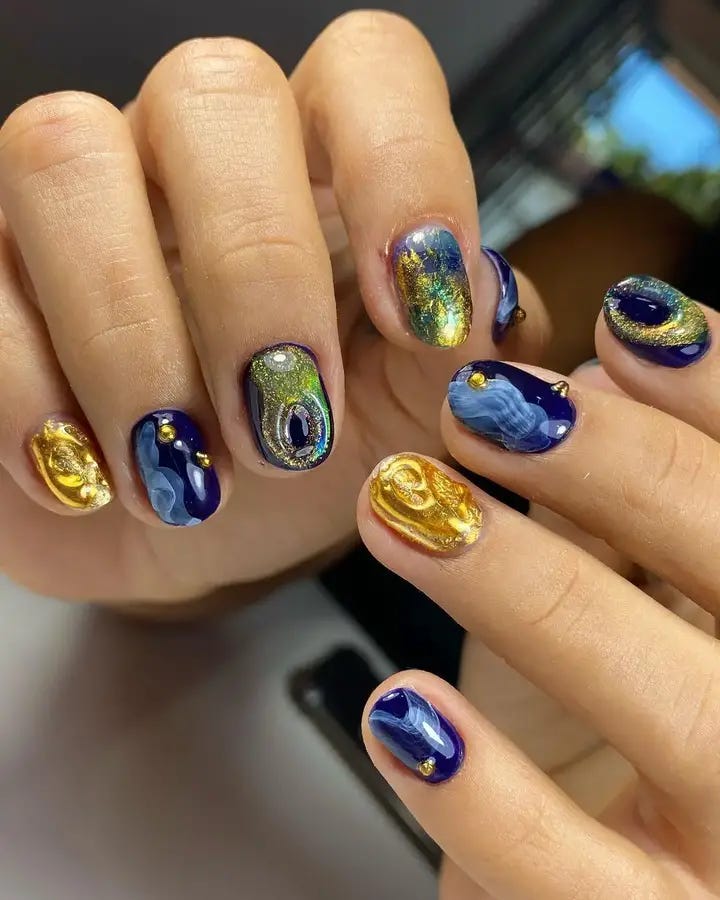
- Deep Blue Polish, Iridescent Green, Gold Foil, Glossy Top Coat are required to produce a shiny effect.
- Professional advice: If you want foil nails that stay for long and have vibrant colors, use gel polishes.
Start by applying deep blue polish. While the polish is still wet but sticky to touch, add small pieces of gold foil quickly. To make it look like a moonlit ocean; use an iridescent polish.
Pink Serenity: Minimalism Meets Sparkle
A soft touch of pink combined with subtle embellishments, gives a simple and charming appearance. This design demonstrates that less can be more when it comes to minimalist tendencies, with diminutive gems just brightening up.
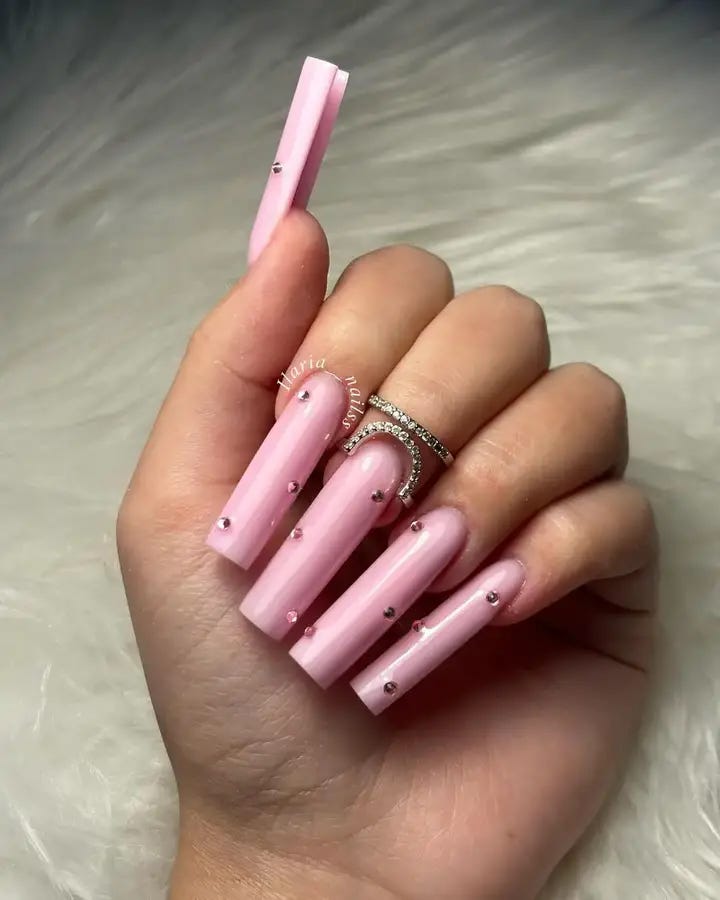
- Necessities: Baby pink gel polish, tiny rhinestones or crystals and an adhesive that adheres well.
- Expert Advice: A soft pink Essie Gel Couture gel polish will serve as chip-free undercoat for long-lasting effect while the Swarovski crystals give the most luxurious brilliance.
Paint on your base pink, cure it and then put every small piece in place using tweezers and some glue. Top off with clear nail polish to ensure it holds firmly as well as giving it a perfect look.
Crimson Edge: Boldness With A Touch Of Sparkle
A flaming crimson that screams out for your attention. This look will give off the impact it intends to with its mixture of fiery colors and vibrant sparkles. It’s meant for those who aren’t afraid to make a statement.
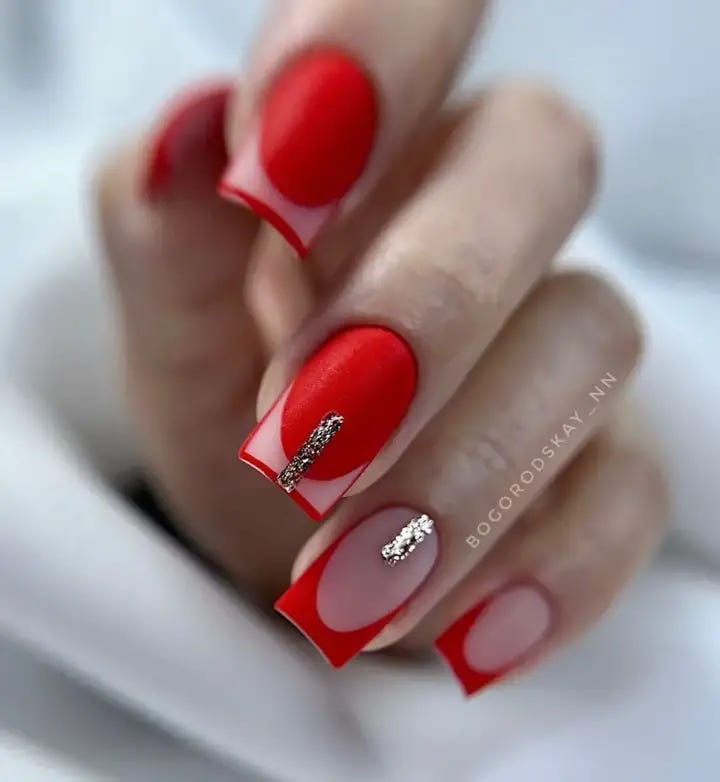
- Supplies: One bottle of matte red nail polish, some silver glitter, and some detail brushes or striping tape
- Recommendations given by professionals: OPI’s Matte Top Coat can transform any glossy polish into something more velvet-like
First paint your nails with the matte red polish. Once that’s dry, take some striping tape and section off where you want the glitter to go. Apply some adhesive in that area and then sprinkle on the silver glitter for a precise, striking line.
Wild Accents: Unleash Your Inner Predator
To channel the wild, this is a sophisticated version of a trendy animal print. It’s a timeless example of wearable art where classic leopard spots against nude bases bring an exotic tinge to any look.
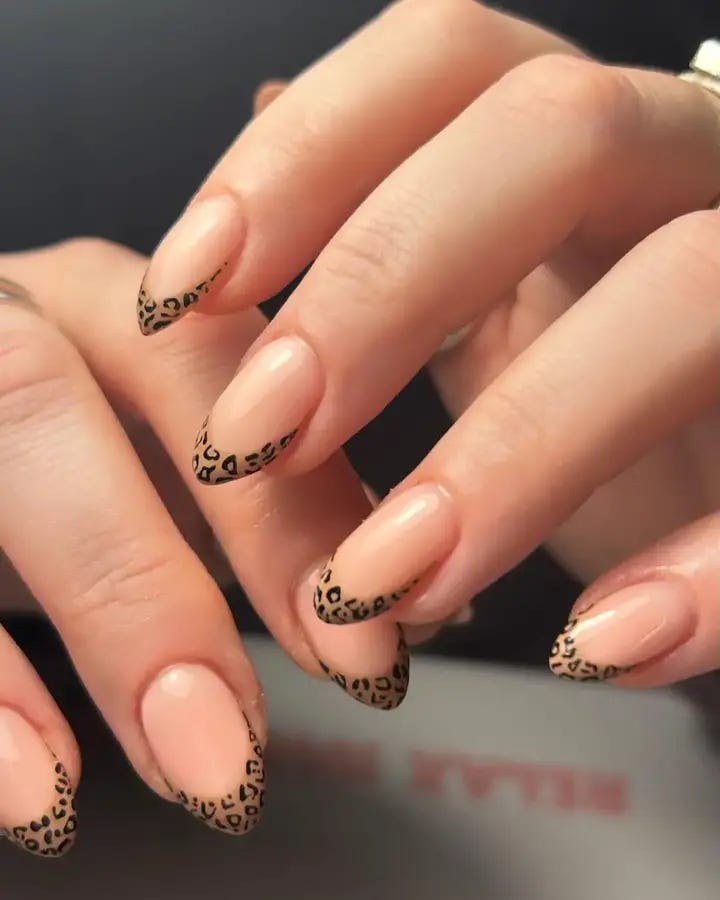
- Nude polish, black and brown polishes for the spots and a fine tip brush are some of the consumables that are used while doing this.
- Professional Recommendations: For the base, choose a polish like OPI’s Bubble Bath for a natural appearance, and use a fine-tip brush for the intricate spots.
Start with nude base. Once dry, use your finetip brush to make uneven brown spots and “C” shapes; then around them add black accents. Seal it all off with top coat to preserve one’s inner beast beauty or something like that.
Lustrous Frost: Sleek And Chic
Epitomizing sleek elegance these nails have a white French tip with a unique frosted finish. This design is both classic yet modern, and offers something new to an age old style.
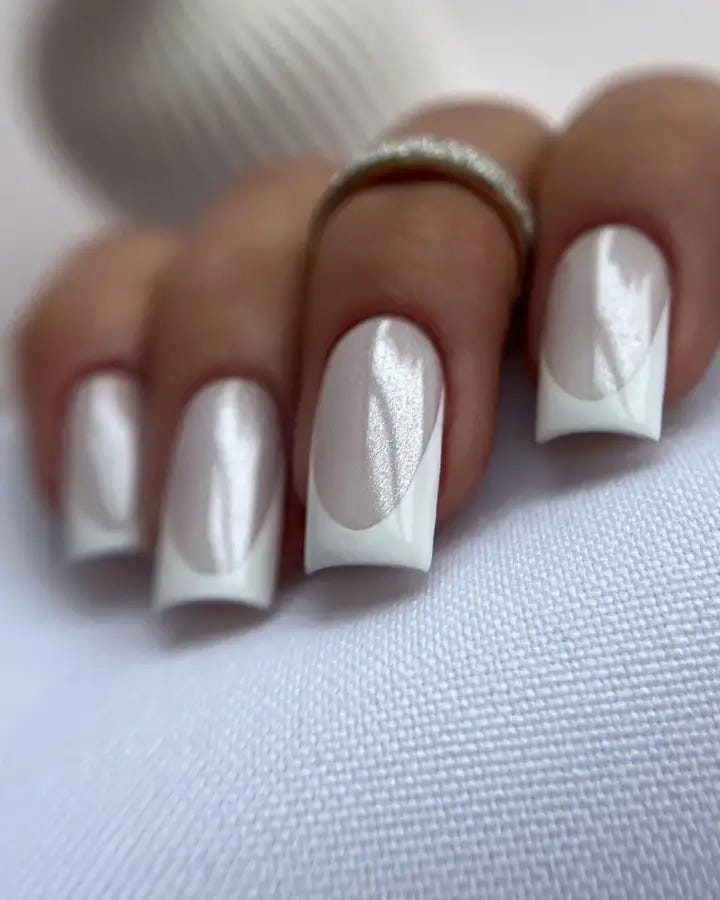
- Frosted white polish, glossy nude base, and fine striping tape are some of the consumables required.
- Essie’s matte top coat over a glossy nude polish will help to achieve that frosted look thus maintaining sophistication as well as permanence according to professional suggestions.
First apply the glossy nude base, let it dry then use the striping tape for creating your perfect French tip. Then smear on the frosted white polish, remove the tape and voila — a stunning look ready for any occasion.


0 Comments